Do-it-yourself window frames and doorways. How to make a pigtail with your own hands - basic views and drawings
A frame made of timber or boards to strengthen the window and door base of the opening is called a pigtail or casing. The fact is that wood is a fickle material, houses made of it can “play”, that is, shrink or swell at high humidity.
The window frame in a wooden house is needed so that the frames do not move during shrinkage. In fact, casing is an additional frame that is not attached directly to the wall. Due to this, a slight adjustment of the opening is possible in case the wall leads to the side.
For all its simplicity, the installation of such a design is really effective.
Types and features of pigtails
Casing in a wooden house can be one of three types, depending on the material and method of manufacture:
- adhesive . The design is created from type-setting boards, carefully processed from knots and errors in the structure of the tree. It behaves well at high compression strains;
- from a solid wood. For such a pigtail, a beam or an ordinary board is used. It looks most attractive while maintaining the overall texture of the wood;
- combined. In the manufacture of solid wood elements and adhesive parts are used.
A window frame is selected depending on what kind of work will be carried out during finishing.
For rough work, glue or combined types are quite suitable. They will be invisible during the next fine finish of the house with siding or other materials.
Before starting the assembly of the casing and installing the window or door structure, consider the following points.
The installation of the pigtail is carried out until the house is completely insulated. The blocks are installed taking into account the carriages, "sliding" along the casing guides.
The material from which the door or window is made is taken into account (metal, plastic, glass, etc.). For the manufacture of windows or doors to order, the dimensions are calculated only after the complete installation of the casing.
Installation Methods
It is possible to install a pigtail in a wooden house using different technologies.
The first is the use of a T-shaped connection. It's called spike technology. Grooves of vertical elements are cut out in the side walls, which are inserted into the window openings together with the insulation. Boards are provided in the upper and lower parts, which are attached with self-tapping screws to the racks of the pigtail.
Casing in a mortgage bar. The design is assembled from edged boards and timber. In the side walls, a vertical opening is made for a square-shaped bar, then it is installed in a groove. The next step is to create a box, which is attached first to the bar, then to the bottom of the frame. Fiber insulation is placed between the gaps.
U-shaped, another name - "into the deck." The easiest way to assemble a pigtail. Spikes are cut in the logs of the wall of the building, grooves are cut in the box. During installation, the elements are connected, insulation is added to the spikes. The design is fixed with self-tapping screws to the racks of the pigtail.
Net. A similar method with the technology of a mortgage bar, but here the bar is rectangular in shape. Thus, part of it goes beyond the pigtail and serves as a support for the window frame.
Do-it-yourself installation of a pigtail
Before installing the structure, you need to know what it consists of. Regardless of the materials and manufacturing techniques, the pigtail has three main parts:
- top . It is necessary to hold the side parts in a vertical position, while providing a gap for the insulation;
- threshold . The lower horizontal side of the structure. It has the same function as the top, while in the window opening it is a window sill, and in the doorway it is a threshold. Most of the load is projected onto it, so its strength is very important;
- carriages. Lateral vertical elements provide a connection with the house and the ability to adjust when shrinking.
Having understood all the design features of the casing, you can proceed to install it in the opening.
Make an opening at a distance of 80 cm from the floor. Depending on the type of connection, a groove or spike is cut out in the wall. Wooden elements are treated with protective antiseptic agents. With the help of thermal insulation close up the space between the wall and the pigtail.
Features of installing a PVC window box in a wooden house
It should be understood that the installation of casing for wooden windows is different from PVC windows. When installing plastic windows, a more complex version of the casing installation will be required.
The construction is assembled from a single log with cut grooves for the ridge. A comb is sawn into the wall for connection. The size of the ridge and groove is made so that when the house shrinks, the frame slides easily along the guides.
Important! Plastic windows in a wooden house cannot be inserted without a pigtail. It will protect the frame from excessive loads and deformation.
The installation of the pigtail begins with the fact that two guide cuts 5 x 5 cm in size are made in the wall of the window opening. The work can be done with a chainsaw or an ordinary chisel.
A bar of the same size as the guides is inserted into specially prepared grooves, with a pre-attached seal. Lnovatin should be located between the wall and the beam so that the part goes out onto the wall.
On the mortgage bar, the board is fixed flush with self-tapping screws. If the scythe is installed using the spike-monolith technology, the T-shaped part is inserted into the groove and fixed. Carriages should not fit back to back, it is necessary to leave at least 3 cm to the edge of the wall beam. Such a gap is necessary when calculating the shrinkage of the house.
The tip is laid on the vertical elements and pressed so that the groove enters the guides. The gap left is filled with insulation, from the outside it is closed with a windproof membrane.
Installation of casing of an adjacent window opening with a balcony door
If the house is supposed to have access to a balcony combined with a window, some subtleties should be taken into account when installing such a structure.
With this arrangement of the opening, it is impossible to make the casing common, they should be separated by a T-shaped sidewall. The combined side of the door will have a U-shape, which will allow the overall structure to slide parallel to each other without deforming the opening.
The gap left above the window opening should be smaller, and above the door more. After the final shrinkage, the gaps will become the same.
Installation of casing for doorways
The process of installing a door in a house from a log house or timber is carried out after the completion of construction. Installation does not occur immediately, it must take at least 6 months. During this time, the house will shrink a little.
Most often, the installation of a pigtail for a door is carried out using the groove-thorn technology. First, using a router, a 50 x 50 groove is made at the end of the opening. A bar with a section of the same size is installed in it. It is important to consider the size of the bar, if the house is newly built, then its length should be 5 cm less.
To increase the reliability of the casing, it is necessary to add a board 50 mm wide to the bar, you can use a metal channel. After the vertical bars are fixed, a threshold from the bar is attached below. When installing the casing for the door, the size of the opening is taken into account. It should be 15 cm higher so that a 150 x 50 board can be installed at the top of the pigtail.
To prevent the penetration of cold, thermal insulation of the gaps is carried out. To do this, you can use tow or mounting cotton.
Installing a door frame in a wooden house is an important undertaking. It is necessary not only to observe the technology, but also to choose the right material.
The main quality of the board for the manufacture of structures is the ability to maintain strength for a long time. The best for this purpose is a board of category "A", made of wood with high performance characteristics (oak, hornbeam, larch).
Unfortunately, this is an expensive material. To find a worthy replacement, they began to use glued beams. It has a high level of reliability and performs well as the main casing material.
For an all-massive construction, the thickness of the log should not be less than 50 mm. It is important to use high-quality insulation in the form of linen or jute.
To maintain reliability, wood must be treated with antiseptics. This will protect the structure from rotting and delamination.
How to determine the cost of a casing
When there is an opportunity to save the family budget and not lose on quality, you should take advantage of this. To do this, you need to understand what makes up the cost of the pigtail. The price is affected by:
- opening size. Accordingly, the larger it is, the more difficult the installation work and the higher the cost of acquiring the required amount of materials;
- house wall thickness. The width of the details of the pigtail and window sill, and hence its cost, depends on the size of the width of the log;
- material for making. A box made from solid wood is more durable, but also more expensive than other materials.
We can conclude that assembling and installing a pigtail with your own hands is a simple task. It is necessary to carefully select the material, focusing on the methods of further finishing the house, and also carefully consider the observance of technologies when installing the box, taking into account the design features of the house.
One of the features of wood buildings is susceptibility to shrinkage, periodic (seasonal) changes in the geometry of the building under the influence of external factors (temperature, humidity). Visually, this is imperceptible, but the installation of blocks of doors and windows in openings with rigid fixation leads to their deformation; or the walls remain in one position (as they say, “hang”), that is, when the material shrinks, they do not settle, which causes the building to skew.

Casing in a wooden house eliminates such problems; it is not connected with the main structure, but is held in it only by the force of friction. It is often called differently - pigtail. It is a box installed in openings. Its purpose is to exclude the destruction of window frames, door jambs, and incorrect operation of the sashes.

general information
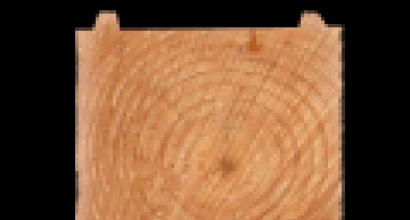
- For the manufacture of the casing, wood is taken, the moisture content of which is at least 12% - too dry material cracks under mechanical stress.
- The width of the pigtail should correspond to the thickness of the walls, but there is also a recommended limit for this parameter - no more than 25 (± 1) cm. The reason is the same - the risk of splitting the wood.
- When mounting the casing, traditional fastening and fixing elements in the form of brackets, nails, self-tapping screws, spacer wedges are not used (only in some cases, during assembly). It is not recommended to use for sealing gaps and mounting foam. It has a gluing property, therefore, the mobility of lumber (logs, timber) of walls and casing relative to each other is excluded. This means that the meaning of installation in the opening of the support box is lost.
- Before installing the casing, it is necessary to make measurements of the opening. If the window (door) unit has already been manufactured or selected in the furniture store, then the reference point is its dimensions. The thickness of the pigtail board is added to them, and this, with a small gap for the insulation, corresponds to the required parameters of the opening. As a rule, its slight expansion in a wooden house does not cause difficulties. If necessary, slightly narrow the opening, it is enough to increase the thickness of the casing board.
- A gap of about 5 mm is left between the upper element of the pigtail and the ordinary log (beam). It is called shrinkable, and it serves to lay the insulation and prevent the destruction of the structure due to the deformation of the wood.

Pigtail design
Regardless of the manufacturing technique, the main parts of the frame are.
- Vershnik. Its purpose is to hold the upper ends of the sidewalls in a static position. In fact, this is a horizontal casing strut. At the same time, it provides a shrinkage gap into which the sealing material is placed.
- Threshold. The lower part of the pigtail. In window openings, this is a window sill. It solves a problem similar to the top, but it is this element that has the maximum load, and therefore its strength is of great importance.
- Sidewalls (carriages). Vertical casing elements installed along the sides of the opening. The function is to ensure the "sliding" of the walls of the house (up / down) when the wood shrinks.

Varieties of casing
From array
The pigtail, made of solid wood, is characterized by increased strength, retains the texture of the material. Depending on the specifics of the installation, two of its modifications are distinguished: “in a deck” has a groove in the form of the letter “P”, “in a spike” - with a section in the form of a “T”. Despite the advantages of these types of casing, their significant disadvantage is the complexity of manufacturing. In order for the pigtail in a wooden house to effectively fulfill its function, it is necessary to accurately fit all the recesses and ridges in size. In addition, to select the material, turning the protrusions, you will need a special tool (for example, a milling cutter, a circular saw, a chain saw); with the help of ordinary household it is quite difficult to achieve the desired result.

Note. There is another type of casing "in a spike" - with a slope. The difference is that the pigtail is obtained not as a composite, from individual elements, but as a whole. That is, it is a finished box with ledges; it is assembled in the opening. As a rule, for installation of doors. But its manufacture is only possible for a professional, since high accuracy of fitting is required.
"mortgage bar"
The most practiced option, simple and convenient for self-assembly. The peculiarity of installing a pigtail of this type is that you can use trimmed lumber. It is only necessary to pick up bars of an acceptable section, grind them and cut out the corresponding grooves in the wall opening (on the sides and bottom). These components of the frame are laid inside the recesses and serve as a support for the finishing board.

The figures show typical drawings that give a general understanding of the design features of the pigtail. Its exact dimensions are determined based on the parameters of a particular opening.
Recommendation. Casing for a window block is done with or without sampling. The first option is for wooden houses, if additional finishing is not expected. The second is suitable for old buildings, the appearance of which needs to be updated (outside, inside).

Casing manufacturing
for windows
With wooden frame:
- Preparation of grooves from the sides of the opening.
- Laying interventional insulation material in its lower part, on top - a bar. Its task is to prevent displacement of the sidewalls.
- The grooves on the left and right sides of the opening are filled in the same way.
- Installation of the upper casing element.

For PVC windows
Experts do not advise installing such blocks in wooden houses, but if the decision is made, then you need to know some of the nuances of installing the casing.

- Opening preparation consists in changing its geometry. The gaps between its sides and the block are at least 130 mm. A more accurate value is determined by the following indicators: the moisture content of the wood of the house and the period of its operation (which means the degree of probable shrinkage), the thickness of the interventional seams.
- Threshold making. Cuts are made in it to obtain a comb. It is needed as the base of the carriage, in which the groove is arranged. This element ensures uniform shrinkage of the house without destroying the structure.
- Manufacture of a carriage. Enough timber 150 x 100, 50 mm less than the height of the opening. A groove is cut in it and the surface is polished to ensure “slip”.
- A “forty” board with a width of 120 - 150 is taken on the top (under the thickness of the walls of a wooden house). It also equips grooves for connection with the crest of the opening.
- Installation of sidewalls - as for a wooden window.
- After checking the geometry, all casing elements are fastened with self-tapping screws. It should be noted that they should not enter the wood of the wall. Otherwise, its “rigid” hitch with the supporting frame will turn out, and the pigtail will not fulfill its function.
- Opening insulation.
- Treatment of wood with special preparations.
for doors
* The simplest option

- Opening preparation. If it is not pre-equipped in the wall, it is marked and a rectangular segment is cut out. At this stage, grooves are being prepared for connection with the door frame.
- Joint processing. This technology implies that he is a doorway jamb. Accordingly, wood is sampled for grooves.
- Placement of the box in the opening.
- Installation of horizontal struts (lower and upper).
- Casing seal with soft insulation. As an option - flax fiber. The work is carried out in such a way as to exclude the fixation of the pigtail in the opening; she must remain free.
- Dismantling of spacers.
- Treatment of wood with a fire bioprotective preparation.
- Platband fastening.
Other technologies for arranging door casing are difficult to implement. Given the importance of this element for the home, it is better to entrust the work to a professional.
Before proceeding with the manufacture of pigtails, you need to consider a number of factors:
- Which door will be installed in the opening. There is a choice for wooden houses - metal structures (entrance), plastic, paneled, even glass sheets. In accordance with this, the manufacture of pigtails has its own characteristics.
- For interior doors, the threshold is not always done, but at the entrance to the house it is an indispensable element.
- Steel blocks are mounted in the same way as PVC windows - with a "sliding" casing carriage.
- Given the specifics of arranging openings in wooden houses, it is more expedient to order plastic windows after preparatory work, according to the final dimensions.
- The installation of casing in a new building is always carried out up to the caulking of the log house.

In principle, it is not difficult to independently arrange a simple pigtail in a house made of wood. But its type is selected depending on the features of the window, doorway and the block installed in it. If there is no confidence in the quality result, it is better to order the casing (the approximate price of 1 linear meter is from 1,350 to 2,600 rubles with the cost of the material) or invite a master.
A wooden house or bath is constantly changing in size - it “sits down” a little, then rises again. Therefore, simply taking and rigidly fixing windows and doors into the openings will not work: either the frames will bend or the walls will “hang” - they will not be able to sit down when shrinkage. To prevent this from happening, a wooden casing box (casing or pigtail) is installed in the opening, which is held only by friction. It is already possible to attach a window or door frame to the elements of this box.
First, let's deal with casing profiles. Fixation due to the force of friction is provided by an elementary thorn-groove lock. In one case, a spike is made on the logs / timber of the opening, in the other, a groove is cut out.
If you have a wooden bath - a log house made of logs or timber, then the technology for installing windows and doors will be exactly the same as in the house. No difference. So everything described applies to the bath.
Monolithic casing boxes
The counterpart is often made from a single piece of wood. They are also called monolithic or finishing. Depending on whether the groove is cut out or a spike, the counterpart is made P or T-shaped. Please note that when installing windows or doors, fasteners should not go into the beam / log of the wall. To ensure proper reliability, the frames are mounted in the "thickest" parts of the casing.
 The casing is made from a bar in which a groove is selected or a spike is cut. Accordingly, casing / pigtail profiles are P or T shaped
 The material for the casing is a monolithic or glued timber. The use of glued beams in baths is not welcome: when using non-moisture-resistant glue (and this usually happens), the glue is destroyed by constant changes in humidity, the beam crumbles. Therefore, it is better to use a monolithic beam of the required size. Just note that the timber must be dry - no more than 12% moisture. Wet will crack or lead. Order at the sawmill a lumber of the required size for chamber drying, or dry it yourself in the shade in a draft for 4-6 months.
This type of casing is called monolithic or capital. You can already attach a window or door frame to it. If the windows/doors are plastic, the "face" of the casing can be left flat. If you plan to install wooden products, choose a quarter for them.

Which of these two casings / pigtails is considered the best? Properly done, both normally perform their tasks. Everyone chooses what is easier for him to do.
How to make a spike on the opening
There are two options - first cut a spike in the doorway, then make a casing under it. The second option is to mark the spike along the finished groove. In any case, markup is applied first.
The width and depth of the tenon should be 4-5 mm less than the dimensions of the groove. The casing is “planted” on a heater, and a place is required on it. The width is marked at the end of the logs / timber, the depth - on the side surface of the walls. When marking, it is important to maintain the verticality of the lines.
Next, they take a circular or chain saw, and cuts are made according to the marked marks. At the same time, it is important to maintain the required depth of cut on the side surfaces and not cut off the spike completely. If you don’t own a chain saw very well, it’s better to use a circular saw - you won’t be able to cut very deep there.
An example of the formation of a spike, see the video.
We make a groove in the opening
It is safer to make a groove: even if you have made too deep cuts, you can not remove the entire core, in extreme cases, make the spike on the pigtail larger.
Everything is simpler here: mark the width of the groove at the end. In this case, it is 4-5 mm larger than the groove on the casing / pigtail. Make two cuts, and remove the middle between them. There are virtuosos who do it with a chainsaw, but mostly they work with an ax, then they earn extra money with a chisel.
Casing box manufacturing
The casing box consists of two sidewalls (side racks), the top - the upper board and the window sill or threshold (also called the bottom). I must say that the lower part is not always present: it is often not done in interior doors. In some cases (when installing PVC windows, for example), they do not make a window sill, but simply a lower mortgage board, to which a “regular” window sill is then attached.
Also note that the tip does not rest against the top edge of the window or doorway. Between them there is a gap of 5-7 cm - for the shrinkage of the log house. This gap is then filled with insulation and closed with platbands, finishing materials.

Most of the questions arise when forming the locks necessary for joining the parts of the casing. These elements are especially difficult if a quarter is to be sampled. It is difficult to explain in words, here are the drawings. Take a look at them and see what's what. But the final understanding will come in the process: when you put the bottom and attach the side racks. They are circled with a pencil, then gradually cut out. In this process, it is important not to cut off the excess - it will not work to grow and there will be ugly gaps.

Before installing the casing, the window / doorway is treated with an antiseptic. Then lay two layers of insulation. The design is "dressed" on it. The procedure for assembling the casing on the windows is as follows:
- The lower part is installed.
- Put two sidewalls, check the accuracy of the coincidence of the locks. Hit the sides well.
- Set the top. Often he "does not climb" - the racks are closer than necessary. Do not immediately take up the saw. Take spacers of the length that the opening should be, and use them to bring the window to the required dimensions. First, put it obliquely, then, aligning it, leveling it. The sidewalls crush the insulation and take the necessary position. After that, the top is in place.
Rough casing or in a mortgage block
One of the varieties of pigtails, when a groove is cut in the opening, is into a mortgage bar. It differs from a monolith in that it consists of two parts - the actual embedded bar, which is inserted into the spike, and a separate casing board. The casing board is attached to the embedded beam, and the door frame can already be attached to it (it can also be attached directly to the mortgage).

Please note that the mortgage bar and the spike under it do a little more than in the monolith. This is necessary to make the fastening more reliable. When fastening windows / doors, fasteners must be chosen so that they do not go into the wall.
Of course, this option is much easier to implement. But they don’t like him very much: his reliability is still much lower than that of a monolith. But it can also be used - for light doors and for any windows. Another possible use is as a temporary option only for the time of shrinkage after the openings have been cut down and the log house has been left to dry. If the openings are not fixed, the walls can twist. In this case, a mortgage beam is an excellent solution.
 They cut out / cut out a groove into which the timber is driven. It is no longer held on by anything - no nails, screws
 Photo report on the production of a finishing pigtail
The work was carried out in a log house that had settled for a year. We used purchased chamber-drying timber and profiled remnants from the construction, which dried for a year along with the house. The casing is monolithic U-shaped. The width of the spike turned out to be approximately 45 mm. This distance remains if you make a cut with a circular saw on both sides of the wall. In order not to modify later with a chain saw, it was decided to make the spike wider. Its height is 35 mm. The spike under the bottom / window sill is 1 cm high. Its task is to prevent the occurrence of a draft.
We start with the preparation of openings. First, cuts were made in the side planes of the walls with a circular saw. There were no problems with vertical cuts, and when cutting horizontally, the saw kept trying to go up and down. Be careful in this part.


Then we take a chain saw and finalize the spike. This is the most responsible and delicate work. We make the first pass from top to bottom. Its depth is only 1-2 cm. All subsequent ones - from the bottom up, gradually increasing the depth. In order not to mess up, a step-by-step algorithm was used: first, they cut it with a circular saw, departing from the cut 0.5-1 centimeter, they cut it with a chain saw, and brought it to the desired depth with a grinder and a planer. Long, but reliable.


The opening is ready. Let's start making a casing. First we make the bottom0-sill. In it we make a groove with a depth of 10 * 45 mm. Also, do not forget about the protrusions: the window sill should "go" onto the wall.


Now let's make the sides. They are from a bar 200 * 100 mm. It was adjusted to the dimensions and polished. The groove was molded using a milling cutter. It could have been done with a circular saw - it would have been faster, but less accurate.

After a circular saw, a quarter was made - its size is 70-30 mm.

Next, you need to cut out the locks. On the sides, those that go into the bottom are simple. All that is needed is to cut off 20-40 mm from three sides. If, like mine, there is a quarter, then on this side we cut out less to the depth of a quarter, i.e. cut out 10 mm (40 mm - 30 mm = 10 mm). Here is the finished spike.

Next, put it on the bottom, trace the outline with a pencil, remove all unnecessary. The castle is ready. Having installed everything in place, we see pretty decent cracks. Now the task is to bring them to a minimum by gradual adjustment. The main thing here is not to cut off the excess, since it is impossible to build up. Therefore, we gradually grind and try on, grind and try on.

When the lower locks are ready and fitted, you can cut the sidewalls. They should not reach the top of the opening by 6 cm. With this calculation, we cut it.
We make the top itself in the same way as the side racks, then we cut out a quarter in it. You'll have to fiddle around with the lock. There are two conditions:
- The distance above should be the same as below. We adjust all the dimensions of the spike based on this postulate.
- Then we also circle it, but the shape here is much more complicated. It is desirable to cut it so that there are no through connections, so that there is no way for air to freely enter from the street.
Therefore, we make stepped cutouts.


When the form is ready, the adjustment with the help of grinding begins again. We work slowly, slowly. When the proper result is achieved, we disassemble the box, grind, round the edges. In general, we bring beauty.


After grinding, we cover all parts (including openings) with antiseptics. After drying, the elements of the casing can be painted in the desired color. In any case, you can go through the paint once.
While everything dries, we lay a jute tape in the opening. There is no tape for the entire width of the casing; it was laid in two parts with an overlap in the area of the spike. We apply a layer of sealant over the insulation.

First, they laid the bottom (it was not possible to put it on jute - it was torn off during installation, but the voids were filled later). Sidewall sat down, but with difficulty. The top part didn't fit at all.

We take a spacer, first we put it obliquely, then with a hammer - more horizontally. The sidewalls move a little. As a result of these manipulations, the upper part also sat in place.
 After installing the spacer "village" and the upper part of the casing
 To prevent it from moving, we install wedges. They are removed after the installation of window or door blocks. Here's what happened as a result.

This type of work, such as the jamb of door and window openings in a wooden house, is a prerequisite for newly erected buildings. Without additional reinforcement, over time, the house can become unsafe, so a lot depends on the quality of the work in this case.
Pivoting of openings is a necessary measure in wooden houses
Why do you need a pigtail
What is a slit of openings? At its core, this is the construction of additional supports that will prevent the movement of walls during gradual shrinkage throughout the entire life of the building. For wooden houses, such an operation is of particular importance, since the specificity of the material increases the risk of plane distortion. Over the years, even the highest quality wood begins to dry out, and the pressure on the foundation of the house leads to the fact that its walls and floors can change their original position.
What are the functions of such a structure?
- protects the building from the effects of shrinkage;
- ensures the presence of a special technological gap at the top of the opening;
- improves the connection of logs;
- necessary for the installation of doors and windows.
It is necessary to make a pigtail within the first ten years after the construction of the building, otherwise the expediency of the operation will be lost. It is advisable to do this at the construction stage.

The window frame of the doorway will protect the home from the consequences during shrinkage
Constituent elements
In order to perform a high-quality pigtail in a wooden house, it is necessary to deal with the main constituent structural elements. First of all, you need to highlight such details as:
- sidewall. These are side racks that connect to the wall of the house, they act as guides along which the walls will move. At the same time, the shape and strength of the opening will remain unchanged.
- Vershnik. This is the upper transverse bar, it is connected to the sidewalls and serves as a horizontal spacer, at the same time it holds the contours of the opening and forms a shrinkage gap with the sealant.
- Threshold. This is the lower part of the doorway; in window structures, its role is played by the window sill. It bears the main load.
In order for the framing of the opening to withstand the load that the walls of a wooden house will put on it, it is best to use glued beams. For spiked connection, a bar with a section of 50x50 mm is used. To finish the slopes, a straight board is additionally taken.

Components of the construction of a pigtail for a wooden house
Basic ways
Okosyachka door and window openings in a wooden house can be carried out in one of the following ways:
- Mortgage bar. A recess is cut in the side parts of the opening, into which a bar of the same size is driven close, then a draft box is stuffed over it, and the top is fixed separately.
- spike monolith. In this case, the embedded bar and part of the box are a single piece, it is cut out of the bar and driven into the prepared groove in the wall, a transverse bar is applied on top.
- Into the deck. The door frame of the doorways is done in the opposite way, now the spike is created on the side of the wall, a box is put on it, consisting of planks with a recess and a straight top.
- Into a thorn with a ready slope. The principle of creating a pigtail of a wooden house is the same as in the case of the “monolith spike” method, the only difference is that in this case, a ready-made box is installed. Details have additional protrusions that tightly envelop the opening.

The most common ways of pigtailing openings
Today, a very popular method is the use of a mortgage bar; as its modification, the “monolith spike” technique is also used. It is necessary to select the technology depending on the characteristics of the building and the skills of the builders.
Sequence of work
Since it is best to make a doorway in a wooden house at the very beginning of construction, all operations can be divided into several stages:
- Formation of the opening. First you need to determine the location of the doorway. This is best done at the design stage of the building, as it is necessary to take into account the basic principles of architecture and distribute the load on the walls. In a wooden house, the exact dimensions can be corrected after laying the logs, marking is done for this, and then a rectangle of the required size is cut using a chainsaw.
- Cutting fasteners. Next, you need to prepare the attachment points. This stage directly depends on the technology used. If you plan to drive the pigtail into the prepared groove, you need to cut recesses 50 mm deep and wide in the side sections. If, on the contrary, the planks will be put on the ledge, you need to cut out the corresponding element.
- Sidewall installation. A 50x50 mm bar is driven into the cut out recess. From above, it should be somewhat shorter so that the walls have room for movement, the joints are laid with a sealant and a rough cut is nailed to the opening. Make sure that nails and self-tapping screws do not go into the bar.
- Vertex installation. The upper transverse bar is laid on the prepared ledges. Between the wall and the pigtail, a heater is laid, for example, mineral wool. Foam cannot be used. Additionally, the pigtail is fastened to the walls with anchor bolts cut at an angle. The top and sidewalls are connected in the same way.

Then you can install directly the door itself. Before installing the pigtails, be sure to remove sawdust and treat all wood with an antiseptic. If you do everything right, your house will be quite safe to live in even after a few decades.
Casing in its essence is a protective element in the design of a window or door opening, which ensures the safety of the geometry of windows / doors. A casing or a pigtail in a wooden house is a kind of buffer between a heavy “living” wall and fragile glass. Proper casing will last as many years as the house itself.
The need for casing of openings is due to the very nature of a wooden house. Let us explain in more detail - the vast majority of log houses / timber houses are built from wood of natural moisture (that is, no one specially dries the logs before construction). This wood begins to dry out gradually, while decreasing in size. Accordingly, the walls "sit down" in height.
The process of shrinking a house takes years. But even after 3-5 years, no one will undertake to guarantee that the openings will not lead in the future. Therefore, since ancient times, windows and doors in wooden houses were installed with casing boxes - they were then called decks.
Painting by Vasily Maksimov "Interior view of the hut", 1869 - a door in a log casing.
Modern casing is a technological thing, perfectly adapted for the installation of plastic and aluminum windows, heavy balcony blocks, metal entrance doors. Let us consider in more detail what types of casing are now popular, how it is made, and the installation scheme in openings.
Types of casing
The classic casing block looks like the letter "P" from the end. Now this form of casing also remains the most popular. In log houses with thin walls, casing with the letter “T” has become popular. Separately, it is worth highlighting the casing in the mortgage (cranial) bar. These are 3 main types of casing boxes.
For each of these types, different profile geometries have also been developed - with or without a selection of a quarter, with an oblique, antique. According to the processing methods and purpose, they also distinguish rough and finishing casings, euro-casting, power, arched, from a gun carriage, semi-antique, from plywood. There are even combined options when the outer layer of the product is made of precious wood.
Consider in detail each type of casing.
Casing with the letter "P"

The form of a casing checked by centuries. Strong, reliable. It is installed most often in chopped log cabins and houses made of logs. Usually, a quarter is selected from the outside of the casing for the installation of a window or door frame.
Requires the formation of a spike in the wall.
Casing with the letter "T"

T-casing appeared on the market relatively recently, when profiled timber with slaughtered bowls entered the market. At the ends of the openings of such house sets, a groove has already been selected from the factory.
The T-type is used mainly in timber houses with a wall thickness of 100-150 mm, log cabins made of rounded logs of small diameter. Requires a groove in the wall. In a high-quality T-pigtail, the spike is glued into the body, which greatly increases the rigidity of the product. It is even better when the spike with the main one are one.
Casing in a mortgage (cranial) bar

Defective T-type casing. A mortgage bar is usually used at the stage of cutting or assembling a log house so that the openings do not warp. After the construction is completed, a wide board is attached to this beam with self-tapping screws, to which the frame (window, door) is attached.
If you use ordinary sawn timber from the market (not kiln-dried), then there is a high probability that it will be reworked in the future. Causes: the bar is clamped and distorted during the shrinkage of the log house, which leads to its jamming in the groove and stops the shrinkage. The board leads when it dries - as a result, it warps the frame. The bar is pressed against the board only at the points of fastening with self-tapping screws - it bends relative to them, the casing begins to blow through.
From the practice of our company, our teams remake up to 80 foreign objects a year, where windows and doors were installed in a mortgage bar. The photo shows a real case.
Rough casing (for finishing)

An inexpensive version of a pigtail for log cabins and log houses, where further finishing is planned. All parts of the casing can be made of solid wood or glued, the products are not polished. Profile shape T or P, a quarter is not selected. Plastic windows are placed on the installation profile, the window sill is plastic, the slopes, as a rule, are also made of PVC. Inside and outside the opening is trimmed with platbands.
The window is installed on a plane (without sampling the groove).
Finishing from an array

It should be made only from high-quality and dry wood. Most often from ordinary pine after forced drying, Karelian pine, cedar, larch, KELO rusk. U-type profile shape, with or without choice of quarter. It looks great in hand-cut log cabins, houses made of thick logs, gun carriages.
Evroobsada (finish glue)

A popular variant of a finishing casing box (not requiring slope finishing). It is made using a type-setting method from dry bars - they are glued together in a face (with knots) or in a microthorn (without knots). The eurocasing profile can be P and T type, straight or with an extension inside the opening, with or without a quarter.
Casing from antique gun carriage

Casing box made of KELO gun carriage - for status houses and baths, hunting lodges. It does not require the installation of platbands - the seam between the casing and the wall is caulked and closed with a decorative rope. The visible part of the casing is skillfully aged (firing, brushing). U-type casing profile, options with or without quarter recess, with expansion of openings into the house.
Antique casing (with platbands)

The classic euro-casing is fired and aged by brushing (during processing, the soft fibers of the upper layer are removed, the surface becomes rough, but polished). Possible profile T and P type, selection of a quarter, expansion of the opening. Wooden platbands are made in the same style.
Combined casing

The base of the product is made of solid pine, and the top layer is made of a type-setting board, which can be made of pine, oak, beech, precious woods. Combined casing successfully combines a pleasant price and aesthetic appearance. The profile of such casing can be P and T type.
Plywood casing

The production technology of plywood casing is the same as that of LVL lumber. Sheets of plywood are glued together securely. The spike in the T-profile can be additionally fixed with self-tapping screws.
Plywood casing may well be used as a draft (for finishing).
How the casing is installed
In general terms, the process technology is as follows:
- cut a hole in the wall
- a spike is formed on the sides of the opening or a groove is selected
- the opening is insulated with jute tape
- a wind bar is laid in the lower part of the opening and a window sill is mounted
- risers are installed
- the top is mounted
- free space above the top is covered with soft insulation
Differences in the installation of door and window casing
In the door casing, the lower part - the threshold - may be missing. In this case, the bottom of the risers is bolted to the bottom crown / beam.
In the window casing, the lower part is always present. But its appearance may differ. The following options are possible:
- in the rough casing, the lower part is not visible. The window sill is usually plastic, in the color of the frame.
- in the final / euro-obsad, the lower part plays the role of a window sill. In this case, the casing can extend into the room and away from the openings, forming the so-called ears.
The video just captures the entire process of installing a door casing in a log house (T-type, with the formation of a spike in the wall):
The technology for installing casing in a timber or log house is the same.
Casing box manufacturing
High-quality casing should be made of dry wood (forced drying in drying chambers, humidity at the outlet is 8-10%). A board, a bar from the construction market is poorly suited for these purposes - precisely because of the high humidity.
Most often, pine wood is used, as the most common and inexpensive. Spruce is also used. An exclusive is also possible - cedar, larch, Karelian pine, KELO cracker.
The basis for casing from the array is a gun carriage with a thickness of 50 mm or more. For P-casing, a carriage from 90 mm is taken. The width of the casing board is equal to the thickness of the wall.
Type-setting casing can be with knots or without them. In the first case, the prepared bars are glued together by the sides - this method is called gluing into the face. Knotless casing is recruited from short bars, which are glued together at the ends - into a microthorn (looks like a comb).
How to calculate the size of the casing / opening
Let's say that you want to install a plastic window measuring 1 meter in width and 1.2 meters in height in a log house with a wall thickness of 150 mm. At the same time, only technical openings have been sawn in your house. Let's count.
First, you need to decide on the type and thickness of the casing. For the selected conditions, casing with a profile with the letter T, type-setting “in face”, with a thickness of 55 mm, is excellent. The window sill will be plastic, which means that the lower part of the casing can be taken with a smaller thickness - 45 mm.
If the frame is installed without a quarter (on a plane), then the width of the cut opening should be 15 cm more than the width of the frame (1.5 cm for foam, 0.5 for jute, 55 for riser). The total opening width is 115 cm.
With a quarter, the width of the opening will be +12 cm, the final one will be 112 cm.