Leveling concrete walls with your own hands. Leveling walls - methods, materials and tools
Smooth walls are a rather rare phenomenon in construction. Even modern developers are guilty of this - when buying an apartment in a new building, they have to eliminate small flaws. As for buildings that were put into operation 20 or even 50 years ago, the walls there require serious preparation before decorative finishing. Leveling walls is a rather lengthy and painstaking job, but the advice of experienced craftsmen will help even a beginner cope with this task.
Many people, when starting a renovation, skip work related to surface preparation. Explain this decision different ways: some want to save money, others want to save time, and others even consider this stage to be insignificant.
Wall alignment becomes a guarantee of high-quality and beautiful decorative finishing.
The pattern on the wallpaper does not “float”, the tiles are securely attached and create aesthetic appearance in the room. The cost of rough work is quite affordable, especially if you do it yourself.
The best way to level walls
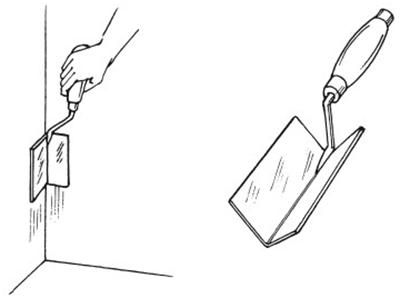
How to level the walls in an apartment? To answer this question, you should conduct a thorough inspection of the surfaces and identify the number and size of irregularities. To do this you will need the following tools:
- nails;
- hammer;
- a plumb line or level 2–2.5 m long;
- threads
A nail is driven into one of the upper corners, with its head protruding from the wall by 2–3 mm. This mark will become the first lighthouse. A thread is tied to a nail, at the other end of which some kind of weight is attached (a nut is quite suitable). The length of the thread should be such that the nut almost reaches the floor. The absence of vibrations of the nut in a suspended state indicates that the thread has formed a right angle with the floor surface. This is where the second nail is driven in at the bottom corner (next to the nut). The nail head and thread should then be on the same line.
The same principle of operation is used when driving nails into opposite corners of walls and partitions. To identify and measure irregularities, long threads are pulled crosswise. From the upper corner the thread is pulled to the lower corner of the opposite wall and vice versa.
Such a guideline of crossed threads will allow you to see all the surface flaws. If the deviations are 10–15 mm, then you can get by with plaster and putty. When there are more irregularities, it is better to choose technology using drywall. How to level a wall with your own hands in one way or another? More on this later.
2 ways to level walls: plaster or paneling
There are 2 main ways of alignment. These are the use:
- drywall;
- dry plaster mixture.
You need to make a choice in favor of one technology or another, taking into account the condition of the walls and the chosen decorative covering.
Masters of interior decoration indoors, it is recommended to use plasterboard sheets for further puttying, painting walls and wallpapering. For tiled masonry, leveling with plasterboard is not suitable, due to the smoothness of the surface, which prevents adhesion.
How to properly level walls for ceramic tiles? For this purpose, plastering technology is used. This method is considered universal, as it is suitable for decorative finishing with any materials.
There is another way to make a wall in a house perfectly smooth - to use putty, but it is only suitable in some cases when the unevenness of the wall is very minor, and you need to achieve a perfectly smooth surface.
Leveling walls with plaster
The process of plastering the surface is quite lengthy and complex, so before leveling the walls with your own hands, you should inquire about the cost of specialist work. It is quite possible that the price will be acceptable and it will be much easier and faster to order this service.
Before giving preference to this technology for leveling the surface from the inside, you should weigh its pros and cons. Among the advantages are the following features.
- A small layer of plaster allows you to achieve a minimal reduction in the volume of the room. This makes it suitable for use in tight spaces.
- The plaster is ideal for rooms with any level of humidity and temperature.
- Any finishing material can be easily attached to a leveled surface.
- Suitable for both general and spot leveling of individual small areas.
However, plastering technology also has several disadvantages.
- Ineffective for large uneven areas. To level the walls in an apartment, a thick layer of plaster will be required, which will increase the cost and labor costs (it’s faster and cheaper to use drywall).
- To perform such work will require skills, so a beginner will have to develop them in the process.
- Long drying (at least a week).
Surface preparation
Before starting leveling work, the surface must be properly prepared. The quality of the work performed and the service life of the plaster layer depend on this.
How to level walls that already have an old layer of plaster? The first step is to remove anything that is chipping or flaking. The most convenient way to do this is with a spatula. If the wall looks solid and there are no potholes or cracks on it, you should tap it thoroughly. In those places where the sound is heard more muffled, there are probably detachments of the plaster layer. Now it is still holding up well, but a fresh layer of material can cause peeling and partial collapse. For this reason, it is advisable to get rid of the old plaster layer completely by cleaning the wall to the base.
If there are cracks on the surface, they should be repaired. Large potholes are first sealed separately, since the plaster has limitations on the thickness of the layer.

An old layer of paint is also not the best base for applying plaster - in this case the surface will be too smooth. A special primer or applying notches to the surface of the wall will help correct the situation. Their quantity should be approximately 100 pieces per 1 sq. meter. A hammer drill or grinder will help you quickly cope with such work. In the absence of power tools, the old method will come to the rescue - making notches with an ax.
The next step is applying the primer. It increases adhesiveness and makes the plaster layer durable.
What mixtures do we use to level the walls?
When choosing a material for leveling walls, you should pay attention to its cost. Too cheap a building material indicates savings on production technology. Such mixtures can quickly peel off, “leak” and cause many other inconveniences.
The differences between dry mixtures lie in their composition. They can be:
- gypsum - capable of maintaining a good indoor microclimate, therefore ideal for the living room, bedroom, nursery and other living rooms;
- cement - more suitable for rooms with high humidity (bath, kitchen).
The maximum permissible layer thickness also requires attention. It is indicated on the packaging.
Plastering walls: step-by-step instructions
Before leveling the walls, you need to prepare the necessary tools:
- Master OK;
- grater;
- grater;
- rule;
- falcon;
- level;
- ladle;
- wide brush;
- metal lighthouse;
- a mortar box or other container for preparing the solution.
You can level the walls in an apartment using 2 methods:
- using beacons;
- using a rule.
Both options have advantages and disadvantages.
Plastering on beacons

The work is being carried out in stages. How to level the walls according to all the rules?
- Installation of beacons. T-shaped profiles are used as beacons (they can be replaced with slats). The distance between the slats is equal to the length of the rule - its sides should rest on the nearest profiles. They are attached to the wall surface using scattered mortar “cakes”. Before the solution has time to set, all profiles must be leveled. As a result, all slats should be in the same plane. The extreme profiles are not attached at the very corner of the room, but at a distance of 30 cm.
- Preparation of the mixture. The solution is prepared based on the manufacturer's instructions and recommendations. A large amount of solution should not be diluted at one time - it hardens quite quickly (especially with a gypsum composition).
- Applying plaster. The solution is poured between the two beacons using a spatula (the volume of the solution should protrude slightly above the slats). The rule is from the bottom up, carefully distributing the mixture throughout the entire niche. In this case, the rule should rest with the edges on the slats. This way they fill all the space between the profiles.
- Profile extraction. After the solution has dried, the slats are pulled out, and the holes from them are filled with the solution and smoothed with a grater.
Alignment by rule
In this case, the work is not performed on the entire wall, but only on its problem areas. While working with the rule, it is pressed against the wall and the solution is distributed until there are no more gaps between the rule and the wall. Even if alignment done “by eye” produces a slight bias, it is almost unnoticeable. This saves both time and effort.

How to level walls with plasterboard
This technology for leveling walls involves the use of plasterboard sheets. This method has become widespread due to several advantages.
- Even large surface irregularities and imperfections are quickly eliminated.
- It can be used in rooms with walls made of any material: wood, concrete, brick, gas blocks.
Drywall allows you to enhance the heat and sound insulation properties of the room.
However, this technology does not exclude inconveniences.
- The volume of the room is noticeably reduced.
- In rooms with high humidity, plasterboards become deformed.
- After installing the slabs, additional finishing is required (reinforcement of joints, puttying, priming of walls).
At the same time, drywall allows you to quickly and without much difficulty level the walls with your own hands without the involvement of craftsmen in two ways:
- frame;
- on glue.
Frame method of fastening drywall
This option is chosen in cases where:
- very crooked walls;
- additional sound insulation and insulation of the room is needed.

All work can be divided into stages.
- Preparation. In this case, to level the wall, minimal preparation is required - remove the wallpaper and the peeling layer of plaster.
- Marking. First, the line of the outer edge of the future wall is drawn on the ceiling, after which these marks are transferred to the floor using plumb lines. They are needed for attaching vertical posts (fasteners are made at a distance of 60 cm).
- Preparing guides. Damper tape is glued to the guides and secured with dowel nails to the floor and ceiling. The fastening step is 40 cm. The pendants are also attached to the wall using dowel nails.
- Installation of racks. The height of the racks should be approximately 1–2 cm less than the total height from floor to ceiling. They are installed in guides and secured with self-tapping screws. The correct installation of each rack is checked with a level, after which they are fixed on direct hangers. To give the frame rigidity, horizontal jumpers are installed (especially in those places where horizontal joints of drywall sheets are located).
- Installation of drywall. The sheets are cut into separate pieces with the required dimensions, and holes are drilled for installing sockets and switches. Using a plane, prepare 45 degree chamfers (at the joints). The sheets are fastened to the frame using self-tapping screws at a distance of approximately 30 cm. Upon completion of this stage, finishing follows.
Drywall with glue
When leveling walls with your own hands, you can use this method if the unevenness is relatively small. Progress.
- Surface preparation. The old layer of decorative coating is removed and all layers of material are removed. An antiseptic primer is applied to the walls.
- Installation. After cutting the drywall sheets, glue is applied not to the entire surface of the sheet, but to its sides. For greater strength, make several “cakes” of glue in the center. Pressing a piece of drywall against the wall, check its position using a level and press carefully for 2-3 minutes. This is followed by final leveling of the walls.
Repair is always a long and costly undertaking. How to level the walls? The main thing is to strictly follow the advice and recommendations of finishing specialists. With their help, even a beginner can handle this task.
In new houses, the walls may be of fairly acceptable quality. But modern design requires that they be perfectly even. It will suit some people, but others need to get a high-quality surface.
How to make walls even and smooth
How and with what to level the walls? The options may be the following:
- Application of plaster.
- Paneling.
- Combined method.
Most of the area of the premises consists of walls that are almost completely open, so all defects are visible on them. The question of how to level the walls in an apartment usually arises when major renovation. Irregularities can be hidden under liquid wallpaper or decorative plaster. Smaller defects are well hidden under wallpaper with a chaotic pattern. This will be a partial solution to the problem, but due to it, the amount of remaining work can be significantly reduced.

How to make walls flat with drywall
If, when deciding how to level the walls, plasterboard is chosen, then here again you need to determine how this should be done. There are two options. This is frameless and framed.
Frameless method
Installation of plasterboard sheets (GKL) is carried out using special glue. If the unevenness does not exceed 7 mm, the composition is leveled along the wall with a notched trowel. With a curvature of up to 20 mm, the glue is applied in the form of cakes on the sheet with small intervals. It should be diluted in small portions, as hardening occurs in half an hour. The cakes are applied along the entire perimeter of the plasterboard, then two more rows vertically. The sheet is pressed against the wall and leveled using a level and a wooden or rubber hammer. When laying, check the evenness in the corners and at the joints.

Frame method
When deciding how to level the walls in an apartment, it is necessary to take into account that the frame method “eats up” a fairly large volume of the room. It is used for the most part in spacious rooms and when it is necessary to hide communications.
To install the sheets, first attach a frame made of profiles or well-dried wooden blocks. First, the ceiling and floor racks are installed and vertical posts are inserted into them at a distance of 40 and 60 cm. The latter are additionally secured with hangers that are nailed to the walls. Then communications are laid inside the frame, after which they begin to fasten the plasterboard with self-tapping screws. All joints between them must pass along profiles. During the installation process, lamps, sockets and switches are inserted into the drywall. All electrical appliances must be removed from the walls under the plasterboard, and the exposed ends of the wires must be protected with insulation.
A primer is applied to the joints between the sheets, after which they are glued with serpyanka, and then putty is applied to it.
mortar
When choosing what to use to level the walls, the first thought that comes to mind is using plaster as the most common method. But first of all, it is necessary to determine the curvature of the walls and calculate the required amount of building mixture. The question of what is the best way to level walls can be solved much easier if you think through all the details and accept correct solution. The thickness of the plaster layer can be significantly reduced by knocking down the main protrusions with a hammer drill. It is quite possible that after this the wall will simply need to be puttied, after which it will be perfectly flat.
If unevenness on the wall cannot be removed, you should purchase the required amount of primer and plaster. The tools you will need are a level and spatulas.
Such work is usually carried out with a complete replacement of electrical wiring. Even in new houses, it may turn out that it does not suit the owners in terms of power and location of lamps, switches and sockets. Working with electricity is no less labor-intensive, since it may require cutting walls for wiring. In addition, all electrical appliances must be removed and the ends of the wires insulated.
First of all, the wall is covered with several layers of primer. The plaster adheres better to it. The primer is applied with a roller or a construction primer is also necessary for hard-to-reach places, for example in niches and corners.
After the primed surface has dried, the wall can be plastered. For small unevenness, one leveling layer is sufficient. Usually three layers of plaster are applied with a primer for each of them.
Rules for applying plaster
- The plaster is smoothed over the wall using a wide spatula in a circular motion.
- The first layer is a rough layer; it is used to eliminate the main depressions and bulges.
- After applying all the layers, the wall is finally leveled with putty.
Leveling walls with cement-sand mortar
How to level the walls in the house? For many, the answer to this question is not a problem. The method of leveling walls with cement-sand mortar is considered the most common, cheapest and simplest. The skills of preparing and applying plaster are quickly acquired and always remain in demand.

The wall surface is first treated with a primer. Then guide rails, called beacons, are installed on it at a distance of 1 m. They are fixed to cement mortar and allowed to dry. Cement and sand plaster is prepared according to the recipe indicated on the package. Then the mixture is applied using a trowel to the wall, which is pre-moistened. The layer should protrude 2-3 mm beyond the level of the beacons. Afterwards, you should go over them from the bottom up, so that the surface becomes even. In places where there are small depressions, you need to add mortar using a spatula, and then level the wall again using the rule.
After the first layer is applied, it is allowed to set and dry, then the next one is applied. In this way, work continues until the entire wall is leveled. You can continue after 10 days, when the cement is completely dry.
How to line the walls in the bathroom
The bathroom is a small room; renovations can be done fairly quickly and efficiently. How to line the walls in the bathroom? To do this, use a cement-sand mixture or gypsum, which, after hardening, is not afraid of water. Waterproof drywall is also suitable, but it takes up a lot of space. When deciding how to line the walls with tiles, you need to weigh the pros and cons to make right choice. The mortar is laid using special plaster beacons, which are not removed afterwards and thereby strengthen the applied layer. The solution is thrown onto the wall with a trowel, and the protruding parts are cut off and the resulting recesses are rubbed with them. Before finishing, the wall is primed. Then you can glue ceramic tiles onto it.

How to line walls with wallpaper
It is difficult to achieve an ideal wall surface in a large room. And often you have to think about how to line the walls with wallpaper. The last stage is most important here. The rough finish also has great importance, since the overall evenness of the surfaces depends on it. Brick walls must first be plastered. Old surfaces are thoroughly cleaned and all previous finishing must be removed. As a rule, putty is most often used to level the surface under wallpaper.
The solution is applied in several layers until final leveling is achieved. Each time, the wall surface should be dried and a layer of primer should be applied on top. The last layer of putty is sanded using sandpaper.
How to prepare solutions for leveling walls
Solutions can be ready-made or you have to dilute them yourself. Putty and plaster solutions for leveling are mineral mixtures with special additives. They use cement as a binder, intended for use in wet areas. If an adhesive base is used, the composition is only suitable for dry rooms.

Gypsum plaster is widely used. It is able to regulate the humidity in the room, absorbing or releasing it, and is a good heat insulator.
The question of how to level the walls can be easily resolved if you use decorative plaster. Its different types serve as a finishing coating or a base for it. The textured surface hides irregularities and flaws well.
There is a wide variety of leveling compounds for plastering a thin layer of smooth surfaces made of building materials. They only stick poorly to plastic and wooden bases. Special compositions for buildings are produced.
Conditions for use of all wall coverings:
- the base must be clean and free of old coating;
- surfaces are pre-treated with a primer or lining emulsion.
When solving the problem of how to level the surface of a wall, the question of savings always arises. The cheapest are simple solutions. They are quite effective and can be prepared with your own hands. mixed with sand in a ratio of 1:5 and mixed thoroughly. The mixture must be used on the same day so that it does not lose its properties. Cement is mixed with sand in a ratio of 1:5, and 0.1 part of lime is added to it. Setting occurs within an hour.

A mixture can be lean when it contains little binder. It does not delaminate during use and does not crack when drying, but is not durable. The greasy mixture is distinguished by the fact that it sticks to the instrument. When dry, it shrinks and can form cracks. When preparing, you need to make a medium solution. Then it applies well and forms a durable layer.
How to align corners
Uneven corners emphasize the curvature of the walls, and this is what spoils the most appearance rooms. To bring out the internal corners, beacons are first installed. They should be at a distance of about 30 cm from the corners. First, the plaster is applied between all the beacons, and then leveled using the rule. After the plaster has dried, the corner is filled with putty with a slightly thicker thickness than necessary, at intervals of 20 cm. Then a perforated corner (counter-schultz) is pressed into it using a level, and the excess coating is removed. The next day, the surfaces of the adjacent wall plane are leveled, and then the finishing coat is applied.
At the outer corners, the contra-shultz is pressed into the putty in reverse. All other operations are performed in the same way.
To speed up the process, the profile is installed first, after which after an hour it will be possible to level the angle. If the differences turn out to be too large, then they can be smoothed out with the same material.
Conclusion
When deciding how to level the walls, you should first determine the consumption of materials and funds. It is easier to level the walls with plasterboard if the unevenness is significant.
Correct assessment of surface quality allows you to make the necessary decisions and facilitate the renovation of an apartment or house. Modern Construction Materials allow you to achieve a lot, and some of them even have unique properties.
Walls are leveled using gypsum or cement mortar only for small (up to 4-5 cm) height differences. In other cases, it is better to use cheaper drywall.
Surface preparation
Poorly secured layers of old plaster will fall off over time, and repairs will have to start all over again. Therefore, you should tap the walls with a hammer and remove all crumbling layers. Plaster that easily comes away from the wall is removed with a spatula. Problem areas are treated with a grinder or cleaned with a hammer and chisel.Removing old plaster
Using a grinder or a hammer drill, it is better to clean off too large deposits. If you leave them, you will have to apply too much plaster to level the wall with them. The cracks must be widened using a hammer and chisel so that the solution can be laid in them.

The cracks in the wall are widened
Sand and crumbling fine plaster are cleaned off with a brush with metal teeth. If left, the solution will not adhere well to the wall and may also crumble over time.

Cleaning the wall with a brush
Materials and tools
deep penetration primer;building mixture (cement mortar or gypsum-based putty);
finishing putty;
plumb lines (threads with a small weight attached to them);
construction falcon for carrying mortar;
trowel for laying plaster;
wide spatula;
rule: a tool for leveling the solution in the form of a 1-3-meter strip of metal;
corner spatula;
grater for smoothing out unevenness;
ladder.

Wall Leveling Tools
Using Plumb Lines
To estimate the degree of surface curvature, it is better to use plumb lines. To do this, take a small weight (for example, a nut) and attach a long thread to it. Such a plumb line is suspended from the ceiling at a minimum distance from the wall so that the load is a couple of centimeters from the floor.The thread with the load should only slightly touch the wall. If necessary, the ceiling mount can be moved a little closer to the wall or a little further from it. The lower part of the plumb line is attached to a nail driven into the floor. Several of these plumb lines placed along the wall will serve as an ideal guide.
Alignment of walls
1. Before starting work, the surface is treated primer. Deep penetration compositions allow you to bind the loose upper layers of the wall, prevent moisture from the solution from being absorbed into the surface and significantly increase the degree of its adhesion to the surface.
Deep penetration primer
2. To equalize large differences use beacons– guides, made in the form of a perforated strip of metal or plastic, attached to the wall using mortar and used to control the leveling of the surface.
3. To place beacons on the wall, draw a horizontal line onto which slats of mortar are applied (“ stamps"). Next, the beacon is pressed into them. The height of the stamps is verified building level.

Beacon placement
4. After the “marks” have completely dried, plaster is laid out between the beacons and spread over the wall using rules– a tool for leveling large layers of mortar.
Important. The distance to the second beacon should be equal to the width rules.

Alignment by rule based on two adjacent beacons

Appearance of the wall when aligned with beacons
5. If the degree of curvature of the walls is high, you should not immediately apply too large a layer of mortar, otherwise it will crack when drying.

Applying part of the solution
Advice. When the total thickness of the layer is more than 2 cm, use it to strengthen it and protect it from cracking. serpyanka(plaster polymer mesh with small cells), which is pressed into the solution.

Laying serpyanka
6. Instead of metal beacons, you can use plumb lines. In this case, small wooden overlays will serve as a guide for the rule.

Arrangement of “marks” using plumb lines
7. In order not to damage the drying solution, leveling is carried out round: first the plaster is applied to the first wall, then plaster is applied to the next wall, etc.
8. You can get a perfectly flat and smooth surface using finishing putty. It is applied in a thin layer (up to 1.5 mm), and after drying it is sanded with sandpaper. Finishing is used to prepare the wall for painting. acrylic paints or a sticker of thin wallpaper. When facing ceramic tiles, plastic, cork, etc. such finishing is not required.

Leveling the wall with finishing plaster
Aligning corners
1. After leveling the first wall, a corner adjacent to it is laid plastic corner profile with or without reinforcing mesh attached to the sides. Its fastening is done using a solution, the excess of which is squeezed out with a spatula. The depth of immersion of the profile into the putty is checked building level. After the corner has dried, the profile is smoothed with a solution.
Corner profile with serpyanka

Checking the inside corner
2. External corners(slopes of walls and windows) are also leveled using profiles made of plastic or metal. They not only allow you to create perfectly even corners, but also protect it from damage when moving furniture or equipment.

Aligning outside corners

Installation of metal profiles
3. You can align the corners and corner spatula – a tool with a plate mounted on its handle, bent at an angle of 90. It can also be used to smooth out corners when installing profiles.
Angle spatula
Advice. If it is not possible to align the angle exactly at an angle of 90°, the spatula can be slightly straightened or bent.
Leveling walls with plasterboard
Finishing with this material is a less expensive method of leveling walls. For the work, you should purchase drywall itself, metal guide posts or wooden blocks for fastening it, hangers for attaching them to the wall and self-tapping screws. To save space, you can do without guides and attach the drywall directly to the wall.1. To mount using metal racks on the wall, at a distance of 1 cm from the corner, draw a straight horizontal line, along which screws are screwed with screws every 40-65 cm direct hangers.

Attaching a direct hanger

Fastening profiles
3. The distance between each of them should be equal width drywall. The edges of the sheets should be at the center of the profile. To strengthen the structure, it is better to install intermediate profiles between them.

Fastening profiles
4. Drywall is attached screws for metal in increments of 25 cm. Do not screw them in at the very corners of the sheet. To prevent them from breaking off, it is necessary to retreat 5 cm from the edge. The self-tapping screw should not protrude above the surface - it is deepened into the sheet by a couple of millimeters.

Fastening drywall exactly in the center of the profile
5. Walls are laid at internal and external corners corner profiles.

Installation of corner profiles
6. Joints between sheets, recesses from self-tapping screws and corner profiles are covered with a layer putties. If the wall is being prepared for painting or wallpapering, a plastic mesh is laid at each joint - serpyanka.

Preparing the wall for painting
Important! Drywall is not able to withstand too much load, so when hanging structures that are too heavy (for example, a water heater) on the wall, you should use long metal pins.
Fastening drywall without guides
1. To secure drywall without the help of profiles, self-tapping screws are screwed into the wall (40-50 of them will be required for one sheet).2. The depth of their screwing is determined using plumb line: a weight attached by a string to the ceiling.
3. A fairly thick layer is applied to each screw gypsum with polymer additives, onto which the drywall will be glued. The solution is applied so that it covers the screw by a couple of centimeters.

Fastening drywall without using a profile
4. To prevent the plasterboard from springing in places where the wall bends, it is better to place pieces there foam rubber.
5. To level the sheet horizontally, pads made from drywall scraps are placed under it.

Fastening drywall sheets without using profiles
6. Until the solution sets (35-40 minutes), the sheet will have to be held on the wall with your hands.
Important! With this method of fastening, there should be no horizontal joints, so for work you should take sheets equal to the height of the room.
It will quickly lose its original appearance, and you will have to do it again. To save time and money, it is better to immediately properly level the walls. Which method of leveling walls is better to choose and how to carry out all the work?
Assessment of wall surface roughness
All methods of leveling walls are divided into two fundamentally different groups:
One way or another choose, taking into account the degree of unevenness of the walls, so this stage is especially important. You can measure how uneven the walls are laser level or regular building level.
Sequence of work looks like this:
- preparation of the wall surface. In order for the leveling mixture to stick, the wall must be properly treated. First, all remnants of the old coating are removed, then priming is carried out for better adhesion to the plaster layer. For cement compositions, a primer made from mortar and water is used, the so-called cement laitance, it is better to use a special one for gypsum plaster;

- if the layer of plaster is more than 2 cm, then at this stage it is better to use reinforcing plaster mesh, which will not allow the composition to crumble. It is worth noting that if you use a ready-made factory plaster mixture, then you should pay attention to the composition: some manufacturers use polymer additives that increase the strength and degree of adhesion of the solution so much that a mesh may not be needed;

 installation of beacons. Wooden slats or a perforated metal profile are used as beacons, which become a guideline for creating a flat surface. The latter will be more convenient for beginners, since such beacons will not have to be removed after the plaster layer has slightly hardened and then the recesses will be masked. First, two beacons are mounted at opposite ends of the wall, and the beacons are secured with gypsum mortar of the required height until ideal verticality is achieved. Three cords are pulled between the two resulting beacons: at the top, in the middle of the wall and at the bottom, and already focusing on them, intermediate beacons are installed so that they lightly touch the cord. The step between the beacons depends on the size of the tool that will be used to level plaster mixture(usually a rule is used for this). In any case, the distance between the beacons should be 20 cm less than the length of the instrument;
 You can find a wide variety in construction stores. At the construction site, all that remains is to prepare the solution correctly, following the instructions. You can prepare a cement plaster solution yourself: mix cement and sand in a ratio of 1:6, then add water to a creamy consistency. Some experts recommend sticking to a component ratio of 1:2 or 1:3; the finished mixture is more plastic, and therefore easier to handle. The finished solution is used for 1-2 hours until it begins to harden;
 applying plaster. To do this, you can use a “falcon” and a trowel. The first is to take the mixture from a container, the second is to throw it on the wall in excess. The use of a “falcon”, a tool similar to a trowel, but larger in size, allows you to increase the speed of work. Now, as a rule, you need to evenly distribute the solution from bottom to top, leaning on the beacons. If the leveling layer is thick, then you can first apply a rough outline of the plaster, and after it dries, apply the main layer with leveling along the beacons. If wooden slats were used as the latter, then when the solution dries a little, they need to be carefully removed, the cavities filled with plaster and leveled with a spatula;
 After the plaster dries, we obtain a smooth but rough surface. To make it smooth, you need to apply thin layer of putty, and then sand the surface with fine sandpaper.
The main advantage of this leveling method is to maximize the preservation of the usable area of the room. The disadvantages are the labor-intensive process, the need to prepare the base and the presence of a large amount of dust.
No. 2. Leveling walls with putty
However, do not forget that this method of leveling walls will take up a lot of usable space, and if it is already in short supply, then the room risks turning into a hole. Walls covered with plasterboard sheets will be able to withstand less load than those lined with plaster. If we are talking about a room with high humidity, then you should use moisture-resistant plasterboard sheets.
Sequence of work:
 frame construction. It may consist of a metal profile. The timber does not allow achieving the desired durability of the frame, it is susceptible to the influence of moisture and microorganisms, therefore in most cases today they are used guide and rack metal profile.
The first two profiles are attached to the floor and ceiling.
Using a level, draw a straight line on the floor at a distance of 5-6 cm from the wall (more is possible if the curvature is large or you need to hide communications).
Using a vertical plumb line, the line is transferred to the ceiling.
Guide profiles are fastened along the resulting lines with self-tapping screws, constantly checking the evenness of their level using a plumb line. Between them, perpendicular to them, supporting profiles are attached along the wall using. The distance between them is 40-60 cm for plasterboard sheets 120 cm wide;
A pleasant apartment or house to live in today means increased demands on comfort, convenience and aesthetics. Repairs have become more painstaking, voluminous and durable. The purpose of leveling the walls is precisely to ensure that the finished rooms are pleasing for a long time.

Ideally even proportions of a room or house are, first of all, simply beautiful. Owners of old houses often suffer from wavy distortions, but irregularities are also found in the newest concrete or monolithic houses. In addition to appearance, smooth walls have other advantages:
- Ideal fit of ceiling and floor skirting boards;
- Durable service of all finishing materials;
- Reducing the cost of subsequent repair work.
Leveling work is not so complicated and you can easily learn how to level the walls in an apartment with your own hands.

The best way to level walls
Leveling walls with your own hands can be done in two main ways:
- Using frame structures and drywall;
- Using building mixtures.
To understand how to properly align, you need to take some measurements. It is permissible to use putty and plaster when unevenness does not exceed 5-6 mm. If the differences are higher, you will have to use the second method of leveling the walls in the apartment - frame and drywall. True, in this case the useful area of the room will be “eaten up”.
If you have to level the walls with your own hands for the first time, it will be more difficult to master the technology of working with dry mixtures. Beginners are recommended to work with GVL.

Required tools and materials
Depending on the chosen option, how to level the walls in the apartment, a different set of tools is prepared. To level with putty you will need:
- Rule and level, tape measure for measurements;
- Set of spatulas;
- Master OK;
- Plaster grater;
- Mixer or drill for mixing the solution;
- Container for solution.
It is better to level the walls in an apartment with your own hands using gypsum plasterboard. For this work you will need:
- Rule for leveling putty;
- Knife for working with gypsum fiber board;
- Hammer and jigsaw;
- Rubber hammer;
- Screwdriver.
In addition to the basic list of what is needed for leveling, we must not forget about the primer. It will be required in any chosen option.

Preparing surfaces for leveling
Alignment of walls in wooden house, brick, monolithic and any other begins with surface preparation. First of all, the previous finish must be removed, preferably the plaster. Any technology for leveling walls requires thorough cleaning of the surface, sealing cracks and holes. It is better to tap the existing plaster - if there is a dull sound, you will have to tear off the coating. Next, you need to conduct a second visual inspection, check for new cracks and repair them. Then the surface must be treated with a primer.
Before leveling crooked walls in an old house, their complete cleansing is absolutely necessary. Applying a layer of plaster to dilapidated materials may cause the fresh layer to fall off. And when leveling timber walls inside a house, treating the wood with impregnations cannot be ruled out. Then, under a layer of mixture or frame, the tree may decompose, but you won’t be able to notice it.

Basic methods of leveling walls
Popular methods of leveling walls in an apartment can be summarized into 2 options - dry and wet method. In the first case, gypsum fiber board and frame are involved, in the second - any building mixtures. All alignment methods are briefly described below.
Plastering
When working with plaster, you can use beacons, or you can do without them. Leveling without beacons as a rule will reduce material consumption, save money on the beacons themselves, improve the quality of work and will not force you to sacrifice space. How to level the walls in an apartment without beacons is indicated in the instructions:
- You need to make the first, rough layer of plaster. To do this, they can use the “spraying” technology - when a slurry-like solution is thrown onto the surface in slides, without leveling. You can also use simple coating with the solution. But in any case, at this stage the surface is not leveled, but the foundation is set.
- The first layer should dry a little, but not completely. When wet, it will better take on the second layer – the soil. Before you completely level the walls in the room, you will have to monotonously apply a primer layer and level it with a trowel or spatula. The excess is removed, and the voids are filled with solution.
- Leveling without beacons involves working with a rule and a laser level. At the second stage, the level of evenness of the wall is already verified and guided by this indicator.
- The second layer will allow for mechanical leveling, but there will still be roughness and marks from spatulas on the surface. Now “smoothing” will come into play - applying a thin layer of plaster using mechanical circular movements.
The degree of drying of the solution at each stage is extremely important. You cannot overdry it - the layer must be pressed through with your fingers.

Leveling with plasterboard
Leveling with plywood or gypsum plasterboard can be carried out in 2 ways - by attaching drywall to a frame or using glue. These methods of leveling walls with your own hands can be summarized as follows:
- If a profile is used, vertical plumbs are installed on the surface. Then horizontal slats are mounted on the floor and under the ceiling, and the frame is attached to them. If the GVL will be attached with glue, prepare a solution.
- To decide how to quickly level the walls in an apartment, it’s worth taking a closer look at the adhesive method of working with gypsum fiber board. In this case, the solution is applied to the sheet in heaps, at an equal short distance. The solution does not need to be straightened, just lightly press it with a spatula and secure the drywall to the surface. GVL is attached to the profile using self-tapping screws and their caps should be slightly buried in the sheet.
- The sheets secured with glue are tapped with a hammer. Then the seams need to be treated with plaster and reinforcing mesh applied.
Sometimes GVL is also treated with a layer of plaster on top. This finishing alignment eliminates the appearance of seams.

For a bathroom, it is better if the walls are lined with gypsum plasterboard using glue, because the metal profile can become corroded, and the structure itself will “eat up” the area of the room from the inside.

Leveling with putty
There is another material that can be used to level the walls. We are talking about putty - its properties allow it to cover cracks, it is easy to apply. You should not use it if the surface is highly curvature, but in other cases you can proceed as follows:
- If you use gypsum putties, then we will talk about leveling the walls with a rotband. It is convenient to work with, but it will not tolerate high humidity, so there is no need to putty the walls in the bathroom or kitchen.
- The area primed in advance must be measured. To do this, you need to understand how to use a laser level to level walls. You can also use a regular level - apply it in different directions and mark places with strong distortions with a pencil.
- The leveling solution mixed with a drill or mixer must be applied immediately. They begin leveling the walls in the apartment from the corners, gradually moving across the entire area. Apply a level to just the putty area to constantly monitor the evenness.
- After finishing the work, the room should dry out within 2-3 days. It is necessary to ensure that air gets inside, but to exclude drafts.
After drying, the walls are leveled using the rule. If bumps or elevations are noticeable somewhere, sand them down with sandpaper.
When working with putty, you need to prepare a damp cloth - the diluted solution dries quickly, so it is better to cover the container with a cloth.

Features of leveling walls made of different materials
All methods for leveling walls in a house can be applied to any material of the building itself. True, before you level the walls in a wooden house with your own hands, you need to understand whether you want to preserve their natural appearance. In the case of concrete or brick, the answer is obvious - such surfaces need to be leveled, hiding the natural appearance of the material. To understand how to properly level walls from different materials, it is worth knowing some features:
Wooden
In houses made of timber, it is better to work with plywood or gypsum fiber board. This is a quick way to straighten surfaces with minimal material consumption. If you use plaster, you will have to spend a lot of time and mixture on sealing the seams between the beams. Before leveling a timber wall, it must be treated with impregnations;

Concrete
Alignment method concrete walls is selected based on calculations of the depth of curvature. Before leveling a concrete wall, level measurements are taken. If the depth of the depressions is less than 5 mm, putty is suitable; for working with depressions up to 4 cm, you can use plaster. If the curved surface has a depth of more than 5 cm, it can only be corrected with drywall;

Brick
Alignment brick walls occurs according to the same measurements of the depth of curvature as in the case of concrete houses. To properly level the walls, you can use both dry and wet methods.
A good result can only be achieved when adequate preliminary measurements have been carried out. Before leveling crooked walls, it is better to invite craftsmen.
Whatever leveling material is chosen, any wall must undergo deep cleaning. This will improve the adhesion of materials to the surface and free it from excess layers of old application.

How to use a laser level when leveling walls
Taking independent measurements of curvature is not so easy. Experienced craftsmen use a laser level or level. There are LEDs and prisms inside the device, with their help you can build a projection on any surface. A laser level for leveling walls is used as follows:
- Before aligning the laser level parallel to the wall, it must be placed on a flat surface and adjusted. As soon as the desired result is achieved, the device will beep;
- You can then position the laser level parallel to the wall. An even projection will appear on it;
- Leveling walls using a laser level begins by marking those places where critical curvature is noticeable. Marks are made with a pencil on the surface;
- Using a ruler or tape measure, measure the distance from the wall to the beam, and so on throughout the entire area.
The only drawback of a laser level is its cost. However, such a tool is useful not only for leveling the walls in the apartment, but also for leveling the floor, laying tiles, and evenly gluing wallpaper.

Which method of wall leveling is better to choose?
Before leveling the walls yourself, it is important to determine the appropriate option. The right solution is help in the fight against unevenness at all square meters, preparing the wall for perfect painting or applying other finishing material. To understand how to properly level the walls in an apartment, you need to be guided by the following factors:
- How severe is the damage and unevenness? With deep depressions it is easier to apply quick leveling with drywall. This will save time and money on plastering;
- Leveling walls made of timber - a house or a veranda - is also easier to do with plasterboard. When leveling walls in a wooden house with your own hands, you must take into account that wood has poor adhesion to many mixtures;
- If you choose the best way to level walls whose deviations are no more than 15 mm, then it is better to use plaster;
- Choosing the best way to level the walls in an apartment is based on your own skill. Working with plaster will require more skill than working with drywall.

There are not many ways to quickly level walls. But there are important preliminary and final stages in these works. And if we level the walls with our own hands, we cannot ignore studying the process, and perhaps the help of experienced craftsmen.

