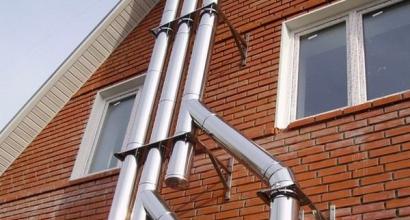
DIY solar collector how to assemble and manufacture. Solar water heater: building a do-it-yourself installation
Good owners of private houses are always looking for ways to save money on water heating and heating. This has become especially relevant in recent times, when utility prices have a strong upward trend almost every quarter. Nature itself comes to the rescue with its inexhaustible source of energy - solar radiation. By putting the laws of physics into practice, craftsmen find interesting ways to save money by designing and assembling solar collectors, which, probably, any homeowner can do on their own - you just have to put a little effort and skill.
A do-it-yourself solar collector can be made in multiple ways and from a variety of materials, sometimes even from those that simply “roll underfoot.” They are constructed from ordinary old beer cans, plastic bottles, hoses or pipes, using glass, polycarbonate panels and other materials.
Some of the ways to make collectors will be discussed below, but first you should study the connection diagrams - they, as a rule, are approximately common to any solar water heating systems.
Solar Water Collector Wiring Diagrams
The effective operation of the solar water heating system depends not only on what the collector is made of, but also how correctly it will be installed and connected. There are a lot of options for connection schemes, but you should not look for the most complex ones, since it is quite possible to use the basic ones that are accessible and understandable.
"Summer" version of hot water supply from a solar collector
This simple solar collector connection scheme is applicable for both domestic and domestic water heating. If hot water is needed outside in a summer building, then the tank for it is also installed in the air. In the case when hot water is distributed around the house, and the storage tank is installed there.
 "Summer" collector connection option
 This scheme usually provides for the natural circulation of water, and in this case, the collector battery is installed 800 ÷ 1000 mm lower than the tank level, where hot water will flow - this should be ensured by the difference in density of the cold and heated liquid. To connect the manifold to the tank, pipes with a diameter of at least ¾ inch are used. To keep the water in the storage tank in a hot state, which it will reach from heating by the daytime sun, the walls must be well insulated, for example, with mineral wool 100 mm thick and polyethylene (if a roof is not built over the boiler). But still, it is better to provide a stationary shelter for the container, since if the insulation gets wet from the rain, it will significantly reduce its thermal insulation properties.
Natural circulation is not very good for use in a system with a solar collector, as it creates a slight inertia in the movement of water in the circuit. And if the battery and the tank are far enough apart, then the water, having passed this path, will gradually cool down. Therefore, to increase efficiency, circulation is often installed. This option is suitable for heating water only in the warm half of the year, and for the winter the water from the system will have to be drained, otherwise, freezing, it will easily break T tons of ruby.
"Winter" scheme for connecting solar water heating
If you plan to use the solar collector year-round, then so that in severe colds the water does not freeze in the pipes, a special antifreeze, that is, an antifreeze liquid, is poured into the circuit instead of it. The scheme takes on a completely different look - an indirect heating boiler is installed. In this case, the antifreeze heated in the solar collector will pass through the coil-heat exchanger of the boiler, warming the water in the tank.

A "security group" is necessarily built into this system - automatic air vent, pressure gauge and safety valve, designed for the desired pressure. For the constant movement of the coolant, a circulation pump is usually used.
Solar heating option
When using solar thermal energy for home heating, an indirect heating boiler connected to the collector is also used, as well as for additional heating of the coolant - running on solid fuel or gas. On autumn or spring days, when the sun is able to heat the coolant to the desired temperature, the boiler can simply be turned off.
 Solar collector - a good help for home heating
 If the winters in the region are very cold, then one should not expect great efficiency from the collector, since during this period there are few sunny days, and the star itself is low to the horizon. Therefore, additional heating of the coolant and hot water is simply necessary. The only way a solar battery will help save on fuel is that not cold, but already somewhat heated water will flow into the boiler, which means that to bring it to the desired temperature, it will take less gas or wood to burn.
You also need to know that the larger the solar thermal collector is, the more energy it will be able to absorb. Therefore, in order for such a system to be able to generate enough heat to heat the house, the size of the collector area must be increased to 40 ÷ 45% of the total area of the house.
Option for hot water supply and heating from a solar collector
To use the solar collector for both heating and hot water supply, it is necessary to combine both previous options in the system, and use a special boiler for water with an additional tank having a coil through which the coolant heated by the solar battery circulates. Due to the fact that the inner tank is much smaller than the main one, the water in it heats up from the coil much faster and gives off heat to the general tank.
 The collector can be included in the general system "heating - hot water supply"
 In addition, the boiler must be connected to an additional heating source - it can be either an electric boiler or a solid fuel heat generator.
The temperature instability created by the solar battery can contribute to overheating of the coolant or, conversely, to its too rapid cooling in the heating and water supply circuits. To prevent this from happening, the entire system must be controlled by automation. Installed in the wiring controller temperature, which can either redirect coolant flows, or turn on or off circulation pumps, or perform other control operations.

In the diagram above, such a temperature controller is designated as a regulator.
So, with connection diagrams (strapping), in general terms, there is clarity. And now it makes sense to consider several options for self-manufacturing solar collectors.
Prices for solar collectors
Solar collectors
Solar collector from hose or flexible pipe
Those who have a private house with a garden or a cottage, of course, know that the water left in the temporary light mains after watering the beds heats up quickly. This is the positive quality of hoses or flexible pipes and was used by craftsmen, creating solar heat exchangers from them. It should be noted that such a collector will cost many times cheaper than bought in a store, but in order for the manufacturing process to be successful, some effort must be made.
 On the roof - a whole battery of solar collectors
 Such a collector may consist of one or more sections, in which hoses tightly coiled in a spiral “snail” are laid and fixed.
 "Snail" - heat exchanger
 This design can be called the simplest both in design and installation. Its main disadvantage can be called the fact that it is practically impossible to use it without the use of forced circulation, since if the pipe contours are too long, the hydraulic resistance will exceed the pressure force created by the temperature difference. However, solving the issue of installing a circulation pump is not difficult at all. And such a system, installed in a country house, will be an excellent help and will quickly pay off, including the costs (very insignificant) for the power supply of the pump.
Similar collectors are also used for heating water in pools. They are connected to a filtration system, which is necessarily equipped with a pump. Water, circulating through the pipes of the collector, has time to heat up before entering the pool.
In some cases, creating the entire system, you can do without installing a storage tank. This is possible when hot water is used only during the daytime and in small quantities. For example, in a circuit of 150 m of a pipe with an internal diameter of 16 mm, 30 liters of water can be accommodated. And if five or six such “snails” from pipes are collected into a single battery, then during the day each family member can take a shower several times, and there will still be a lot of hot water for household needs.
If someone still has doubts about the effectiveness of such water heating, we recommend watching a video that shows a test of a hose collector:
Video: the efficiency of a simple solar collector
Materials for manufacturing
To make such a solar water collector, you need to prepare some materials. It is not at all excluded that some of them can be found in a barn or garage.
- A rubber hose or a flexible black plastic pipe with a diameter of 20 ÷ 25 mm is, in fact, the main element of the system in which heat exchange will occur when water circulates. The number of hose will depend on the size of the solar battery - it can be 100 or 1000 meters. The black color of the hose is preferred because it absorbs heat more than all other shades.
It should be noted right away that metal-plastic pipes are not particularly suitable for the manufacture of a collector, even if they are covered with black paint. The fact is that their plasticity in this case is insufficient - they break at bends of a small radius and thus, even if the integrity of the walls is not violated, the intensity of the water flow will decrease.
Hoses are sold in coils of 50, 100 or 200 meters. If you plan to make a large volume battery, then you will have to purchase several bays. In the event that it is planned to use, for example, 50 or 100 m of hose in each section, then you should not buy a whole 200-meter bay, it is better to purchase a ready-made measured hose. This will save time during installation.
The hose can be laid not only in a round spiral, but also oval, as well as in the form of a coil.

As a good alternative, you can also try modern PEX pipes. They have good plasticity, but how to give them a black color if it is not on sale is easy to figure out.
- If the slope of the roof on which the collector battery will be installed is steep, then special boxes are made for hose spirals - from bars, plywood or metal sheet. This will require bars 40 × 40 or 40 × 50 mm, plywood 6 mm thick, or a metal sheet 1.5–2 mm.

The blanks of the future module are processed (wood) or anti-corrosion compounds (metal). Then a box is assembled from them into one or more spirals.

By the way, as the sides of the box, you can use old window frames, on which the bottom part is simply mounted.

- For pre-treatment of metal and wood, it is necessary to purchase antiseptic, anti-corrosion and priming compounds.
- Hoses (pipes) will experience considerable loads both from the mass of the coolant and from temperature extremes and internal pressure. Therefore, they will try to break the laying, deform, sag, so you need to provide special fasteners to maintain them in the initially set position.
It can be a metal strip, which is fixed between the pipes with self-tapping screws.

Another option is a loose bundle with a tight cord or plastic tie-tie with a cross or crossbar. But still, this fastening method is more suitable for a plastic pipe than for a hose, since it can sag on the cord when the rubber expands. If a reinforced rubber hose is chosen for the collector, then this method is quite suitable for fixing.

Another fastening option suitable for a plastic pipe or reinforced hose can be wide-head nails. They can be hammered either into the bottom of the box (in this case it must have a thickness of at least 10 mm), or onto a kind of cross made of a bar.

- It will be necessary to prepare the connecting elements for the hose or pipes. There are a lot of varieties of such fittings, but you need to choose exactly those that are intended for selected for manufacturing material collector.

In addition to such connectors, threaded fittings will be required to switch from a plastic or rubber pipe to a common metal one. Such a connection will be necessary if the collector will consist of several modules.
To know how many connecting elements are required, you need to draw in advance a schematic diagram of the system being created and calculate their number on it.
- To combine all the modules into a single battery, two collector - cut metal pipe. Through one of them, fixed at the bottom of the battery, cold water will flow into the heat exchangers, and in the second, fixed at the top, warm water will be collected.

The upper pipe will be connected to the storage tank, that is, it will go to the consumer. It should have a diameter of 40 ÷ 50 mm.
Battery installation
Having prepared everything you need, you can get to work.
- First you need to treat all the wooden parts of the future structure with an antiseptic.
- Further, if the bottom of the modules is made of a metal sheet, it must be coated with an anti-corrosion compound. Usually, mastic is used for this purpose, designed to cover the bottoms of cars.
 Known to all motorists "anticorrosive" - what you need
 - After the compositions have dried on the prepared elements, single or common modules are assembled from them.
- Then hoses are laid in them, for which holders are fixed.

- For free passage of pipes through the sides of the modules, holes are drilled for them - in its upper part and lower. Accordingly, a cold water inlet pipe is led into the lower hole, and a heated outlet is led into the upper hole.
- If several modules are mounted vertically, or one common one, into which several "snails" of the pipe are also placed, one above the other, then the lower end of each of the spirals is connected to the upper output of the underlying one - and the entire "column" is switched according to this sequential principle. The lowest end is connected to a common metal manifold through which cold water will flow. All adjacent vertical rows are mounted in the same way - with a common connection to the supply manifold.

- Accordingly, the upper ends of the hoses of the uppermost horizontal row of modules are connected to a metal collector pipe, through which hot water is drained for consumption.
- The spiral collector circuit can also be mounted on a metal sheet installed not on the roof, but near the house, on its south side, or near the pool, if it requires heating. In this case, the metal base will contribute to faster heating of water and heat retention in pipes, as it has good thermal conductivity and heat capacity.

- Another option for a thermal solar collector can be laying the circuit on the roof plane in special boxes in long parallel rows along the entire length of the roof.
Prices for XLPE pipes
XLPE pipes
Video: simple linear tube solar collector
Enhance the effect with plastic bottles

The figure shows a solar collector made of hoses (pipes), the efficiency of which is greatly increased by using ordinary plastic bottles. What is the "feature" here? And there are several of them:
 The action of a plastic bottle as a casing - schematically
 - Bottles play the role of a transparent casing, and do not allow air currents to take away heat during absolutely unnecessary mutual heat exchange. Moreover, the air chambers themselves become a kind of heat accumulators. There is a greenhouse effect, which is actively used in agricultural technology.
- The rounded surface of the bottle plays the role of a lens that enhances the effect of sunlight.
- If the bottom surface of the bottle is covered with a reflective foil material, then the effect of focusing the rays in the zone of the pipe passage can be achieved. Heating will only benefit from this.
- Another important factor. A plastic transparent surface will to some extent reduce the damaging negative effects of ultraviolet rays, which neither rubber nor plastic "like". Such a circuit should last longer.
To make such a solar collector you will need:

1 - Rubber hose, black metal or plastic pipes - as a heat exchanger.
2 - Plastic bottles that will become a casing around the pipes of the circuit.
3 - In the bottles, in their half, which will be adjacent to the base, foil or other reflective material may be inserted. The reflective part should look towards the sun.
4 - It will be quite easy to mount the stand from a bar or a metal pipe.
5 - Storage tank for heated water, which must be connected to the intake point - faucet, shower, etc.
6 - Cold water tank that can be connected to the water supply system.
Installation of a solar collector
The assembly of the version shown in the upper diagram is as follows:
- To begin with, a stand is mounted from a metal pipe or bar. If it is made of wood, then it must be coated with an antiseptic composition, but if it is made of metal, then it must be treated with an anti-corrosion agent. It is necessary to calculate the length so that an even number of bottles is installed between the two racks.
- On racks, at a distance the width of the bottles, horizontal strips are fixed, on which it will be possible to make additional fastening for the coil. In addition, they will betray the frame additional rigidity.
- Next, the required number of plastic bottles is prepared - the bottom part is cut off from them so that one bottle with the side of the neck fits snugly into the resulting hole.

- A hose (pipe) of the required length is taken, which will be enough for laying coil circuit on a ready-made frame-stand.
Stepping back from the edge of the hose 100 ÷ 150 mm, make a mark of the place of its fastening. Then, through this edge, the required number of prepared bottles is put on the pipe, which will be enough to completely close the area to the opposite rack. The bottles are installed tightly one to the other, so that the neck of the second one enters the hole cut in the bottom of the previous one.
- When the pipe section for laying the upper section of the coil is completely covered with a bottle box, its edge is fixed on top of the left rack of the frame. For fastening, you can use clip-holders for plastic pipes with a latch, the desired size.

- If necessary, the position of the bottles is adjusted so that their foil half is at the bottom, near the collector frame.
- Then the pipe is given a smooth turn, and it snaps back onto the clip.
- The next step is to put bottles on the pipe again, and it is already fixed on the left rack. This follower is continued until the entire frame is filled with a collector coil.
- Now it remains only to “pack” the fittings through which the resulting collector will be connected to the cold water supply and to the hot storage tank.
 Here's what can happen in the end - you can't imagine it easier!
 Such a collector, as you can see, absolutely not difficult in manufacturing, but it can become a good "helper" in a private house, taking on the functions of heating water.
By the way, solar energy can be used not only for heating water, but also for supplying heated air to rooms. For example, how to make it yourself, you can find out if you follow the link to a special publication of our portal.
Video - do-it-yourself solar power plant assembly
Heating a private house can be arranged in various ways. Most often, this is a connection to a central heating system or the installation of individual heating devices that heat the coolant by burning gas, liquid or solid fuel. Less commonly, owners of small cottages use electric boilers and various types of fan heaters for heating, directing the air flow into the living space.
Today, there are alternative methods of heating, such as devices that convert solar radiation into thermal energy. Solar collectors for home heating are quite efficient, completely environmentally friendly and do not require special care.
Why solar heating is beneficial
The solar heating system has several very significant advantages:
- solar heat is free and can be used in all corners of the planet, regardless of climatic conditions;
- the use of solar energy involves the cost solely for the purchase of the installation, the rest of the time the solar collector works completely autonomously;
- The design of an autonomous heating system with a solar collector is quite simple, so you can even do it yourself.
It is important to understand that a home-made collector and thermal energy accumulator will have a rather low efficiency compared to industrial designs, but it will still significantly save money on hot water supply at home.
The simplest calculation shows that a 3 m2 collector is enough not only to create a source of hot water in a small private house, but also to heat it during the off-season. This significantly reduces the cost of using energy resources, and consequently, your family budget.
Solar system device
Solar collectors for heating and creating hot water at home consist of the following components:
- a device for heating water or other coolant;
- thermal energy accumulator;
- a circuit for moving thermal energy with a coolant.

A solar collector for arranging heating is a system of pipes with a heat carrier, which is air, water, propylene glycol or any other non-freezing liquid. A container with a coil acts as a thermal energy accumulator, through which the coolant received from the collector circulates. The thermal circuit is used to combine a device for heating water, air or antifreeze with a heat accumulator.
Solar energy enters the collector, where it heats the coolant, which circulates in the solar plant. After heating, it enters the heat accumulator, where heat exchange takes place between the coil and water. The heated water from the battery enters the heating or hot water system of the house.

Water circulation in the solar system occurs by gravity or with the help of a circulation pump (depending on the purpose of the system and the method of installing the storage tank in relation to the collector).
The natural movement of water or air along the circuit is due to the principle of convection, when, after heating, the liquid tends upward from the collector to the heat accumulator.
If we take into account that the solar system will be used only for hot water supply, then nothing else is needed except for a solar collector and a heat accumulator. If the system is planned to be used for home heating, then a pump may be required to pump the coolant through the radiators.
Types of heat sinks
Modern industry has mastered the production of several types of heating heat exchangers for solar heating systems:

- air;
- flat;
- vacuum.
They all work on the same principle, but have some design features and differences in efficiency. For the correct choice of one or another type of solar installation, knowledge of their features and competent calculation is necessary. Consider each type of solar collector in more detail.
Flat plate heat exchanger
This type of solar collector for heating consists of a flat box, insulated on three sides, filled with a heat-absorbing substance. Inside this substance is a heat exchanger made of thin-walled metal pipes, through which water or propylene glycol circulates.

The design of a flat solar energy absorber and the calculation of its required parameters are quite simple, therefore it is this type of “heater” that is used to make a do-it-yourself solar heating system.
The vacuum heat absorber consists of glass tubes, inside of which there are tubes of smaller diameter with an adsorbent that accumulates solar heat. Inside the tubes with the adsorbent, metal tubes are laid along which the coolant moves.

A vacuum is created between the large diameter glass tube and the tube with the heat storage substance, which prevents heat from escaping from the adsorbent to the atmosphere.
The efficiency of such an installation is the highest among all types of solar collectors. Based on the power of the device, its required area is calculated for heating the coolant.
Air collector for home heating
In such a device, air is used as a coolant, the circulation of which is carried out both naturally and with the help of a fan. As a rule, the air collector is used exclusively for heating small summer cottages during the off-season, since such a design has a rather low efficiency. In addition, this installation is not suitable for heating water and creating hot water at home, therefore it is rarely used by our compatriots.

Despite the low efficiency, the air absorber has two advantages: a simple design and the absence of a coolant (water), and with it corrosion, leaks, freezing problems, etc.
Creating a solar collector with your own hands
To create a flat solar heat absorber, a rather complicated calculation of the required heat exchanger area, tank volume and circuit length will be required. Self-calculation requires relevant knowledge, experience and initial data. To simplify the task, you will be presented with three main sizes of the solar system:

- the volume of the accumulator tank is 100-150 l, the length of the heat exchanger pipe is 7 m, the collector area is 2 m2;
- the volume of the accumulator tank is 150-300 l, the length of the heat exchanger pipe is 9 m, the collector area is 3 m2;
- the volume of the accumulator tank is 200-400 l, the length of the heat exchanger pipe is 12 m, the collector area is 4 m2.
Instructions for self-assembly.
box
It can be made from plywood or plastic sheet and wooden battens fixed around its perimeter as boards.
For its manufacture, it is necessary to weld a grate or bend it from metal pipes, which will be used to heat the coolant. Fasten the finished product with staples to the second sheet of plastic or plywood and paint with black matte paint.

Glue insulation over the entire area of the box.
Assembly
Install the heat exchanger in the prepared box. Install the glass on top of the absorber, having previously smeared the places of its contact with the box with a silicone-based sealant. Homemade solar heat absorber is ready.
Production of a heat accumulator
A coil should be made from a copper pipe, and then placed in a prepared container, having previously made holes for the inlet and outlet of the coolant. Pull the ends of the heat exchanger through the seals from the accumulator.
Warming
It is necessary to carefully insulate the storage tank with mineral wool.
To preserve the insulation layer, close it with a sheet of galvanized metal, creating a kind of "cover".
Installation
It is necessary to make a supporting structure for a heat accumulator and install a ready-made solar collector next to it. After that, all devices are connected by a thermal circuit.
System start
To heat water and supply it to the building, it is necessary to fill the system with antifreeze, and the heat accumulator with water. After 20-30 minutes, the water in the tank will begin to heat up, after which it can be used for space heating or other needs.
The level of development of modern technologies and materials is so high that not using solar energy is unreasonable from the financial side and criminal in relation to the environment. Unfortunately, the purchase of industrial installations for generating electricity and heat is irrational due to their high cost. Nevertheless, there is a way out: to make a productive solar collector with your own hands from materials that can be found in the nearest hardware store.
The purpose of the solar collector, its advantages and disadvantages
A solar water heater (liquid solar collector) is a device that heats a coolant with the help of solar energy. It is used for space heating, hot water supply, water heating in swimming pools, etc.

The solar collector will provide the house with hot water and heat
The prerequisite for using an eco-friendly water heater is the fact that solar radiation falls on the Earth all year round, although it differs in intensity in winter and summer. So, for middle latitudes, the daily amount of energy in the cold season reaches 1–3 kWh per 1 sq.m, while in the period from March to October this value varies from 4 to 8 kWh/m 2. If we talk about the southern regions, then the figures can be safely increased by 20-40%.
As you can see, the efficiency of the installation depends on the region, but even in the north of our country, the solar collector will provide the need for hot water - the main thing is that there are fewer clouds in the sky. If we talk about the middle lane and the southern regions, then the solar-powered installation will be able to replace the boiler and cover the needs of the heating system coolant in winter. Of course, we are talking about productive water heaters of several tens of square meters.
A solar battery will help save money from the family budget. The following material will help to make it yourself:
Table: distribution of solar energy by region
| Average daily amount of solar radiation, kW * h / m 2 | |||||||||
| Murmansk | Arkhangelsk | Saint Petersburg | Moscow | Novosibirsk | Ulan-Ude | Khabarovsk | Rostov-on-Don | Sochi | Nakhodka |
| 2,19 | 2,29 | 2,60 | 2,72 | 2,91 | 3,47 | 3,69 | 3,45 | 4,00 | 3,99 |
| Average daily amount of solar radiation in December, kW*h/m2 | |||||||||
| 0 | 0,05 | 0,17 | 0,33 | 0,62 | 0,97 | 1,29 | 1,00 | 1,25 | 2,04 |
| Average daily amount of solar radiation in June, kW*h/m2 | |||||||||
| 5,14 | 5,51 | 5,78 | 5,56 | 5,48 | 5,72 | 5,94 | 5,76 | 6,75 | 5,12 |
Home-built solar collectors are no match for factory-made solar collectors, but a home-made solar installation will cut domestic water heating costs and save electricity when connected to a washing machine and dishwasher.
Advantages of solar water heaters:
- relatively simple design;
- high reliability;
- efficient operation regardless of the season;
- long service life;
- the possibility of saving gas and electricity;
- no permission is required to install equipment;
- small mass;
- ease of installation;
- complete autonomy.
As for the negative points, not a single installation for obtaining alternative energy can do without them. In our case, the disadvantages are:
- high cost of factory equipment;
- dependence of the solar collector efficiency on the time of year and geographic latitude;
- susceptibility to hail;
- additional costs for the installation of a heat storage tank;
- dependence of the energy efficiency of the instrument on cloudiness.
Considering the pros and cons of solar water heaters, one should not forget about the environmental side of the issue - such installations are safe for humans and do not harm our planet.

The factory solar collector resembles a construction set, with which you can quickly assemble the installation of the required performance
Types of solar water heaters: the choice of design for self-production
Depending on the temperature that solar heaters develop, there are:
- low-temperature devices - designed for heating liquids up to 50 ° C;
- medium temperature solar collectors - increase the outlet water temperature up to 80 °C;
- high-temperature installations - heat the coolant to the boiling point.
At home, you can build a solar water heater of the first or second type. To manufacture a high-temperature collector, industrial equipment, new technologies and expensive materials will be needed.
By design, all liquid solar collectors are divided into three types:
- flat water heaters;
- vacuum thermosyphon devices;
- solar concentrators.
A flat solar collector is a low heat-insulated box. A light-absorbing plate and a tubular circuit are installed inside. The absorbing panel (absorber) has an increased thermal conductivity. Due to this, it is possible to achieve maximum energy transfer to the coolant circulating around the water heater circuit. The simplicity and efficiency of flat installations is reflected in numerous designs developed by craftsmen.

Inside a flat solar collector - a light-absorbing plate and a tubular circuit
The principle of operation of vacuum solar water heaters is based on the thermos effect. The design is based on dozens of double glass flasks. The outer tube is made of impact-resistant, tempered glass that resists hail and wind. The inner tube has a special coating to increase light absorption. Air is evacuated from the space between the elements of the flask, which makes it possible to avoid heat losses. In the center of the structure there is a copper thermal circuit filled with low-boiling coolant (freon) - it is the heater of the vacuum solar collector. In the process, the process fluid evaporates and transfers heat energy to the main circuit working fluid. In this capacity, antifreeze is most often used. This design allows the system to operate at temperatures down to -50 °C. It is difficult to build such an installation at home, so there are a few self-made vacuum-type structures.

The design of the vacuum solar collector is based on a set of double glass flasks
The solar concentrator is based on a spherical mirror capable of focusing solar radiation to a point. The liquid is heated in a spiral metal circuit, which is placed at the focus of the installation. The advantage of solar concentrators is the ability to develop high temperatures, but the need for a tracking system for the Sun reduces their popularity among DIYers.

Building a productive solar concentrator at home is not an easy task
For home fabrication, flat plate solar heaters built using thermal insulation materials, high transmittance glass and copper absorbers are best suited.
The device and principle of operation of a flat solar collector
A homemade solar water heater consists of a flat wooden frame (box) with a blank back wall. At the bottom is the main element of the device - the absorber. Most often it is made of a metal sheet attached to a tubular collector. The efficiency of energy transfer depends on the contact of the absorber plate with the heat exchanger pipes, so these parts are welded or soldered with a continuous seam.
The fluid circuit itself is an array of vertically mounted tubes. In the upper and lower parts, they are connected to horizontal pipes of increased diameter, which are intended for the supply and withdrawal of the coolant. The inlet and outlet for the liquid are located diagonally - due to this, complete heat removal from the heat exchanger elements is ensured. Antifreeze for heating systems or other antifreeze solutions are used as a heat carrier.
The absorber is covered with light-absorbing paint, glass is placed on top, and the box is protected with a layer of thermal insulation. To simplify the task, the glazing area is divided into parts, and in order to increase productivity, double-glazed windows are used. The closed design creates the effect of a thermos in the solar collector and at the same time prevents heat loss due to wind, rain and other external factors.
The solar water heater works like this:
- The non-freezing liquid heated in the solar collector rises through the tubes and enters the heat storage tank through the coolant withdrawal branch.
- Moving through the heat exchanger installed inside the storage tank, the antifreeze gives off heat to the water.
- The cooled working fluid enters the lower part of the solar water heater circuit.
- The water heated in the tank rises and is taken for the needs of hot water supply. The replenishment of the liquid in the heat storage tank occurs due to the water pipe connected to the bottom. If the solar collector works as a heating system heater, then a circulation pump is used to circulate water in a closed secondary circuit.
The constant movement of the coolant and the presence of a heat accumulator allows you to accumulate energy while the sun is shining, and gradually spend it even when the luminary is hiding behind the horizon.

The scheme for connecting a solar collector to a storage tank is not so complicated.
Options for homemade solar installations
A feature of do-it-yourself solar water heaters is that almost all devices have the same design of a heat-insulated box. Often the frame is assembled from lumber and covered with mineral wool and a heat-reflecting film. As for the absorber, metal and plastic pipes are used for its production, as well as ready-made components from unnecessary household equipment.
From a garden hose
A snail-shaped garden hose or PVC plumbing pipe has a large surface area, which makes it possible to use such a circuit as a water heater for the needs of an outdoor shower, kitchen or pool heating. Of course, for these purposes it is better to take black materials and be sure to use a storage tank, otherwise the absorber will overheat during the peak of the summer heat.

A flat-plate garden hose collector is the easiest way to heat your pool water
From the condenser of an old refrigerator
The external heat exchanger of a used refrigerator or freezer is a ready-made solar collector absorber. All that remains to be done is to retrofit it with a heat-absorbing sheet and install it in the case. Of course, the performance of such a system will be small, but in the warm season, a water heater made from refrigeration equipment parts will cover the hot water needs of a small country house or cottage.

The heat exchanger of an old refrigerator is an almost ready-made absorber for a small solar heater
From a flat radiator heating system
The manufacture of a solar collector from a steel radiator does not even require the installation of an absorbing plate. It is enough to cover the device with black heat-resistant paint and mount it in a sealed casing. The performance of one installation is more than enough for a hot water supply system. If you make several water heaters, you can save on heating the house in cold sunny weather. By the way, a solar plant assembled from radiators will heat utility rooms, a garage or a greenhouse.

The steel radiator of the heating system will serve as the basis for the construction of an environmentally friendly water heater
From polypropylene or polyethylene pipes
Pipes made of metal-plastic, polyethylene and polypropylene, as well as fittings and devices for their installation, allow you to build solar circuits of any size and configuration. Such installations have good performance and are used for space heating and hot water for household needs (kitchen, bathroom, etc.).

The advantage of a solar collector made of plastic pipes is low cost and ease of installation
From copper pipes
Absorbers constructed from copper plates and tubes have the highest heat transfer, therefore they are successfully used for heating the coolant of heating systems and in hot water supply. The disadvantages of copper collectors include high labor costs and the cost of materials.

The use of copper pipes and plates for the manufacture of the absorber guarantees high solar plant performance.
Solar collector calculation method
The performance of a solar solar collector is calculated based on the fact that 1 sq.m of installation on a clear day accounts for from 800 to 1 thousand W of thermal energy. The losses of this heat on the reverse side and walls of the structure are calculated according to the thermal insulation coefficient of the insulation used. If expanded polystyrene is used, then for it the heat loss coefficient is 0.05 W / m × ° C. With a material thickness of 10 cm and a temperature difference of 50 °C inside and outside the structure, the heat loss is 0.05/0.1 × 50 = 25 W. Taking into account the side walls and pipes, this value is doubled. Thus, the total amount of outgoing energy will be 50 W per 1 sq.m of solar heater surface.
To heat 1 liter of water by one degree, 1.16 W of thermal energy is required, therefore, for our model of a solar collector with an area of 1 sq.m and a temperature difference of 50 °C, it will be possible to obtain a conditional performance coefficient of 800/1.16 = 689.65/kg × ° C. This value shows that a 1 sq.m installation will heat up 20 liters of water by 35 °C within an hour.
The calculation of the required performance of a solar water heater is carried out according to the formula W = Q × V × δT, where Q is the heat capacity of water (1.16 W/kg × °C); V - volume, l; δT is the temperature difference at the inlet and outlet of the installation.
Statistics say that one adult needs 50 liters of hot water per day. On average, for hot water supply, it is enough to raise the water temperature by 40 °C, which, when calculated using this formula, requires energy costs W = 1.16 × 50 × 40 = 2.3 kW. To find out the area of the solar collector, this value must be divided by the amount of solar energy per 1 sq.m of surface at a given geographical latitude.

Calculation of required solar system parameters
Making solar water heater with copper absorber
The solar collector proposed for production on a sunny winter day heats water to a temperature above 90 ° C, and in cloudy weather - up to 40 ° C. This is enough to provide the house with hot water. If you want to heat your home with solar energy, you will need several such installations.
Required materials and tools
To make a water heater you will need:
- sheet copper with a thickness of at least 0.2 mm and dimensions of 0.98 × 2 m;
- copper tube Ø10 mm, length 20 m;
- copper tube Ø22 mm, length 2.5 m;
- thread 3/4˝ - 2 pcs;
- plug 3/4˝ - 2 pcs;
- soft solder SANHA or POS-40 - 0.5 kg;
- flux;
- chemicals for absorber blackening;
- OSB board 10 mm thick;
- furniture corners - 32 pieces;
- basalt wool 50 mm thick;
- sheet heat-reflecting insulation 20 mm thick;
- rail 20x30 - 10m;
- door or window seal - 6 m;
- window glass 4 mm thick or double-glazed window 0.98x2.01 m;
- self-tapping screws;
- dye.
In addition, prepare the following tools:
- electric drill;
- a set of drills for metal;
- "crown" or cutter for woodworking Ø20 mm;
- pipe cutter;
- gas-burner;
- respirator;
- paint brush;
- a set of screwdrivers or a screwdriver;
- electric jigsaw.
To pressurize the circuit, you will also need a compressor and a pressure gauge designed for pressure up to 10 atmospheres.

For soft soldering, a simple gas torch is suitable
Instructions for the progress of work
- Using a pipe cutter, the copper tube is cut into pieces. You will get 2 parts Ø22 mm 1.25 m long and 10 elements Ø10 mm 2 m long.
- In thick pipes, a margin of 150 mm is made from the edge and 10 holes Ø10 mm are made every 100 mm.
- Thin tubes are inserted into the resulting holes so that they protrude inward by no more than 1–2 mm. Otherwise, excessive hydraulic resistance will appear in the radiator.
- Using a gas burner, hot air gun and solder, all parts of the radiator are interconnected.

The solar collector circuit works under pressure, so special attention is paid to the tightness of the connections
To assemble the radiator, you can use special fittings, but in this case, the cost of the solar system will increase significantly. In addition, collapsible connections do not guarantee the tightness of the structure under variable thermodynamic loads.
- Plugs and threads are soldered in pairs along the radiator diagonals to 3/4˝ pipes.
- Having closed the outlet thread with a plug, a fitting is screwed onto the inlet of the assembled manifold and the compressor is connected.

The compressor is connected with a fitting
- The radiator is placed in a container with water and a pressure of 7–8 atm is pumped up by the compressor. The bubbles rising at the joints are used to judge the tightness of the soldered joints.
If a suitable container for checking the collector could not be found, then you can assemble it yourself. For this, a box or a simple barrier is made from improvised means (trimming of lumber, brick, etc.) and covered with plastic wrap.
- After checking the tightness, the radiator is dried and degreased. Then proceed to the soldering of the copper sheet. Solder the absorber sheet to the tubes with a continuous seam along the entire length of each element of the copper circuit.

Soldering of the absorber sheet is carried out with a continuous seam
- Since the solar collector absorber is made of copper, chemical blackening can be used instead of painting. This will allow you to get a real selective coating on the surface, similar to what is obtained in the factory. To do this, a heated chemical solution is poured into the container for leak testing and the absorber is placed face down. During the reaction, the temperature of the reagents is maintained by any available method (for example, by constantly pumping the solution through a vessel with a boiler).

Blackening of copper is one of the most critical stages in the manufacture of an absorber.
As a liquid for chemical blackening, you can use a solution of sodium hydroxide (60 g) and potassium persulfate or ammonium persulfate (16 g) in water (1 l). Remember that these substances are dangerous to humans, and the process of copper oxidation itself is associated with the release of harmful gases. Therefore, it is imperative to use protective equipment - a respirator, goggles and rubber gloves, and the work itself is best done outdoors or in a well-ventilated area.
- Parts are cut out from the OSB sheet for assembling the solar collector housing - the bottom 1x2 m, the sides 0.16x2 m, the top 0.18x1 m and the bottom 0.17x1 m panels, as well as 2 supporting partitions 0.13x0.98 m.
- A 20x30 mm rail is cut into pieces: 1.94 m - 4 pcs. and 0.98 m - 2 pcs.
- Holes Ø20 mm are made in the side walls for the inlet and outlet pipes, and 3-4 holes Ø8 mm are drilled in the lower part of the collector for microventilation.

Holes needed for micro-ventilation
- Cutouts are made in the partitions for the absorber tubes.
- A support frame is assembled from slats 20x30 mm.
- Using furniture corners and self-tapping screws, the frame is sheathed with OSB panels. In this case, the side walls should rest on the bottom - this will prevent the deflection of the body. The bottom panel is lowered 10 mm from the rest to cover it with glass. This will prevent precipitation from getting inside the frame.
- Install interior partitions.

When assembling the case, be sure to use a building square, otherwise the design may turn out to be lopsided
- The bottom and sides of the body are insulated with mineral wool and covered with rolled heat-reflecting material.

It is better to use mineral wool with moisture-repellent impregnation.
- The absorber is placed on the prepared space. To do this, one of the side panels is dismantled, which is then put in place.

Scheme of the internal "pie" of the solar collector
- At a distance of 1 cm from the upper edge of the box, the inner perimeter of the structure is sheathed with a wooden lath 20x30 mm so that its wide side touches the walls.
- A sealing gum is glued around the perimeter.

For tightness, use a conventional window seal.
- Glass or a double-glazed window is laid, the contour of which is also pasted over with a window seal.
- The structure is pressed with an aluminum corner, in which holes for self-tapping screws are pre-drilled. At this stage, the collector assembly is considered complete.

When assembled, the thickness of the solar collector is about 17 cm
To prevent moisture ingress and heat leakage, at all stages the joints and mating points of the parts are treated with silicone sealant. To protect the structure from precipitation, the wood is coated with a special compound and painted with enamel.
Features of installation and operation of liquid heating collectors
To place the solar collector, choose a spacious place that is not shaded all daylight hours. The mounting bracket or subframe is made of wooden slats or metal in such a way that the inclination of the water heater is adjustable from 45 to 60 degrees from the vertical axis.
Connection diagram for a solar heater in a forced circulation system
The storage tank to reduce heat losses is placed as close as possible to the installation. Depending on the conditions, natural or forced circulation of the coolant is organized. In the latter case, a controller is used with a temperature sensor embedded in the outlet pipe. The pumping of the working fluid along the circuit will turn on when its temperature reaches the programmed value.
A seasonally operating system is filled with water, while year-round use of a solar water heater requires the use of an antifreeze fluid. The ideal option is a special antifreeze for solar systems, but to save money, liquids intended for car radiators or domestic heating systems are also used.
Video: do-it-yourself solar water heater
Building a solar collector is not only an interesting and exciting activity. A solar water heater will save your family budget and will prove that you can protect the environment not only in words, but also in real deeds.
Thanks to my versatile hobbies, I write on various topics, but my favorite ones are engineering, technology and construction. Perhaps because I know a lot of nuances in these areas, not only theoretically, as a result of studying at a technical university and graduate school, but also from the practical side, since I try to do everything with my own hands.
Every year, the problem of providing one's country house or cottage with hot water becomes more and more urgent. Especially often the owners of the cottages in which they live permanently reflect on this problem. After all, the cost of heating and hot water supply occupy a significant share in the financing of the life support of a home. And the search for opportunities to reduce the cost of maintaining a house is a normal and natural desire of any person. Of course, the most realistic option is to reduce costs in terms of home heating, to study and start making do-it-yourself devices from the field of alternative energy.
The fact that a selective renewable energy device used for heating a house has many undeniable advantages has long been known, and almost every adult knows about it. However, in practice, not every one of these adults, who have a desire to become more autonomous in matters of water heating, decides to shell out a decent amount of money to purchase a factory-made selective home heating device. Of course, you can find a way out of any situation, and even more so from this one. Do-it-yourself solar collector for home heating. You can assemble a flat, air solar collector without any problems. Such homemade devices for heating water using solar energy can be made from beer cans and plastic bottles, connecting them with a hose, leading vacuum tubes. As a result, you will get a solar energy absorber for heating your home by heating water, the production of which will require almost no financial investment from you (especially when choosing the tin can option).

What materials do you need to make a homemade absorber
It seems to an ordinary man in the street that it is an incredibly difficult task to independently manufacture a solar-powered absorber for heating your home, having personally made each part that makes up the device. However, in order to make such an absorber, which will act as a device for heating water in a home heating system, you do not need to purchase or search for some exotic materials. You don't have to go to a lot of stores looking for the right hose looking for vacuum tubes. Do not worry - these are all speculations of lazy people and people who are afraid to get down to business. The main thing is to take a balanced approach to solving the problem, plan everything correctly, draw a diagram and select the necessary materials.

A self-made flat air absorber with a selective coating can be made from common HDPE materials and components. Polycarbonate vacuum tubes and other parts can be purchased at low prices at any hardware store or supermarket. The assembly scheme is quite simple, for learning purposes, you can watch videos on the worldwide web (there are more than enough such videos). In fact, in the global network you can find a lot of specialized literature on this issue. If you decide to do the planned work at a qualitatively high level, reading a certain amount of literature will not be superfluous.
The main difficulty in the assembly process is how exactly to make the coil (this is a tube in a tortuous shape through which the liquid circulates, carrying out the accumulation of energy). There are several options based on which the assembly scheme will be drawn up. The easiest option is to assemble an absorber based on a finished coil (you can try to look for something suitable for this purpose, it is important that it be vacuum). Alternatively, a circulation system located on the back of the refrigerator may be suitable. The second option is to pick up the necessary vacuum tubes, two or three hoses, a couple of plastic bottles of water (the coolant is assembled from them). For more confidence, watch the tutorial video again. Pipes for heating water are better to use copper. Next, you will need to do soldering directly to the coil.

The second very significant element that goes into the absorber is the top side made of transparent polycarbonate. Under industrial conditions, a polycarbonate coating is not used, the front coating is cast from a tempered glass alloy. However, in our case, a self-made air collector is considered, the thermal scheme and the required efficiency of which allow the use of polycarbonate, since we will assemble the device from improvised inexpensive materials. It is worth noting that there are assembly schemes where materials are used ranging from beer cans to the use of plastic bottles.

Preparing to assemble the absorber
So, in assembling your device, you'd better resort to using cellular transparent polycarbonate. The use of this type of polycarbonate will allow you to achieve maximum heating efficiency from the device being created. It is also worth making a choice in favor of this polycarbonate because it is very durable. This is important, given the possible weather disasters, such as a large hail, a hurricane that rips off branches from trees - these accidents must be taken into account, as they can damage a weak coating. The honeycomb structure of the coating will help you create an air effect of the greenhouse, as a result, creating an increased moment of heating the water in the tubes. Simply put, by applying this material and in addition to it a selective coating, you will significantly increase the efficiency of the product.

For the absorbent panel, you will need a sheet of metal about 0.8 millimeters thick (however, copper material is better). In principle, a steel sheet will also do. A so-called selective coating will need to be applied to the outer surface (painted with matte black paint, the paint must be resistant to high temperatures). If you do not follow these recommendations (black coating is also meant), the device will not function in the correct mode.
In addition to the listed components, purchase the mineral wool necessary for thermal insulation, it will create a kind of air trap, minimizing heat exchange with the surrounding space, transferring all the heat to the coil, and then through the hose to the house heating system.

You can also assemble the body of the device yourself, for this you need to use aluminum materials or use a less durable, but easier to process wooden material. When working with wood, you will spend significantly less time creating a heater, and working with plywood is even easier. But still, it is better to use an aluminum frame, its durability, in comparison with wood, cannot be compared.
Determining the dimensions of the collector
Now to summarize, we list all the materials necessary for assembling an effective home-made collector:
- Copper tubes with dimensions of 18 millimeters - from which you will form a coil (the same tubes are used when assembling heating systems);
- black matte paint resistant to high temperatures (with its help you will apply a selective coating);
- mineral wool (thermal insulation);
- metal sheet (copper, iron, steel), sheet thickness 0.8 millimeters in thickness;
- corner transitions 18 x 18 millimeters;
- plumbing transitions 18 mm x ¾ (needed in order to connect to the water supply system);
- cellular polycarbonate (collector front cover);
- aluminum sheet and aluminum corners to create the body of the product, in the absence of such - wooden planks and plywood sheet for the rear wall of the heater;
- all tools necessary for soldering work.

It is important to determine in advance the dimensions of your collector based on its size, calculate in advance the required number of tubes, transitions and other materials (in other words, the overall performance of the device being mounted). Calculate the amount of water that will be required to provide heat exchange throughout the system. To do this, decide in advance for what purpose the collector will be used - either it is only washing dishes, or for a shower, or to ensure that all household needs of hot water supply in your home are covered. To heat water for washing dishes or taking a shower, it will be enough to assemble a collector measuring 200 x 100 centimeters, the distance between the tubes in the coil should be from 8 to 10 centimeters.
The process of assembling a homemade solar collector
The beginning of the assembly of this solar energy product starts with the manufacture of the coil. If you managed to pick up a ready-made coil, the final assembly will take much less time. The selected coil should be washed very thoroughly under running water (preferably hot) in order to wash all blockages from the inside and get rid of freon residues. If you did not find suitable tubes, then you can purchase the right amount in the store. But in this case, you will have to make the coil itself. To make it, cut the tubes to the required length. Next, using corner transitions, solder them in the form of a coil structure. Further, so that the collector can be connected to the water supply system, solder ¾ plumbing transitions to the edges of the coil. There are several options for the shape and design of the coil, for example, you can solder tubes in the form of a "ladder" (if you are going to implement this option, then buy non-corner adapters, you will need tees).

Then, on a pre-prepared sheet of metal, you apply a selective coating with black matte paint, it is advisable to do this in at least a couple of layers. Wait for the airflow to dry the paint and start soldering the coil (unpainted side). The entire coil structure must be soldered along the entire length of the tubes, by doing this, you guarantee the most efficient heat transfer and, as a result, the maximum heat transfer to the water supply system. If you do everything right, the solar collector you have assembled will work as it was intended.
Responsible assembly stage
The final step is to assemble the case, which will fasten all the components of the device into a single structure. Using a sheet of plywood and wooden blocks, you need to knock down a strong box. In the used wooden bars, cut grooves in advance, then you will insert a polycarbonate screen into them (groove depth is about 0.5 cm). Tube outlets can be made after all major components have been installed. Next, in the already assembled wooden box, to create an air pocket, you lay mineral wool insulation. Mount a panel with a coil over the mineral wool. Tuck the edges of the cotton wool so that the coil does not touch the walls of the box. The heating panel and the polycarbonate panel must also have a distance between them and not touch each other.
The final stage consists in treating the body with a special water-repellent solution and enameling (except for the front part).

That's all, the do-it-yourself solar collector is ready. In order to activate it, place it on a support structure, turning its front part towards the sun so that the rays fall on the front part at the most right angle. On the roof, install a tank for the accumulation of water, it will serve as a reservoir. To the top of the tank, run a hose connected to the top tube of the manifold, to the bottom of the bottom tube. By connecting water according to this scheme, you will ensure operation in natural circulation mode. According to the laws of physics, hot water will rise up towards the tank, and the cold water that is displaced will enter the collector for heating in the coil. Do not forget that it is necessary to attach a hose and a valve to the tank to draw water from the tank, as well as to fill it with a new one.
A solar collector is a device designed to absorb solar energy and convert it into thermal energy in order to further transfer it to a coolant. The classic device is a black metal plate placed in a glass or plastic case, the surface of which absorbs radiation. There are several types of them and the purpose may be different. Let's take a closer look at the principle of operation of this device, as well as the phased manufacture of this object with our own hands.
What are
Depending on the temperature that the plates can reach, the collectors are:
- low temperatures - do not give high power energy, they heat water no more than 50 degrees Celsius;
- medium temperatures - they heat the water already up to 80 degrees, so they can be used for space heating;
- high temperatures - are used mainly in industrial enterprises, and it is impossible to make them at home.
Integrated collectors are divided into:
- accumulative integrated;
- flat;
- liquid;
- air.
Accumulative integrated or otherwise thermosiphon collector. It can not only heat water, but also maintain the desired temperature for some time. It does not have pumps, so it is much more economical than other options. The storage device is a structure of one or more tanks filled with water and placed in a heat-insulating box. On top of the tanks is a glass lid that goes through the glass and heats the water. It is inexpensive, easy to maintain and easy to operate. However, in winter its use is very difficult.
A flat-plate collector looks like an ordinary flat metal box, inside of which is placed a black plate that absorbs sunlight. The glass lid of the box strengthens it, the glass has a low iron content, thus contributing to the absorption of all rays. The box itself is thermally insulated, and the black plate is heat-receiving, due to which heat is released. However, the efficiency of the plate is only 10%, so it is additionally covered with a layer of amorphous semiconductor. Flat-plate collectors are used for space heating and other rubble needs.
In liquid storage tanks, liquid becomes the main coolant. They are glazed and unglazed, with a closed and open heat exchange system.
Air collectors are much cheaper than their water counterparts. They do not freeze in winter, do not leak. They are used for drying agricultural products.
There is another kind - concentrators , they differ in the concentration of sunlight. This is due to the mirror surface, which directs the light onto the absorbers. Their main drawback is the impossibility of working on cloudy days, so they are used in countries with a hot climate.
Solar ovens and distillers. Distillers work on the principle of water evaporation, thereby not only providing heat energy, but also purifying water. Furnaces are also used for both heating and water sterilization.
Photo gallery: various types of collectors
There can be several tanks in the design of a storage collector Flat-plate collectors are more often used for space heating and water heating in swimming pools In a liquid collector, the heat carrier is water Air collectors can also be used for drying fruits
Scheme of work
The collector consists of two main parts: a light collector and a heat exchange accumulator, which converts the radiation energy into thermal energy and transfers it to the coolant. Accumulators can be vacuum, tubular and flat. In the first, the design is similar to a thermos: one pipe is inserted into another, and there is a vacuum between them, creating ideal thermal insulation. Due to the cylindrical shape of the pipes, the sun's rays hit them perpendicularly and transmit maximum energy.
 The solar collector consists of two main parts: a light collector and a heat exchange accumulator.
The coolant in such structures is ordinary water. It can not only heat the room, but also serve for domestic needs. At the same time, there is no emission of carbon dioxide into the atmosphere, which is very important today. In addition, no fuel costs are required, and the collector efficiency is 80%. In most of Russia, from March to October, on average, the sun produces 4-5 kWh / m 2 per day, which allows a small device 2 m 2 in size to heat up to 100 liters of water daily.
For all-weather use, the manifold must have a large surface area, two antifreeze circuits and additional heat exchangers. Thus, thanks to wisely used energy, it is possible to receive free heat 7 months a year, regardless of whether it is clear on the street or not.
Thermal energy for your home: how to make a collector with your own hands?
For the manufacture of the device, polycarbonate sheets, copper or polypropylene pipes can be used.
The most versatile design is the development of the Bulgarian engineer Stanislav Stanilov. The basic principle of operation of this collector is the use of the greenhouse effect. The accumulator is a tubular radiator placed in a heat-insulated wooden box, welded from steel pipes. 1 or ¾ inch diameter water pipes are used for water supply and drainage.
The box is thermally insulated from all sides with foam, expanded polystyrene, mineral or ecowool. The bottom is especially carefully insulated, where a sheet of galvanized roofing iron is placed on top of the insulation, on which the radiator itself is placed. It is fixed in the box with steel clamps. The metal sheet and radiator are painted matt black, and the box is covered with white paint on all sides, except for the glass lid. The cover glass, through which sunlight will pass to the radiator, is well sealed. The heat accumulator can be a metal barrel placed in a wooden or plywood box, in the cavity of which it is filled with ecowool, dry sawdust, expanded clay, sand.
Necessary tools and materials
 The main principle of operation of such a collector is the use of the greenhouse effect
- glass (for example, 1700/750 mm);
- glass frame;
- hardboard for the bottom;
- board with a section of 120/25 mm;
- steel strip with a section of 20/2.5 mm, length 3 m;
- overlay-corner;
- wooden block with a section of 50/30 mm;
- coupling;
- radiator pipe;
- radiator intake pipe;
- clamps for fastening;
- galvanized iron as a reflector;
- heat insulator;
- tank for 200-300 liters.
Manufacturing: step by step
 The structure of the solar collector is simple
- A box is knocked together from the boards, the bottom of which is reinforced with a bar.
- Thermal insulation (polystyrene, expanded polystyrene, mineral wool) is laid on the bottom, on top of which a sheet of iron or tin is placed.
- A radiator is placed on top and secured with steel strip clamps.
- All joints are sealed, joints and cracks are smeared.
- Radiator pipes and metal sheet are painted black.
- The box and the water tank are painted in silver. The water tank is placed in a heat-insulated box or barrel (thermal insulation material is poured between the tank and the walls of the box).
- To create a constant low pressure, an aqua chamber with a float valve is purchased, as in a toilet barrel. It can be purchased at a plumbing store.
- In the attic of the house, under the roof, there is an aqua chamber and a water storage tank (tank). The aqua chamber is placed at least 0.8 m above the tank.
- The collector is placed on the roof of the south side of the house at an angle of 45 0 to the horizon.
- Next comes the connection of the entire system with pipes: half-inch pipes are used to install the high-pressure part of the system from the aqua chamber to the water inlet. Inch pipes are mounted low-pressure parts. The minimum number of pipes is 12 pieces, but, depending on the distances between the parts of the collector, 18-15 pipes will be needed, but not less than 12.
- To avoid air locks, the system is filled with water from the bottom of the radiator. As soon as the entire system is filled with water, water will flow from the drainage tube of the aqua chamber.
- Open the valve in the pipe to fill the tank.
- The water starts to heat up immediately. Warm water rises, displacing cold water, and it automatically enters the radiator.
- As soon as some of the water is used up, the float valve in the aqua chamber will work and cold water will flow back into the lower part of the system. There is no mixing of water.
At night, it is advisable to block the access of water to the tank so that heat loss does not occur.
Video: air solar collector device for home heating
Video: using solar energy to heat the pool
Video: manufacturing and installation of a collector for heating a greenhouse
Video: a simple device for collecting solar energy from beer cans
Use solar energy to heat your home, heat your greenhouse or pool. The solar collector will help you save a lot of money and last a very long time.