The process of making paneled doors with your own hands. Making wooden windows and doors with your own hands: technology and video How door panels are made
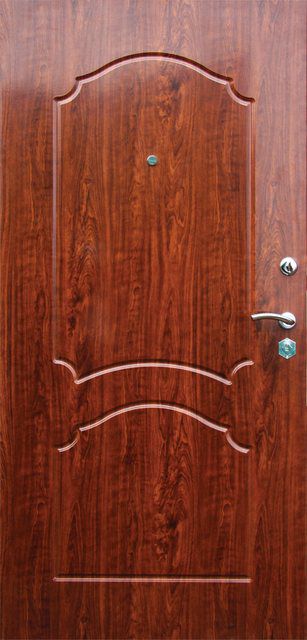
Despite the fact that today doors are made from a wide variety of modern materials, wood products still remain the most in demand. Wooden doors are installed between rooms, at the entrance to the house or outbuildings, and they are also installed on all functional rooms of the bathhouse. The popularity of wooden doors remains unchanged due to the warmth of the material and its environmental friendliness, as well as the amazing natural beauty of textured patterns.

To figure out how to make a door from boards with your own hands, you need to decide where it will be installed. The fact is that all wooden doors, from the simplest to the most elite examples, are made of boards, but the material can have different quality and processing. There are also significant differences in wood species.
In addition, door leaves are divided into types according to their design, and in order to decide which one is more suitable for a particular case, you need to find out what they are.
Wooden doors can have several types of structures - paneled and solid, panel (hollow and solid) and frame.
Massive doors
Massive doors are made from thick tongue-and-groove or planed boards, joined together in one plane and thus forming a flat surface. The resulting shield should have horizontal or inclined jumpers, which will make the structure more rigid.
For solid doors, wood of different species and qualities is used, depending on where they will be installed. For example, if a massive entrance door is being made, then you need to choose moderately dried, dense, high-quality wood from expensive species such as oak, cedar, larch and others. They have a beautiful noble textured pattern and dense structure. With appropriate treatment, such a door will last a long time without deformation or damage by insects dangerous to wood.
A massive door can have a different design - either a simple one, which is suitable for installation, say, in a steam room in a bathhouse, or a complex one, with a relief design, suitable for entering a house or apartment.

For bath doors, less expensive wood can be used, such as pine, spruce, linden and others. The only thing you need to consider when making a door structure for wet areas- this means thorough treatment with water-repellent agents.
Massive doors may have their own design features, but one thing remains unchanged - the door leaf, which should always be made of natural wood.
Paneled door
Paneled wooden doors are also made from boards or timber, but the glued version is more often used, which is made from individual wooden parts - lamellas. They are glued together to create thick boards or beams.


Glued laminated timber serves as a rigid frame for the canvas - vertical and transverse elements, as well as mullions, are made from it. Previously, individual elements were fastened together with the help of spikes; today, dowels are more often used for this. When making a door, you need to take into account the fact that the more crossbars are provided in the door leaf, the stronger it will be. The timber is used to form unique frames into which panel panels are installed, made from thinner boards, MDF covered with natural veneer, or plastic imitating the textured pattern of wood. The panel usually has a thickness of ⅓ of the thickness of laminated veneer lumber. The panels are fixed in the frames using veneered or natural glazing bead, which adds aesthetics to the appearance of the paneled door, smoothing out the sharp edges of the frame.

Paneled doors can have a very diverse design and will decorate any apartment. As can be seen from the design diagram, the main part of the door leaf is small in thickness, so they are most often installed in openings between rooms.
The paneled structure is made of durable materials that are not inferior in their durability to solid wood. Sometimes this type of door has an even higher cost than solid wood. Pricing is based on what type of wood the boards and beams are made of, and what kind of veneer the material for the paneled door is covered with.

It should be noted that paneled canvases are often made entirely of natural wood, only made according to a similar design scheme.
Panel doors
Panel doors can be called a budget option, since their price is much lower than the two types mentioned above. They are made from cheaper material - low-quality wood and fiberboard, lined with veneer or laminate. High-quality panel structures have a completely aesthetic appearance, and if their surface is also lined with natural veneer, then sometimes they are very similar to massive doors.

Panel doors can be solid, hollow or small hollow. They differ in that in some the internal space is completely filled with unedged timber, fastened together, the second consists only of strapping and outer cladding, and the third has partial filling.
A typical hollow panel door consists of two transverse ones - upper and lower, as well as side beams, which are sheathed with fiberboard, clapboard or other materials. Sometimes horizontal and vertical cross members are installed inside the structure, as they give the structure additional rigidity. Such a door can already be called a frame door.
Small-hollow door leaf structures have different fillings of the internal space, and a variety of materials can be used for filling - this can be plywood, MDF boards, cardboard, shavings or foam plastic.
Solid panel doors are those whose filling is a kind of shield made of unedged or edged timber tightly fastened together.
Schemes of panel structures of different occupancy are presented in the figures:

Panel door diagrams - 1
A– solid structure;
B– small void filling;

Panel door schemes - 2
IN– filling voids with veneer;
G And D– small-hollow filling with pieces of plywood or MDF;

Panel door schemes - 3
E– filling with chips;
AND– filling with paper or cardboard honeycombs;
Z- a panel partially filled with solid bars with space provided for installing glass or plywood sheets.

Panel door schemes - 4
AND– filling part of the canvas with veneer;
TO And L– filling with plywood or wood-fiber elements;
M– filling with paper or cardboard honeycombs.
The frame of the panel door is covered various materials on both sides - plastic (laminate, melamine), fiberboard, plywood or veneer.
When facing the panels with high-quality plywood with a beautiful textured pattern, they can be additionally decorated with profiled overlays.
- To obtain a high-quality panel door, the structure is faced with glued linden or alder plywood, which is mounted in one or two layers, each of which is 2÷3 mm. The material, made from alder and linden, does not cause deformation, which creates a reliable basis for
Finishing plywood made of valuable wood is fixed on top of the glued layer. The direction of the fibers of the decorative plywood layer should be perpendicular to the glued material.
Often, instead of plywood, natural veneer made from expensive wood species is attached to the glued layer. Its layers, and there can be 3 or 5 of them, are also laid perpendicular to each other.
- Sometimes a solid board made of glued timber is immediately decorated with veneer; it is applied in 5–10 layers to create a total facing layer of 2–4 mm.
The end sides of the shield must be neat and solid, therefore, if the door is made without a frame, then smooth, well-processed bars are used for them, which in color and texture will match the finish of the remaining planes.
The end bars are fastened to the shield with dowels and glue.
This type of door, depending on the finish, can be used for a bathroom or utility room, as well as in quality. However, it should be noted that panel doors have absolutely no protection, so they are not suitable for the role of entrance doors. Most often they are used for this only as a temporary option.
Now that the designs of all types of doors are known, you can decide which one is suitable for a particular case, and then move on to preparatory work and manufacturing.
Tools for making doors
In order to make any model of a wooden door, you will definitely need high-quality tools and a stable, large table-workbench on which all the elements will be assembled into a single piece.
Tools you need to prepare:

- Manual milling machine - this device will help make the door leaf smooth, cut out any holes and grooves, straighten the right angles of the structure, process the glazing bead and much more. If your goal is to make a professional-looking door, then you can’t do without this tool.

- Planer for leveling the end sides of the door.
- Clamps for tightening glued fabric.
- Hacksaw.
- Bow and hand saw.
- Chisels of different sizes.
- Rubber and regular hammer.
- Building level.
- Ruler, tape measure, folding meter and pencil.
- Sandpaper and sanding machine.
- Screwdriver.
Necessary materials
To make doors you will need the following materials:
- Wood - its grade, quantity and dimensions are selected for each door separately. The choice of this material will be discussed below.
- Wood glue.
- Self-tapping screws of different lengths.
In addition, for each type of door you will need to prepare specific materials, which will be mentioned in the sections on the manufacture of certain door panels.
Selection of lumber
It is imperative to know how to choose the right blanks for the door leaf, otherwise the finished door may become deformed, and it will no longer be possible to correct this defect.

The main criteria when choosing wood are:
- The type of wood is chosen according to desire and financial capabilities.
- For doors, so-called industrial wood is purchased, since it has a small number of knots, and if there are any, they are small in size and light in color.
- In order for the wood to “behave” well during processing and during the period of operation of the doors, upon purchase the material must have a residual moisture content of 12÷15%. It is recommended to choose material dried in a special drying chamber. Wood treated in this way will not deform or dry out, since the chamber creates an optimal temperature effect on its fibers.
- When buying boards, you must check them for evenness. To do this, they should be laid on a flat surface and tried to be connected to each other using tongue-and-groove locks. The boards should not be bent or bent.
- The thickness of the door boards can be 25÷50 mm, depending on where it will be installed - at the entrance or between rooms.
- Before starting work, it is recommended to go over all surfaces of the boards with a sanding machine with fine-grained sandpaper. If this device is not available, then you can make a grinding device yourself from an ordinary wooden block, attaching sandpaper to it.
Making a solid door
Whatever model of solid board door is chosen, the basis for it will be a board panel that must be assembled correctly. Otherwise, the wood may “sink”, and such a structure will be impossible to operate.
A solid board door is made for installation between rooms or for installation at the entrance to an apartment, house and outbuildings. Naturally, the appearance of the product will differ in different situations.
- For a bath, the most simple design, in which a shield assembled from boards is fastened with transverse and diagonal elements.
In this drawing you can see different options for fastenings and strappings:

General view of the door;
I – door with a Z-shaped frame;
II – X-shaped harness;
III – double Z-shaped harness;
IV – double X-shaped harness;
V – triple harness.
To enter a house or to be installed in residential premises, doors must have more aesthetic appearance. Therefore, the assembled shield is processed in a special way to achieve its ideal evenness and smoothness. Next, markings of the selected relief pattern are applied to the canvas, and then the relief is cut out using a router.
| Illustration | |
|---|---|
 | For the manufacture of the shield, tongue-and-groove boards are taken, either with a tongue-and-groove fastening or without tongue-and-groove boards. The thickness of the boards must be at least 25 mm, but if a door is being made for the entrance to an apartment or house, then a board even 40–60 mm thick is taken. Doors for outbuildings or bathhouses are most often made from non-grooved boards using one of the strappings shown above. For doors installed in residential premises, a high-quality thick tongue-and-groove board is used. |
 | Next, the prepared boards are marked and sawn into the required sections. |
 | The next step is to assemble the boards into a shield. In this case, you need to lay them in such a way that the pattern of the annual rings is directed in one direction. If tongue-and-groove boards are used for manufacturing, then the tenon is carefully cut off from the outermost element of the shield, and the end is carefully processed. When assembling a panel, tongue and groove boards are assembled using both a tongue-and-groove joint and wood glue. Non-grooved - simply glued together. |
 | The work should be carried out on a large work table - a workbench, where it is possible to place the entire door leaf and lay it perfectly flat. |
 | The assembled and glued panel of the canvas is pressed in several places with clamps and left to dry. |
 | The finished, dried board is processed with a milling cutter until it is perfectly smooth. In this case, the joints between the boards become almost invisible. |
 | It should be noted that, if necessary, a massive door is assembled from two or even three layers of boards, each of which is glued perpendicular to the previous one, and the entire resulting structure is clamped with clamps. The result is a fairly heavy, powerful shield with a thickness suitable for installation at the entrance to a house or apartment. Especially often, a door is made in this way, on which some kind of relief design will later be milled or cut out. |
 | Next, you need to fasten the shield with one of the types of strapping. The simplest of them are two or three crossbars installed in the upper, middle and lower parts of the canvas. In this case, parts are prepared whose length will be equal to the width of the manufactured shield. Their possible shapes and sizes are shown in the figure on the left. This configuration must be maintained so that the crossbar can easily fit into the groove that will be cut for it in the door leaf. |
 | Then markings are made on the door leaf where the grooves for the crossbars will be cut. Ready-made transverse elements are applied to them and outlined with a simple pencil. In addition, you immediately need to determine and mark the depth to which the groove will be selected in the shield boards. The recess can be ⅓ or ½ the thickness of the board. |
 | Using the marks made on the shield, transverse grooves of the desired shape and size are cut with a milling cutter. The cutter is able to make their surfaces perfectly smooth, so the crossbars will fit into their “sockets” quite easily, but very tightly. Additionally, the groove is coated with wood glue. You can cut the groove manually - first, cuts are made at the desired angle, and then the wood is selected with a chisel. |
 | When the grooves are prepared, the crossbars are inserted into them from one side and then gradually pushed inward using a rubber hammer or mallet. |
 | When assembled, the canvas, reinforced with crossbars, will look something like this. |
 | If you plan to decorate the finished shield with any relief design, then its outline should first be drawn on the surface with a pencil using a template. After that on manual frezer cutters of the desired configuration are installed alternately, and the selected pattern is cut out without haste. |
 | The finished canvas should be treated with antiseptic agents. If the door is planned to be installed at the entrance of the house and, therefore, will be exposed to external factors, then in addition to antiseptic, water-repellent compounds must also be used. When making a door to enter an apartment, it is recommended to coat the wood with fire retardants. |
 | If you want to change the color of the canvas, make the door more “noble” or artificially “age” it, then you can use staining technology for this. Wood is covered with stain in one or several layers, achieving the desired darkening of the texture. After the composition has dried, the doors can be coated with several layers of varnish. |
 | Markings are made on the finished leaf and door frame to install the selected model of hinged hinges. Then the loops are mounted in the marked places. |
 | The next step is to mark the location of the lock on the door leaf and on the door frame, after which it is cut into the structure and the handle is installed. The last step is to hang the door in the doorway and make a fine finishing adjustment if necessary. |
Manufacturing of a panel door
Making a panel door yourself is not difficult. The main thing is to have all the materials at hand, a good-quality tool, maintain all dimensions, maintain even edges and straight corners. The amount of work will depend on the design of the selected door option. For example, for a solid panel door, just like for one made from a solid board, it is necessary to make a shield, only it can consist of low-quality wood and processing. If you plan to make a finely filled canvas, then the same bars are used, but they are fastened not into a continuous surface, but with gaps.
Based on the description of the design, it can be made in three ways:
- The first is that a frame frame (tiring) of the required size is first assembled, and then its internal space is filled completely or partially, that is, a solid or finely filled shield is created inside the frame.
- The shield can be made separately, and then it needs to be fixed into the frame, and then sheathed with finishing material.
- The third option is performed in the reverse order, that is, first the shield is made, and then it is sheathed with a frame and cladding.
Each method has its pros and cons, and the master chooses which one to choose independently. Below, as an example, we will consider the first option for making a door.
| Illustration | Brief description of the operation performed |
|---|---|
 | So, first, a frame (frame) of the structure is made, which will determine the size of the canvas. For this, it is necessary to prepare a beam with a cross-section of approximately 30×120 mm, which is cut to the size of the future canvas (length and width). |
 | Having prepared the timber, you need to select the connection that will be used at the corners. There are several types of connections, but the simplest is the one called “half-tree”. The grooves are first marked on the edges of the prepared timber, which must be done very accurately, and then easily selected using a conventional hand hacksaw and chisels. The depth of the groove should be equal to half the thickness of the timber. The grooves are coated with glue and connected at the corners, and they need to be checked using a construction angle, since the beams must be perfectly perpendicular. When connecting the timber, the frame should lie on a hard, flat surface, and after connecting the corners, it is left to dry on the same table without moving it. |
 | After the glue has dried on the joints, they must be fastened with dowels, for which through holes with a diameter of 8-10 mm are drilled. Then dowels treated with glue are carefully driven into them. |
 | One side of the frame must be immediately lined with one of the selected materials after fastening and drying the frame - it can be plywood, as described above, but more often, for reasons of economy, fiberboard is chosen. Carved by the right size a sheet of material is laid on a flat table, then the frame is laid on it and its location is marked on the facing material. After this, the frame is removed, and wood glue is thickly applied to the marked strips. The frame is then returned to its place and pressed firmly against the facing material. In this position under pressure, the entire structure should dry well. It should be noted that very often, for the rigidity of the frame structure, one or two cross members are mounted between its side bars |
 | Next, the internal space of the frame is filled with one of the selected filler materials - this can be timber, pieces of MDF or other woodworking waste mentioned above, or low-quality wood. This is how, in principle, all panel structures are made, and they differ only in the type of filling. All filling elements are glued together and also glued to bottom sheet facing material and frame beams. Before covering the entire structure with cladding, you need to let the glue dry thoroughly. |
| This diagram shows a frame-panel structure, and it clearly shows the inserts, which are usually installed in hollow and small-hollow versions. These elements are designed for rigid insertion of a lock or door handle. |
|
 | While the glue dries, you need to prepare the material for lining the outside. To do this, the perimeter of the frame is measured and one or two canvases are cut according to these dimensions. finishing material. If you plan to glue two sheets, then first glue a regular fiberboard, and on top of it - a laminated sheet or veneered plywood. It is advisable to send the door leaf under a press, which you can build yourself, for example, by covering the leaf with plastic film and then laying gypsum boards on top of it. |
 | If desired, instead of a laminated sheet for cladding, you can use slats made of natural wood, but they will have to be screwed to the frame, drilling holes “under the countersunk” to recess the heads of the screws. Subsequently, these holes are filled with a mixture of sawdust and wood glue. When it dries, the surface should be treated with sandpaper. |
 | Then, all corner parts and ends of the door leaf must be processed using a router - only then will the door look high-quality and neat. A lock or latch handle is cut into the finished door leaf, and the hinges are also secured. Finally, the door is hung in the door frame. |
It should be noted that frame doors are made in the same way - their internal space is additionally reinforced with a frame made of timber or boards. But, before making a frame door, it is necessary to make accurate calculations and draw up a drawing.
Making a paneled door
Paneled doors have the most complex design, and its manufacture cannot be done without special carpentry tools and stable skills in working with them, since the elements require special processing.
Paneled doors consist of several parts, which can be made of solid boards or laminated veneer lumber and plywood. Naturally, they differ significantly in price. You can find a lot on sale different models, but for self-production in the absence of significant experience in carpentry, it is best to choose the simplest option.
| Illustration | Brief description of the operation performed |
|---|---|
 | The first thing you need to do when you decide to make a paneled door is to draw up a drawing of the future structure and put on it the dimensions of each of the parts. This drawing shows a door with four panels: A) general form doors; b) tenon joints of the upper, middle and lower crossbars: 1- racks; 2- upper cross member; 3-lock cross member; 4- lower cross member; 5- upper middle; 6 - lower middle; 7- upper panel; 8 - lower panel; 9 - key; 10 - groove. |
 | To make the frame you will need timber - it can be made from solid boards or laminated veneer lumber. It will be somewhat more difficult to work with the latter, since due to the presence of glue in its structure, it has greater rigidity. The timber will be needed for the vertical elements, cross members and centerpiece. The beam must be processed with a router, making grooves on one of its sides. And sometimes they immediately make shaped cuts that will replace the glazing bead. If you plan to use a bead, then the surfaces around the groove should be left smooth. |
 | Then, you need to work on the crossbars, cutting out connecting tenons on both sides and finishing all the edges with a router. At the ends of the crossbars, grooves are made for installing panels and mullions in them. The end side of the upper and lower crossbars, which will extend to the end of the door, remains smooth and solid. |
 | According to the size of the tenons on the crossbars, slots are made in the vertical beams for assembling the door. Before making them, the bars are carefully marked. |
 | To make panels that will be installed in the grooves of crossbars and beams, you will need plywood, board or chipboard. It should be noted that all panel parts or several of them can be replaced with glass. If glass is chosen, then you will also need glazing beads, which will additionally fix the glass panels in the grooves and become a relief frame for them. |
 | The panels can have an absolutely flat plane, and after installation in the cut-out grooves, they are framed with a figuratively cut glazing bead. In another case, the panels are processed around the perimeter with a milling cutter, with which you can achieve the desired relief configuration. If the second option is chosen, then for their manufacture, plywood or boards with a thickness greater than for flat panels are purchased - it can be 20÷25 mm. The edges of the panel are milled so that their thickness is 1–2 mm less than the grooves cut into the transverse and vertical beams, since it should fit into them freely. |
 | All prepared door elements are treated with antiseptic compounds and dried. |
 | Before assembly, you need to check all the elements again and, if necessary, make additional markings. All parts are assembled into a single piece on a table, in a horizontal position. All tenons, before being installed in the grooves, are coated with wood glue. |
 | The canvas is assembled in the following sequence: - In the grooves of one of the vertical beams, according to the markings, all the parts are glued - crossbars and panels. - Next, the mullions are installed, the spikes of which are also lubricated with glue. - Then, the remaining panels are mounted into the crossbars and mullions. - After this, the remaining vertical beam is glued. |
 | - The last to be glued are the framing beads. If necessary, a rubber hammer or wooden mallet is used to install tenons into the grooves. After this, the canvas is carefully tapped on all sides, and its corners are checked with a construction angle. Then, it is compressed with clamps until it dries. |
 | On the finished door leaf, markings are made for installing fittings - hinges and a lock or just a door handle. After this, the parts are installed on the canvas for fitting, but are not secured - they are mounted only after final finishing surfaces. |
 | The final finishing of the door can be done acrylic varnishes or water-based paints. If necessary, the surface of the door can be made darker, thereby emphasizing the beauty of the textured wood pattern. For this, a stain is used, which can be applied in one or several layers. The top of stained wood can be coated with colorless varnish or hot wax. When the coating dries, the fittings are installed. |
The position of the loops is approximately as shown in this diagram. In addition, the figure shows the dimensions of the gaps that should be observed when installing the leaf in the door frame.

These parameters are, in principle, identical for installing any types of leaves in a door jamb.
In conclusion, it must be said that making a wooden door yourself, without experience in carpentry, is quite difficult. Moreover, it is almost impossible to do without special tools, which not everyone has in their home “arsenal”. Therefore, if you want the door to look perfect, then it is best to order it from a professional craftsman or buy a ready-made version.
Video: master class on making a paneled door from solid wood
But if you still decide to experiment or have a persistent desire to learn how to make carpentry products that are always in demand, then you must definitely purchase a high-quality tool, both manual and electric (including, of course, a router with a set of cutters) and learn how to work with it. Only after everything starts to work out successfully can you try to make individual parts. In any case, if you want to do this kind of work, then you need to try your hand.
Find out how to make it yourself from new article on our portal.
Paneled canvases are becoming popular. Almost anyone can make them at home. To ensure that the material chosen for the job is not wasted, think through the subtleties that the door will have, including even minor details.
Product selection
Peculiarities
Before you start designing a door, thoroughly understand its structure. Find out what features it has. The main difference between such doors is the presence of inserts that make the product sophisticated and elegant.
Attention! Due to the fact that special technology is used in the production process, the door becomes not only reliable, but also elegant.
Installation and its varieties:
- A blank sheet made of plywood. It consists of elements made from sheets of plywood, fixed inside with self-tapping screws;
 Blind installation
 - With glass inserts. Glass inserts are used to fill the canvas. The canvas looks decorative and is light in weight.
 Insert
 - Made of wood. This design is considered durable and reliable. The insert in this case is made from thin wooden sheets, but it should be noted that this way the production costs a large sum of money.
 Natural wood
 The technological manufacturing process is that the frame and insert are connected to each other. This is done using special fastenings with glazing beads. Manufacturing also involves other types of fastenings.
Tools and materials needed during the work process
To technological process door manufacturing was carried out correctly, theoretical knowledge will be required, as well as materials for work.
To work you need:
- A hacksaw, which is used to work on wooden material;
- Screwdrivers of different diameters;
- A simple pencil and tape measure for measuring;
- Fine to medium sandpaper.
 Hacksaw for woodworking
 Before you start work, you should clearly decide on the material from which the door will be made. For strength, you need high-quality wood species that have high resistance to any factors. Oak or ash are perfect for work. In addition, production can be made from pine. This material is also of high quality and low cost.
The panel is often made from plywood, due to which the final structure has insignificant mass and low cost. To achieve decorative qualities, use glass inserts.
 Plywood panel
 Important! If you use frosted or additionally decorated glass to decorate your door, this will transform your home as a whole.
 Frosted glass insert
 Materials for work:
- Initially, a frame is made, for which boards of sufficient thickness are used;
- Plywood for panels. During operation, this element can be replaced with glass. If you initially plan to use glass, consider having glazing beads;
- To make the initial preparation, glue and screws are used;
- Door fittings;
- Materials used for finishing painting.
 Accessories
 Step-by-step instruction
First of all, measure the doorway. Build a box using a wooden beam. Currently, all blanks are sold on the construction market. This way you will save time and money.
Once the box is in place, fix it in the required position. To do this, the structure must be accurately measured.
 Frame
Frame Panel and its production
 Build process
 If the work is supposed to be done from an array, then you need to start preparing the sheets according to pre-made measurements. To make the assembly process easier, use the tongue-and-groove connection method.
Attention! If the workpieces are connected using glazing beads, then the assembly sequence will not matter at all.
If the door is equipped with glass inserts, then for a beautiful appearance Many designers recommend using colored glass or glass that is additionally decorated with film. In addition, if you use, for example, stained glass, the design can fit perfectly into absolutely any interior.
Benefits of DIY
If during the renovation process you and your whole family decided to install doors, this does not mean that you should go to the store to buy the finished product. For those who have at least some skills in home craftsmanship, it will not be difficult for them to build it themselves, without resorting to outside help.
Let's look at the advantages of making it yourself:
- Price. At self-production you will save a significant amount of money compared to ready-made option presented in the store;
- At self-installation there is no need to make additional adjustments, since the measurements taken will initially come to the rescue;
- The paneled version of the installation differs from its analogues mainly in that it is less exposed to external influences and is practically unaffected by various temperature indicators.
Help with decoration
After making the door, the last stage is decoration. Such manipulations are carried out not only for aesthetic reasons, but also in order to enhance the strength and reliability of the canvas. When using natural wood, the surface is covered with stain or varnish. With the help of such impregnation, a film is created that protects the material. The varnish also protects the finished product from high humidity.
In addition to these types of processing, you can use a paint coating, for example, in some neutral or, on the contrary, extraordinary color (if the interior requires it). If this option is not suitable, then it is possible to finish it with veneer or, for example, decorative film.
 Decorated look
 The option of creating a contrast between the door and the panel is often used. That is, you can paint the vertical and transverse planks, and decorate the existing inserts with an unusual pattern or paint them in a different color scheme.
If you pay attention to the presence of glass, you can also decorate it yourself. For this purpose, special decorative materials are used. You can create a unique design or an unusual stained glass window. If you wish, you can depict family photographs or other pictures you like that bring positive emotions every day.
Making beautiful doors yourself is easy and without the help of qualified specialists. They will have not only a functional character, but also a decorative one, as they will express the individuality of their owner. In addition, you will be able to show not only your true skills, but also please your entire family and friends.
And see how the manufacturing process takes place and all its details in our video. You can take more useful information from it.
It’s very popular, but anyone can make it with their own hands. House master. In order not to waste expensive materials, think through all aspects related to this matter in advance, in particular, select suitable model, which you can master on your own.
A self-made paneled door will decorate your interior
Features and types of design
First of all, before you decide to make a paneled door with your own hands, you should understand in more detail the structure of this design and its main features. The main distinguishing feature of paneled doors is the presence of thinner inserts, which give the door elegance and special chic.
Thanks to this design, the leaf becomes stronger and more reliable while simultaneously reducing the weight and massiveness of the door.
There are three main types of such products:
- Solid ones made of plywood or fiberboard. In such models, the panels are made of thin sheets of fiberboard or plywood, which are fixed inside the cutouts.
- With glass inserts. Glass is used as filling for the paneled part; such doors look especially light and give the room additional decorativeness.
- Wooden. The most durable and complex to make, for inserts it is necessary to make thin sheets of solid wood, which usually costs a lot of money.
The production of such canvases is based on connecting the frame and inserts to each other. This can be done by means of tongue-and-groove fastening, as well as using glazing beads. You can combine both of these approaches.

Interior paneled door made of solid pine with blind and glass inserts
Required tools and materials
To start making paneled door panels with your own hands, you should take care of preparing all necessary tools and devices. Since you are going to be turning out fragments from scratch, it is important to have all the suitable attachments available. To complete the entire process from start to finish, first of all you will need:
- roulette;
- pencil;
- sandpaper;
- hacksaw for wood and wood materials;
- a circular saw;
- awl;
- level;
- drill;
- pliers;
- screwdriver;
- chisel;
- milling attachments.
You should also take care of preparing fasteners and fittings in advance; you will need hinges, a handle and a latch lock. In addition, stock up on small nails without heads and wood glue or PVA.

Selection of base material
To make a unique and reliable paneled door with your own hands, one of critical issues At the preparation stage is the selection of materials. Despite the variety of choice of inserts, the base is still wood, so that’s where you should start.
The most common option is to make a frame and frame from pine; this type of wood is good because it makes the structure lighter and can be processed well; besides, pine does not cost that much. The downside is that even with good resistance to moisture and temperature changes, the wood will not last you too long. And when processing with stain and varnish, it is necessary to de-resin the material.
An alternative option is larch. This wood is quite affordable, but its strength and durability are much higher than those of the previous material. Of course, it will cost more, but it will also be more useful.
The following types of wood can also be used for doors:
- birch,
- maple,
- etc.
You can combine several materials, including wood of different species. As for the inserts, the best option is to use fiberboard or plywood. For kitchen doors or to decorate the entrance to the living room, it is better to add glass top inserts. For more sophisticated products, wood is selected, its sheets are left flat, chamfered or carved. It all depends on the skills and wishes of the master himself.
Frame making
Since it is best to make a durable paneled door with your own hands from wood, let’s take a closer look at this option. First of all, to determine the size of the future door, you need to design the doorway. To do this, you should build a box; as a rule, a wooden beam is used. Blanks of suitable width and thickness can be purchased on the construction market; in this case, you will save time, because you will not need to cut out protrusions and recesses, and also be tricky with methods of fastening elements.
After the frame is installed and finally fixed in its position, you need to measure the opening, this way you will determine the dimensions of the door leaf. In this case, about 5 millimeters should be subtracted from the obtained figures to ensure the optimal gap between the door and the frame.

Wood frame door frame options
Perhaps the most critical part of the design and assembly process is the manufacture of the paneled door frame. For this, it is best to take solid wood with a thickness of at least 50 mm. It is necessary to cut out the side and transverse strips from the material according to the markings. For example, for a standard door with six rectangular panels you will need:
- side vertical racks – 2 pcs.;
- central vertical stand – 1 pc.;
- upper and lower cross bars – 1 piece each;
- internal cross bars – 4 pcs.
The number and size of elements depend on the specific panel door project.
All parts are connected to each other using the tongue-and-groove method and the joints are additionally lubricated with wood glue. For aesthetic perception and convenience of further work, the inside of the planks is cut at an angle, thus creating a chamfer.
Making panels
The next point in the question of how to make a high-quality paneled door yourself concerns the internal filling. The production of panels largely depends on the type of material chosen. You can combine inserts, for example, put wood or plywood on the bottom and glass on top.
If you decide to use solid wood, look for sheets of suitable thickness and dimensions so that you don’t have to glue parts of the panel together. For ease of fastening, connections are machined using the same tongue-and-groove method.
It is most convenient to carry out the final assembly of doors with ready-made panels. In this case, the constructor principle is followed. First you need to fasten one side together, and then, moving from bottom to top, connect all the elements, fitting them close to each other. If you use glazing beads, the order of work is not important.

Panel installation diagram
For glass inserts, you can use colored glass, smooth or embossed, as well as regular glass with a decorative film glued to it. Great option– stained glass windows, if you have glass painting skills, be sure to use them when making a paneled door.
Decoration
The final stage in making doors with panels with your own hands is decorating them. This is done not only for aesthetic purposes, but also taking into account the increase in strength and reliability of the product. If you used natural wood, it is best to cover it with stain and varnish. This impregnation will create a protective film for the material, and the varnish will additionally protect it from moisture, fungus and insects.
The product can also be painted neutral or, conversely, bright colors, colors should be selected to match the interior. If this option is not for you, try covering the canvas with veneer, film or laminate.

Decorating a paneled door by painting
A very interesting solution is to create a contrast between the door frame and the panels. For example, you can paint the vertical and transverse strips, and decorate the inserts with an ornament, design, or simply paint them a different color. A great way is to stick film, wallpaper or fabric.
As for the glass inserts, you can also decorate them yourself. To do this you will need simple float glass and your imagination. You can create a unique painting on its surface, imitate a real stained glass window, or simply stick a translucent film. If desired, you can apply your favorite photos and other images to the surface.
As you can see, making a paneled door with your own hands is not at all difficult, the main thing is that you have desire, patience and creative skill.
Interior doors play a very important role: they not only separate one room from another, but also set a certain tone for the interior. These designs can either emphasize the style of the room or overshadow it, attracting Special attention to yourself. Despite the fact that the modern market is replete with products, buyers are increasingly purchasing paneled doors.
The popularity of such designs is quite natural and understandable. They are durable and solid, and if desired, panel doors, for example, for a summer house, can be made with your own hands.
Paneled doors are unique in that they have a supporting frame, as well as panel inserts (GOST regulates the presence of these elements). It is simply impossible to confuse such designs with another type of door system.
As a rule, the frame is made of solid wood. At the same time, the lower part of the leaf is always much wider than the sides and the upper part: thanks to this feature, the sash becomes stronger. By the way, they also produce more expensive models, reinforced sheet metal(copper, brass, polished bronze plates): usually these are entrance blocks or door systems intended for installation in the country house.
As for panel inserts, they are produced from a variety of materials: plywood, glass, MDF, etc. GOST specifies that these fragments are attached to the frame in the following way: special grooves are created in the frame into which these elements are installed, or fixation occurs using decorative beads.
According to experts, the latter option is considered more practical: if the glass insert installed in the interior doors suddenly breaks, the home craftsman can replace it with a new one with his own hands. It will not be difficult to perform such an operation even for a beginner.
Variety of models
Paneled doors are made either from solid wood or from a combined material.
The current GOST regulates the following classification of these products according to the type of material used:
- Block made of valuable wood.
Typically, such interior structures are made from solid hornbeam, teak, oak or walnut. The panel inserts in such models are fastened together with tenon joints, so such door systems are distinguished by high strength and durability (GOST focuses on this point). - Coniferous wood construction.
The production technology provides that such a block after production must be covered with a special chemical composition: Thanks to this, paneled doors of this type acquire excellent fire-fighting and anti-corrosion properties. Such designs are ideal for country house or dachas. - Block made of combined material.
The main advantage of this design is its low cost. The production technology of this door system is as follows (GOST reflects this production feature): veneer made of valuable wood species is glued onto an MDF frame, and the product is coated with special impregnations and varnish on top. Of course, such interior doors are not as durable as products made from valuable wood, but with careful care they can last 4-5 decades.
The current GOST also regulates the finishing of paneled structures. Finishing Doors of this type are painted using special water-based varnishes (acrylic). These finishing products are considered more environmentally friendly, and besides, they (unlike alkyd and nitro varnishes) do not change the color of wood fibers.
Please note that the block can have either a glossy or matte finish. The matte surface has a significant drawback: dust and other contaminants are very visible on it.
The downside of a glossy surface is the fact that it hides the luxurious structure of the wood. Therefore, when choosing panel doors, experts recommend choosing semi-matte or semi-gloss products.
Advantages of panel doors

What are the parts of a paneled door called?
As you know, each door block has its own strengths and weak sides, and paneled interior doors are no exception. The main advantage of these structures is their durability and high strength.
The second advantage is excellent sound and heat insulation. Even if the block production technology involves the use of glass or stained glass inserts, such elements are attached to the door leaf using special frames, which impart structural integrity and provide the door with excellent insulating properties. And besides, such structures are not subject to drying out: they are not afraid of sudden temperature changes and high air humidity.
Moreover, the range of such products is also diverse. For example, you can purchase white paneled doors. In addition, those door systems, the production of which is carried out using glass inserts, can vary greatly from each other: one block may have colored glass, another block may have patterned or frosted glass, etc.
And, of course, the undeniable advantage of door systems of this type is the ability to make them yourself. Do-it-yourself interior structures will eliminate the need to adjust the product to the size of the opening. And besides, such canvases can have an original design.
Self-made design
Making paneled doors with your own hands first of all requires the desire of the master, as well as the presence of certain skills in working with wood.
 The home craftsman will have to stock up on a small set of tools:
- construction meter;
- pencil;
- coarse and fine-grained sandpaper;
- screwdriver;
- chisel;
- wood hacksaw, etc.
In addition, you will need cutters for making paneled doors, as well as the entire necessary set of materials and fittings.
The first thing you need to do is measure correctly doorway. Errors are unacceptable, because correcting them will be very difficult. After this, they make a box with their own hands and install it (under no circumstances should there be any distortions). Then they begin to design the paneled fabric.

What is a paneled door made of?
To do this, a sketch of the future sash is drawn and all its elements are detailed. Experts recommend that a beginner start by making a canvas with six panel inserts: the production technology of such a design is much easier than any other model.
Then the required length is measured on the timber and the excess part is sawed off. This operation is performed several times with your own hands. As a result, you should get two main side racks, two cross members (upper and lower parts of the sash), as well as slats and internal cross members. In order to ensure tight fastening of the individual elements, grooves and tenons are made, then these parts are lubricated with wood glue and connected. In places where panels will be fixed in the future, you need to make chamfers.
If the panels for interior doors made by yourself are made of wood, it is better to use solid wood for this (this will save the home craftsman from the additional headache of creating a prefabricated chamfer). The parts are cut out of solid wood, special cuts are made along their edges, after which these elements are secured with a chamfer.
If desired, the block can be decorated with carved wooden panels. But for this, the home craftsman must have the skills to work with the special equipment used to make such an artistic ornament.
Moreover, GOST specifies that inserts can also be glass. In this case, such elements are attached to the structure using special slats and jumpers (their length depends on the size of the inserts). The technology for manufacturing paneled structures also involves the use of glass inserts with painting, however, painting on such glass must be done before the insert is installed in the block.
At the final stage of manufacturing a panel door system, you do the tinting and varnishing of the surface with your own hands.
At home, varnishing can be as follows:
- transparent (only one layer of durable varnish is applied);
- tinted (the canvas is covered with colored dye);
- painted (apply several layers of glossy or matte varnish);
- painted with a shiny finish (this effect can be achieved by applying several layers of polyurethane-based varnish to the structure).
Then, when the varnish has dried, fittings are installed on the interior doors and their installation is carried out. This design will undoubtedly become the highlight of your interior!

