Is it possible to make a mold from silicone sealant? Making a silicone mold at home
Today we will create a complex silicone mold for reusable castings.
To do this, you will have to dive into some interesting subtleties. Taking impressions opens up enormous opportunities for all kinds of homemade products. Usually, to make a cast of a figure, you need to make two halves. One half is covered with sculptural plasticine, and the second is filled with silicone.

Then remove the plasticine and pour silicone into the free half again. This way you can make impressions of excellent quality.

But what to do if the entire figure is made of sculptural plasticine.

No, it’s not a tree, not a mushroom, or even broccoli. This is a model of an atomic explosion from the largest bomb in human history, AN602.

The author tried to make this model more or less similar in shape to that very explosion. We will make a cast of it. To then cast it from epoxy.
Everyone loves explosions and it's nice to have such a small glowing atomic explosion on your desk.
Materials and tools:
1. Silicone
2. Vaseline
3. A couple of boards
4. Screwdriver and screws
5. Knife
6. Pliers
7. Plastic caps
8. Sculptural plasticine
When taking an impression, it is very important to think about how the model will be positioned, so that when pouring silicone it does not turn out to be unable to fill some areas. Or in the future, when you pour plastic, epoxy, gypsum, wax or anything else into the mold, there should also not be a place where air cavities may appear, into which the composition simply cannot enter.
For this purpose, the author bought a bucket of cheap Chinese silicone and, probably, this is the cheapest silicone that exists. Hardness thirty. That is, it seems like medium hardness. For collapsible forms exactly what is needed.

The layer of silicone around the figure should be at least two and a half centimeters.

You'll have to make a box of the right size.


All seams must be covered with plasticine, otherwise it will leak.


The silicone won't leak much, but it's still unpleasant. At the top the model is much narrower than at the base. You can’t leave it like this, otherwise a whole kilogram of precious silicone will be lost. Therefore, the filling had to be made from the bars. Unused corners and nooks and crannies can also be covered with plasticine to save money.


To make it easier to peel the silicone from the wood, all walls must be thoroughly treated with Vaseline. Where would we be without him?

In order to secure the model inside the formwork we will use self-tapping screws. Plasticine
sculptural, not too soft and holds its shape well. So, in principle, it should work. In order to know to what height to fill and not guess later whether you poured a lot or a little, you need to roughly mark the desired level with a pencil.

And now there's silicone. It comes with a tin hardener, and sometimes with a platinum hardener. Tin is naturally cheaper and more unpretentious.


There are rumors that silicone does not interact well with plasticine and may not polymerize. In this case, the plasticine begins to melt and the model can then be thrown away. To save yourself the hassle and not worry about this, just pour a little silicone into a mold made of the same plasticine as your model. After some time, see what happens. Most likely everything will be fine and there will be no mistakes.

If the silicone does not want to harden, then you need to cover the plasticine with a layer of Vaseline. Or, as an option, purchase special aerosol separators. They are sold in the same place where silicone is sold.
Having estimated the required volume of silicone, taking into account the fact that it will also spread throughout the container when stirred, the author decided to prepare one and a half kilos. When mixing with the hardener, you need to mix very carefully, by hand, so as not to create bubbles in the silicone. Usually, even if bubbles appear, they basically come out of the mixture well. But not in our case. Chinese silicone snatches air just like before death. Even with gentle stirring, there are a bunch of bubbles inside. The author tried to do degassing using a small vacuum pump.


The process went on, bubbles came out. But this volume is too large for such a pump, and silicone cannot be kept idle for a long time. It needs to pour. You need to pour slowly, carefully, so as not to touch the model with the stream. Otherwise, you will have to cut off excess silicone from it before pouring the second half.

Now you need to make the locks. The form will be collapsible, which means it must fit together clearly. The author suggests using these plastic caps.


Plastic is lighter than silicone, but not by much. You need to experiment before pouring. Mix a little silicone and choose something suitable that will not sink completely and will be easy to remove. We press plasticine inside the caps to make them heavier.

But not so much that they sink completely, but so that they stick out slightly from the silicone. You need to place such locks as often as possible. There won't be any extra ones - that's for sure.


After the silicone has completely hardened, you can pull out the caps and cut off any protruding burrs.


When pouring the second half, silicone will be poured into the resulting recesses and you will get locks that will help to accurately join the two halves.
Next, lubricate the surface of the silicone with Vaseline so that the next layer does not stick to it. We finally close the formwork with the last board. Then pour silicone to the mark that you previously marked with a pencil.
In order for the silicone to better wet the model and release gases, you can lightly vibrate it with a spoon.


Now you need to wait for the second half to completely harden. This should take about 16 hours at room temperature. In general, this particular silicone sets within an hour, but it gains full hardness in almost a day.
The silicone remaining in the container polymerized, but not completely. As usual, it is not possible to mix the silicone with the hardener well at the bottom and in the corners. It remains forever a sticky mess.
Therefore, it is better to use disposable utensils for kneading. Or the one you don’t feel sorry for. But if you happen to mix silicone in the favorite cup of your mother, wife, or God forbid mother-in-law, then you will definitely have to wash it. Basically, just like your hands. Regular soap, to be honest, does a terrible job. More precisely, it does not wash off silicone from your hands at all. Most silicone from dishes and hands can be wiped off with rags. And hand cleaning paste works well with the remaining silicone.


This paste is something like concentrated soap mixed with a fine abrasive. It scrapes off all the silicone and prevents it from sticking again. After wiping with the cleaning paste, simply rinse off all the silicone with water. And no solvents or other cleaning agents are needed.
Well, you can disassemble this miracle box. Any excess protruding pieces are immediately cut off. You can see how the silicone leaked through a small gap.

Even after smearing with Vaseline, the pieces of wood do not want to come off. You have to make an effort to separate the silicone. The halves stuck together quite strongly, but they were still served. Plasticine, even without Vaseline treatment, does not stick to silicone at all. The model turned out to be absolutely undamaged. Except for minor mechanical issues that are easy to fix. This method of making copies turned out to be very gentle.
Silicone is a soft and pliable material that is used to make molds. There is nothing difficult about making something like silicone at home from improvised materials.
How to make silicone at home - method 1
- White Spirit;
- pipette, spoon, plastic glass;
- acrylic paint;
- liquid glycerin;
- silicone sealant.
All components are mixed in the following proportions: for 30 grams of sealant, take 150 grams of white spirit, 1 drop of paint and 3 drops of glycerin.
- Place the sealant in a plastic cup.
- Add the specified amount of paint and glycerin. If you don't have a pipette at hand, you can use a straw.
- Add white spirit.
- Stir the solution until it is will not become homogeneous (paints will not should be visible).
- Ready. You now have about 5 hours to use this silicone before it hardens.
How to make silicone at home - method 2
To make silicone you will need the following components:
- ethanol;
- liquid glass.
Sequence of actions when preparing silicone:
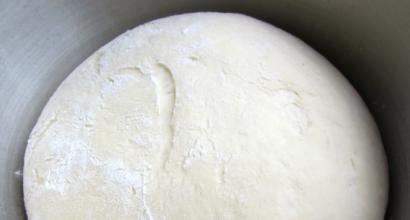
- You need to prepare a suitable container in advance and create working conditions. The container can be any. Pour ethyl alcohol and liquid glass into it in equal proportions. Mix the ingredients with any tool (wooden stick or spoon). When the solution begins to thicken, it can be brought to the desired state simply by rubbing it with your hand. A white dense mass forms in the container, which after some time will become similar to plasticine.
- The required shape needs to be sculpted only when the mass begins to harden. There will be no problems with this, since the substance will be plastic and soft, similar to rubber. Once you have the desired shape, set it aside until it hardens completely. The silicone will harden and the mold will become less susceptible to deformation.


How to make silicone at home - method 3
Add 3 tablespoons of silicone sealant and the same amount of potato starch to a plastic cup. The resulting solution must be stirred for 7-10 minutes. When the silicone begins to easily come off your hands and knead well, you can begin making the mold, which is very simple.


How to make silicone at home - method 4
Buy several packets of gelatin and the same number of vials of glycerin. The quantity depends on the size of the mold. Everything is mixed “by eye”, approximately 50/50. Try not to violate the proportions: if there is little glycerin, the mixture will be liquid, and if there is too much, it will stick like glue. 55/50 is the best option.
All this needs to be heated in a water bath, but an ordinary candle will do. Your main task is to prevent the gelatin from boiling. Otherwise it will start to stink a lot. You need to heat and stir the substance for about 10 minutes until you get a homogeneous mixture.


How to make silicone at home - copying an object
Prepare a mold that is slightly larger than the item you are copying. Pour some silicone into the bottom and leave to harden. This will be the basis for the item. The thickness should be at least 1 centimeter so that the “rubber” reliably envelops the object from all sides. If the mold is thin, it will tear when the prototype is removed or will not hold its shape at all.
Partially dip the prototype into a bowl of gelatin to remove any air bubbles. Quickly transfer the item and place it on the bottom of the mold, gluing it down. Fill the mold completely with silicone. Homemade resin from the 4th method hardens very quickly - before our eyes. Immediately after cooling, disassemble the mold. Make a cut and carefully remove the prototype.
Mix and pour epoxy resin into the mold. The frozen casting is quite difficult to remove, so you will have to cut the silicone in a circle or completely tear it apart.


Getting rid of silicone
Wash the surface using any detergent, intended for fat. You may also need a piece of pumice and a knife to get rid of the silicone. The hardened silicone is cleaned off with a knife, and all its remnants are removed with pumice. This method is only relevant for non-scratch surfaces.


Silicone is a material consisting of an organic silicon substance; it has the properties of plasticity and softness; it is because of these properties that it is used to create blanks and molds, as well as figurines and figurines. In the absence of special tools and materials, you can make polydiethylsiloxane at home, or if you use non-scientific formulations, rubber-based silicone.
Ingredients and getting started
To prepare silicone from rubber, you need to use only two common household products - the so-called “liquid” glass and ethyl alcohol.
You will also need a flat surface to work on and a container for the silicone itself, preferably not very deep and made of plastic. Then pour into the prepared container in equal proportions, first ethyl alcohol, and then “liquid” glass. Mix the resulting mass using any suitable object, be it a regular rod or a spoon. As soon as the mixture begins to thicken, you can stir or rather knead the silicone with your hands. The result will be a dense substance, which in structure and appearance resembles plasticine and the color of this substance will be white.
As soon as the substance hardens, you can give the silicone the structure we need; it’s better to figure out in advance what you will sculpt. This will be very easy to do, since the mass itself is soft and pliable, reminiscent of rubber, plasticine or clay. Once you have finished shaping, leave the resulting object for a certain time to allow the silicone to completely harden. The rubber silicone will harden, and the product itself will become more elastic and less susceptible to deformation, shock, etc.

Making copies from silicone
To make certain copies of objects or objects, you need to use liquid silicones, which you can find in the store. These silicone liquids contain certain impurities and the solidification process takes longer, thereby making it possible to cast the necessary objects from them.
Before starting production, take a mold in which you place plasticine for sculptures and the object itself to be copied. The mold must be without holes or crevices, and the sides of the mold must be removable to remove the silicone blanks themselves.
Pour the silicone into the mold, starting from the edge of the mold. As soon as it hardens top part blanks, take out the plasticine for sculptures, then in the mold you will see a figure 1/2 filled with silicone. Therefore, it is necessary to pour silicone from the back side, and then remove the workpiece by disassembling the mold. The item itself for the copy is pulled out and a blank remains from which copies can be created an infinite number of times.
Souvenir soap, jewelry and costume jewelry, cooking and cosmetology, food industry and construction - and this is an incomplete list of possible applications. Before moving on to recipes for independently obtaining analogues of elastic polymers produced by manufacturers, let us remember their qualities.
Molding polymers
The universal material is obtained by dissolving crushed quartz with nitric acid. When mixed with one of the catalysts, it somewhat resembles rubber. The substance is non-toxic, resistant to alkalis and acids. When finished, it is elastic, impact-resistant, water-resistant and has an unlimited service life. Products made from it are very easy to care for and easy to store.
According to their intended purpose, two-component compounds, consisting of a paste and a hardener, are divided into pouring, coating, and silicone for making molds. With your own hands, you can make from these mixtures not only blanks for souvenir soap, but also strong templates for pouring paving slabs, obtaining decorative stones and gypsum stucco.
To give the substance a solid state, before use it is mixed with a tin or platinum catalyst, which is included in the kit. Some qualities of elastic rubber depend on the type of hardener:
- transparency or dullness;
- tear or tear strength;
- dimensional retention and heat resistance;
- hardness;
- final hardening time;
- durability and circulation resistance.
For example, mixtures with tin catalysts are used in industry and construction. For production artificial stone or strong plastic products, you need the most durable materials. for the manufacture of molds into which chocolate and caramel are poured, they are produced on the basis of platinum hardeners. The softness and elasticity of these compounds is more suitable for “sweet” production and baking.

Where is homemade polymer used?
Despite the variety of compounds on sale, some craftsmen prefer to do everything themselves. This is usually justified by savings and a creative approach to business.
Making silicone for molds with your own hands is possible in several ways. It should be clarified that the resulting substance differs in characteristics from industrial mixtures. And these differences are not always positive. If branded liquid silicone for making molds is used to create large and small products, then homemade rubber is made only for home creativity.

When starting to make silicone for molds with your own hands, place a container, box or drawer for the main work. It is made from cardboard (if the sample is small), wood or plastic. It can be collapsible or solid. From the first it is easier to release the frozen workpiece. There should be no gaps between the container parts, since all types of elastics have fluidity.
Before putting the “model” into the container, it is covered with a separator. This lubricant should be wax, fat or soap. To get a matrix for a vertical souvenir, it is attached by a stand to the bottom of the container on a piece of plasticine so that it does not float up. Then the pre-mixed compound is poured in a thin stream around the model. Filling the container begins from the corners, completely covering the figure installed inside.

Recipe No. 1: preliminary preparation
If you need a small amount of elastic rubber for a small product, you can use one of the options below. Making silicone for molds at home begins with preparing a vessel, a spatula for stirring, components, a main container for pouring and a small souvenir, the so-called master figurine, a cast of which is planned to be obtained for “cloning”.
For the first method, take equal amounts of glycerin and gelatin and place them in a small container. The composition is melted in a water bath with constant stirring, avoiding boiling. Heating lasts 10-12 minutes.
Details of recipe No. 1
The bottom of the prepared cardboard or wood tray is evenly covered with the resulting mixture. Then the souvenir is dipped into homemade silicone and quickly placed in this box. The stuck figure is immediately poured with hot mixture, filling the tray to the brim.
Liquid silicone for making molds, obtained in this simple way, hardens in a few minutes, almost before our eyes. After the mass has completely cooled, the resulting block is removed from the box, a cut is made on the bottom side and the souvenir is carefully removed.
The resulting shaped cavity can only be filled. Manufacturing according to this recipe has several disadvantages:
- the finished master product absorbs water, so it cannot be used to produce plaster castings;
- the mass melts when you try to fill it with a hot substance, so it is not suitable for creating designer soap.
- After several uses, the inner surface of the mold deteriorates, loses its gloss and quality.
The ability to repeatedly remelt used dies is considered a plus.

Recipe No. 2: preparation
Making silicone for molds with your own hands requires some effort. Craftsmen who work with plastic clay make templates and molds in this way to bring their ideas to life. So, you will need one of the types resistant to high temperatures construction sealant and regular food starch or talc. It is advisable to work in Since the sealant sets within 10 minutes, it is necessary to place in advance next to the object from which the cast will be prepared: a shell, a figurine flat on one side, something else. The mold will be solid, with a concave depression, so it is suitable for the production of only one-sided souvenirs.
Recipe No. 2: details
- Sprinkle a little talcum powder or starch on the surface of the table (to prevent it from sticking).
- A bunch of sealant is squeezed out of the tube into the center of the sprinkle.
- Add starch on top and mix everything.
- The resulting “dough” should contain so much starch that it does not stick to your hands or to the table.
- A thick cake is made from the mass, corresponding to the size of the future souvenir.
- Quickly and carefully, with force, press the selected sample into this workpiece.
- The silicone for making molds is left to dry for a day.
- After removing the figure, the template cavity is lubricated with talcum powder using a brush and tightly filled with plastic clay.
- This base can be placed in the oven to dry along with the filler; it is not afraid of high temperatures.

What's good about this method?
The first advantage is the reusability of the resulting template. The material retains all its qualities. You can pour hot soap base into molds made from starch, after sprinkling them with alcohol from a spray bottle. DIY silicone for making molds can withstand temperature loads on par with industrial compounds.
Among the disadvantages are the sharp vinegar smell of sealants and the rapid hardening of the “dough”. But the master can prepare the amount of substance that is needed at a given moment in time for a specific job.
DIY liquid silicone at home. Liquid silicone for making baits and how to make fishing baits. Friends, I’ll show you a YouTube video, I want to cast liquid silicone into plaster molds, making it myself. I also want to experiment with the color of fluorescent dyes. I set myself the task of getting closer to the uniform coloring like a sucker. I also want to demonstrate the work area where I pour silicone for baits, namely liquid silicone for edible baits. The place where the bait is prepared is to remove the chemical smoke as much as possible. When melted, liquid silicone releases vapors. Guys, use protective equipment: a gas mask, a respirator. And work in a well-ventilated area or outdoors. Prepared plaster molds, interesting silicone baits with your own hands. Which a friend gave me for molding. They have an unusual configuration and a complex geometric shape. Before making plaster molds, you need to prepare a model. Surprisingly, they turned out to be quite high quality. When I started pouring liquid silicone, I thought that I wouldn’t be able to get the bait out of them. It is very ribbed and thin. When opening the two parts of the mold, I saw that all parts poured quite well. So, we can conclude that, in principle, any bait, even the heaviest, can be created and cast. I'll show you how to pour liquid silicone with your own hands. We will also conduct a test and you will see the color of the silicone when adding pigment. I plan to mix liquid silicone with my own hands. Fluorescent dyes from soft plastic. Which Konstantin sent me for experiments. There is now time for experiments and for pouring for yourself and friends for the season. I also want to make the most workable colors for the conditions we hunt for.
Social comments Cackle
The article describes personal non-professional experience!
Silicone molds are used both in production and in everyday life. They are used to make gypsum products, such as decorative stone and souvenirs, in the production of soap, candles, jewelry, and in cooking for creating dishes and baked goods. For some applications, molds are produced from special types of silicone, for example, heat-resistant, for food and others. In addition to silicone, polyurethane molds are also often used. We haven't worked with polyurethane, so we'll skip this topic.
There are many different silicone molds on sale, but it’s not always possible to find what you need. If you really want to, you can make a silicone mold yourself at home. There are several ways to make molds with your own hands:
1. Most affordable way- This using silicone sealant. Not the best option, but in some cases it can be useful. The only advantage that can be noted is the availability of sealant. The main disadvantage is that molds made from sealant quickly and easily lose their shape (stretch). In addition, silicone sealant in its pure form is inconvenient to apply to the product because of its stickiness, it takes a long time to dry, it needs to be applied in thin layers and before applying a new layer you need to wait for the previous one to dry completely (about 24 hours). Making the mold takes several days. To prevent silicone sealant from sticking to your hands and to make it easier to apply it to the desired relief, the sealant can be mixed with potato starch. The resulting mixture will be a bit like a thick dough and will be easier and faster to make into a mold. For silicone molds made from sealant, as well as for thin molds made from molding silicone, you need to make a rigid frame, for example from plaster, so that the mold does not deform when pouring. Acrylic sealant is not suitable for making molds!
2. Using silicone compound for making molds. It is a set of liquid silicone and a catalyst (hardener). The principle of operation is simple - 2 components are mixed in certain proportions and the resulting mixture is poured into the object from which the mold needs to be removed. To fill the product, you need to make formwork around it. It can be made from anything: plasticine, plastic, wood and even CD boxes, the main thing is that it does not leak. Easy to seal with a glue gun. The product itself does not need to be treated with anything (if it is not made of silicone) - silicone practically does not stick to anything and the mold is easily removed. If the molded object has reverse angles or you need to make a 3D mold, you may (depending on the brand of silicone) need to make a composite mold from several parts. To do this, you must use a release agent. The silicone must be poured in such a way that the molds can be smoothly joined together; for this, there must be holes in the first part and protrusions in the second. For this we used glue sticks from a hot-melt glue gun: the rods were cut in half and secured at the bottom of the formwork around the object being poured, before pouring the next layer, we remove them and cover the entire surface of the resulting part of the mold with a release agent so that the second layer does not stick to the first.
 The photo shows a form made from Pentelast 710 after 45-50 plaster pours.
There are many varieties of silicone compounds, we only had the opportunity to work with 2 of them: Pentelast 710M and Pentelast 718. Both of these compounds are made in Russia and are available in 1 kg packages, and they are also among the cheapest. Pentelast 710 M differs from 718 in its greater fluidity and longer reaction time with the catalyst (remains fluid longer). When cured, 718 is a little harder, no other differences were noticed. Mix silicone with the hardener strictly according to the instructions, quickly but carefully, so that there are a minimum of air bubbles. If you add less hardener than necessary or mix it poorly, the silicone will remain in a “thick sour cream” state; if you add more, you may not have time to fill the mold. After 24 hours, the resulting form can be used. These silicones are not the best in terms of strength, so for objects with reverse angles it is better to make composite molds. Unlike some ready-made commercial molds, which are initially cut to remove the resulting products and do not tear when you stretch them, molds made from the above compounds will easily tear at the cut site. They stretch well without damage and you don’t have to worry about the shape breaking if you do everything carefully.
We use these molds to cast souvenirs and figurines, and they can also be used to make soap. Molds made from these silicones cannot be used for culinary purposes and polymer clay cannot be baked in them in the oven.
There are special silicones for these purposes. They are also not very suitable for making decorative stone, for this it is better to use either molds made of more durable silicone or polyurethane.
Old and unnecessary molds can be used by adding them when making new ones; to do this, unnecessary molds need to be cut into small pieces.
 By the way, the release agent has a shelf life of 6 months (indicated on the label), but it copes with its functions quite normally after more than 2 years from the date of production. One bottle lasts a long time; you need to apply it in a thin layer.
Although we here describe methods for making molds at home, it is still undesirable to do this at home, because the catalyst is toxic and stinks very strongly, and the sealant also does not have the most pleasant smell. All work must be carried out in a well-ventilated area. As a last resort, you can use the balcony (like us :)).

Silicone is the main material of the 21st century
What do an airliner and a dish sponge, a car and contact lenses, a telephone and a space station have in common? All these mechanisms, things and devices contain silicone.
It can be liquid like water or hard like glass - polyorganosiloxane or simply silicone, according to many scientific experts, is the main material of the 21st century, which has radically changed our lives. Any compound containing silicon can be classified as silicones. Actually, the entire group of silicone materials takes its name from the English name for silicon “Silicon”.
Silicones are of enormous importance in modern industry. If you look around you, almost any object modern world We didn’t see, each of them contains silicone.
Oxygen and silicon are the most common elements on Earth. Quartz, rock crystal and ordinary river sand are all based on silicon, the natural reserves of which are large and constantly replenished, which means that the resource for producing silicones is practically inexhaustible.

From such a silicone “cake”, silicone can be made by vulcanization new material with absolutely any properties.
To understand why this material is so popular, you need to look at it at the deepest molecular level.
Almost any element can be added to the main silicon-oxygen-silicon (Si-O-Si) chain in any sequence. It can be a nonlinear structure or a molecular lattice. The ability to organize many different types of chemical bonds is an unusual property of silicone.
Silicone materials appear through a combination of seemingly incompatible elements, due to which they have special properties. It is silicones that have a very high and very good temperature range - from -120 to +300 degrees. At the same time, any, even the most common type of this material works from -60 to +200.
A sharp difference between these temperature marks is extreme conditions for many materials. But not for silicones, which is very easy to check. The boiling point of water is 100 degrees and the instantaneous drop to zero (the moment ice forms) does not leave a trace on the silicone samples. This ability of silicones has made them indispensable in aviation.
The airplane is a very clear example. When it flies at an altitude of 10 thousand meters, where the temperature is -60 degrees, and lands at the airport, where it is +30-50 degrees, the silicone parts do not react in any way to such sudden temperature changes and it easily withstands them and properly seals everything what do you need.

The amazingly high-quality sealing of modern aircraft is achieved through silicone gaskets.
Silicones are even added to aviation oils and landing gear rubber, and in aircraft engines - silicone gaskets and seals. In the cockpit there are silicone buttons on the control panel, and all seams in the aircraft structure are also completely sealed due to silicone.
Silicone-based sealants are also used in construction. They are excellent for sealing windows. The entire current window industry producing plastic windows was able to rise only because there was such an opportunity to instantly seal the inserted double-glazed windows. Moreover, this can be done very reliably and for a long time.

Use of silicone in construction.
Regardless of the appearance and application, the raw material for all silicone products looks the same - it is always liquid. In this case, silicone easily becomes a hard material that can be easily ground, polished, cut and generally processed in any way you like. Silicone can also be rubber-like - soft and elastic, which can be easily compressed, bent and stretched.
What the silicone will be like depends entirely on the catalyst. The first stage is the production of silicone liquids, oils and silicone rubbers. At the same time, based on the latter, it is possible to obtain a variety of seals (rings, valves), prostheses and different types liquid and solid silicones that you have.
The liquid raw material takes the desired shape after interacting with the catalyst and as long as it has not cooled down, the future silicone can be painted in any color. The final stage is vulcanization, when under the influence of hot air the silicone mass hardens, taking the form of a finished product.

Regular silicone rings in different colors.
The vulcanization temperature of silicone is the upper limit of normal operation of the future product. Upon completion of vulcanization, the shape and properties of the material will be constant, so the already formed mass enters the vulcanizer.
And the molding process itself is called extrusion and is very similar to the work of a conventional meat grinder. The silicone mixture is loaded into the device, the powerful spiral piston of which literally squeezes the silicone into the existing hole, which represents the profile of the future product. To make a part of a different shape, you just need to change the profile attachment. This is how all kinds of medical tubes and probes, hydraulic hoses, insulating tapes for furnaces and household appliances, which is now almost entirely equipped with silicone.
For example, a coffee machine. The compartments for coffee beans are insulated with silicone to preserve the aroma and taste of fresh coffee. Even the dishwashing sponge contains silicone - it is made of polyurethane foam, which provides it with such a porous structure. And if you look closely, you will see that the bubbles of the sponge are almost identical and located exactly relative to each other. This is the merit of silicones, which can control foaming.
Foam is formed during the production of a variety of substances - during oil refining, in the pulp and paper industry, etc. And the more foam, the less space there is for the product itself. And in order to destroy it, you need to remove from there those particles that cause gas bubbles not to burst, but to be in a foam-air state.
But how does it work? One of the most illustrative examples– combination ordinary water and vegetable oil. Due to the difference in the density of these liquids, they will always remain independent layers. Even if you mix them, the water and oil will separate again very quickly. An emulsifier, a surfactant that stabilizes emulsions, can force such different molecules to mix.
Only then will there be uniform distribution due to the fact that there will be an emulsifier between the liquids. But if you remove it, then the “collapse” of this system will occur again - the particles of oil and water separately connect with each other and the two layers become separated again.
In a similar way, silicone materials act on individual components of foam substances, literally controlling the diameter of the bubbles. Due to these properties, silicone is used in almost any production made from polyurethane foam, be it a dish sponge or a braid for a car steering wheel.
By the way, In the automotive industry, silicone has also managed to take a strong position. Let's say in car gaskets, it is used because of its ability to compress well, thanks to which it dampens everything, and this allows for better preservation of the car.

Silicone braid for a car steering wheel helps when driving due to better grip of the hands on the steering wheel rim.
The long service life of silicone parts in a car provides not only resistance to deformation. The fact is that automotive silicones are not susceptible to oils and gasoline. This property is provided to them by special catalysts.
In general, there are a lot of types of silicone rubber, but the differences between them - appearance, density, set of properties, etc., appear only after vulcanization. The stage of high-temperature vulcanization is quite short - on average only 10-15 minutes of exposure. The exposure time depends on the type of rubber and its purpose. Different rubbers have different requirements and each has its own exact technical conditions - does it tear easily, does it stretch well, what is its hardness and much more.
The hardness indicator indicates the ability to keep its shape.
For example, on remote control On a TV, buttons that are too soft will stick, and buttons that are too hard will be difficult to press. But the really tough test is the so-called insulating rubber. Since it must last a long time and it is very problematic to carry out tests during the entire expected period of its service, the conditions during testing are much more extreme than in reality.
Silicone rubber samples are exposed to a current with a voltage of 3000-4000 Volts - such a load is comparable to a lightning strike. From the back side, a destructive solution of homomonium chloride is supplied to the rubber plates to enhance the effect of the current. The test lasts 6 hours, after which the degree of damage to the silicone is assessed. And the less impact the passing current has on the plate, the better the rubber.
A similar situation is unlikely to occur in real life. Meanwhile, some silicones have to work only in extreme conditions - for example, in outer space.
Edible silicone
And this is real high technology and the production of such silicone is special. It can withstand incredible temperatures and is used as a lubricant in outer space and in hydraulic systems used in space technology.
Man's first steps on the Moon were made possible thanks to silicone - it was from this that astronauts' boots were made. New development, which will make space a little closer - is the production of super-hard and super-heat-resistant materials from silicone.
But reliable heat-resistant materials are needed not only in space. Metallurgy, automotive and food industry are closely related to very high temperatures and these are no longer hundreds, but thousands of degrees. But silicones can do this too.
Newly developed materials have unique heat resistance - up to 1500 degrees and more. Thus, a domestic development based on silicone has amazing thermal insulation properties. When the temperature on one side of the sample exceeds 1500 degrees, the other remains slightly above room temperature. Such material can become a real protection, for example, for low-melting metals.
More recently, another type of silicone began to be produced in Russia, the main task of which is protection. New silicone rubber can literally save lives. In the metro, airports, and train stations, in case of some emergency, the premises must be supplied with electricity for at least 3 hours. And this rubber, which insulates the wire, does not emit harmful substances during a fire, but rather forms a fairly strong ceramic layer, which allows the wire to work for at least three hours and protects electric wires from short circuit.
In fact, silicones can be given any properties - even the most incredible. But this can only be done at the stage of working with raw materials, since the finished silicone product that has undergone vulcanization is bio and chemically inert, that is, it does not form new chemical bonds. That is why silicones are not afraid of many aggressive environments.
Silicones easily withstand short-term contact with concentrated acids and alkalis. And they can remain in weak solutions almost indefinitely, again, without losing their properties.
It is precisely due to its inertia silicones are actively used in medicine. There is no place or organ in the body that cannot be either temporarily replaced or helped to function thanks to silicone.
Medical silicone is produced using platinum catalysts. The presence of precious metal makes silicone absolutely safe for humans. In the biological environment in which implants and prostheses made of silicone rubber may be located or where some devices or instruments (probes, drains) are temporarily placed, they do not cause rejection in the body and are completely non-toxic.

Silicone breast implants have brought happiness to thousands of women around the world and brought great fame to the material from which they are made.
In particular, the use of silicone significantly reduces the likelihood of complications after surgery. By the way, some types of medical silicones do not require high temperatures in production. The stage of their vulcanization (fixing the shape) takes place at room temperature.
Thanks to silicone, doctors managed to defeat the most common disease of aging. With age, a person loses vision and this occurs mainly due to clouding of the lens. Doctors now install silicone lenses in such patients. For the first time, such an operation was performed by our compatriot, the famous ophthalmologist Svyatoslav Fedorov, who, thanks to an artificial lens, instantly restored vision to elderly people.
But silicone helps restore vision not only during surgery.
Contact lenses are also made of silicone. Despite their apparent fragility, these lenses are quite durable. When properly selected, the thinnest silicone hydrogel lenses do not cause any harm to the eyes.
And the tiny presence of platinum gives silicone healing properties. You can easily get rid of burns and scars using silicone patches, which were developed by Russian scientists quite a long time ago. They help very well with burns, for smoothing out keloid sutures after burns and operations.
If you accidentally receive a minor burn, then it is enough to apply a strip of silicone plaster to the burn site. And after a very short time you will find that you no longer have any traces of the burn.
At the same time, the silicone patch can be removed, washed and reapplied. You can, say, take it off at night or wear it around the clock until you get full results. One patch can last for 2-3 months, which is a real record compared to a regular patch.
However, almost all silicones can boast of durability. Underwater and in outer space, on the kitchen table and in the human body - silicones work everywhere for a very long time and are equally reliable. And apparently, silicone is just beginning its grand march across the planet.
Scientists promise to soon obtain silicone that can withstand temperatures of more than 3000 degrees. Such a material will surpass titanium in terms of heat resistance, and this no longer seems incredible. Silicone opens up such tempting prospects that there is no doubt that new discoveries with its active participation are just around the corner.
So far, there is not a very wide selection of silicone on the market for making molds.
Silicone baits at home. Video

More and more craftsmen are showing a desire to try their hand at working with this relatively new material, but from the very first steps they are faced with difficulties, not knowing where to start, what silicone to use and how to handle it. Here I will try to summarize the main points, based on my own experience and information obtained from the Internet. I’ll say right away that I won’t tell you anything fundamentally new - everything that will be discussed is well known to professionals working with silicone, but I hope that the information collected in one place will help beginners overcome their first difficulties.
What silicones are needed for casting?
So, first of all, the silicone itself. When creating dolls, I use platinum-based compounds (two-component silicones) from Smooth-On made in the USA, so we will talk about them. To work, you will need two types of silicones: for casting the dolls themselves and for making the mold. There are not many of the first, primarily the Dragon Skin Series and Ecoflex Series. They have a high degree of elasticity and allow you to most realistically convey the effect of human flesh.
The silicones of each of these series have different specifications: softness, pot life (length of time when silicone remains fluid), hardening time, viscosity, etc. What kind of silicone is best to use when creating dolls? I can’t say anything specific here - it all depends on the master’s ultimate goal. In my opinion, it is best to follow the path of experimentation, trying different series in order to find in practice the very, only material that allows you to achieve the desired effect.
Silicones from the Dragon Skin Series and Ecoflex Series are colorless and translucent, so to obtain a realistic doll color they must be colored using special Silc Pig pigments.
The second type of silicones is used to make the mold. Be careful - Platinum-based silicones can only be cast into molds made from platinum-containing silicone. Silicones with a tin catalyst cannot be used. Otherwise, the casting will not harden. Silicones intended for mold removal have a lower degree of elasticity, greater hardness, and are usually colored bright colors or transparent. The bright color of one of the components allows you to evenly mix components A and B before pouring, and the transparent ones allow you to see the model in the mold (this is convenient if the mold is cast as a whole and then cut into parts). Silicones intended for mold removal include such series as: E-Series, Mold Star Series, Equinox Series, Rebound Series, etc.
The mold can be made by pouring, or by gradually applying layers of silicone with a brush.
The first method is simpler and faster, but requires more silicone consumption. The second one is more labor-intensive, and it also requires various additional materials. You can clearly see the process of creating a “spread” form on the official video of the company:
A little about forms
The finished silicone mold remains elastic, this is its absolute advantage, but we must not forget that it can be easily deformed, so it must be placed in a special protective casing cast from ordinary plaster.
Before pouring silicone into a silicone mold, you must use a special release agent, Ease Release, otherwise the mold and the casting will stick tightly together. The separator layer must be thoroughly dried, since in some cases it prevents the silicone cast from completely hardening.
Molds for casting dolls can be made not only from silicone, but also from plaster. It is advisable to use special dental plaster for this purpose, such as Fuji Rock, which has increased strength, perfectly conveys small relief details and dries fairly quickly. Compared to silicone molds, gypsum molds do not require the use of a release agent and absorb excess silicone oil during the casting process. However, plaster molds also have significant drawbacks - the master model is almost impossible to remove from the plaster without damage, the molds open with great difficulty and quite quickly become loose, losing the accuracy of the alignment of the halves. Also, in comparison with silicone, plaster mold have to make out of more parts, which increases the number of seams on the finished casting.
Basic rules for working with silicone
So, we’ve sorted out the materials for casting, now let’s talk about the process itself. To avoid defects and failures when working with silicone, you must follow two golden rules that make the life of the master much easier:
- 1. Always strictly and pedantically follow instructions, avoiding any amateur activities.
- 2. Always test new materials that come into contact with silicone for compatibility.
For work, it is advisable to purchase a vacuum chamber with a pump that pumps out air from the mixture before pouring. Some types of silicones can be used without prior degassing, however, the risk that air bubbles will remain in the frozen mass is quite high.
It’s also a good idea to have an oven or drying cabinet for post-curing finished products. Silicone that has undergone heat treatment quickly acquires the physical and chemical properties declared by the manufacturer. I would not risk heating products in an oven intended for food products, despite the fact that platinum-based silicones are considered non-toxic materials.
I would like to note that making silicone dolls requires significant financial expenditure, but it is impossible to save on materials and equipment by looking for cheap analogues and doing amateur work - the result of such experiments is usually disastrous and leads to inevitable damage to castings and molds.
When working with silicone, you should only wear vinyl gloves; latex gloves cannot be used.
The casting room must be heated; the temperature in it should not fall below 22-23 degrees. The required temperature regime is one of the most important factors - at temperatures below 18 degrees, silicone may simply not harden, and higher air temperatures slightly reduce the life time of the finished silicone mixture.
But you can’t store silicone in the heat. The material has a limited shelf life, which is reduced by increasing temperature. Opened jar must be used quickly, since contact with the environment can also affect its properties.
The algorithm for working with silicone should be as follows: take the jars of silicone out of a cool place, wait for it to warm up to the required 23 degrees, thoroughly mix the contents of each jar, combine components A and B in exact proportions, subject the finished mixture to degassing, pour into the mold and return the remaining silicone to the cold room.
In general, it should be remembered that silicone is a very capricious material that does not allow liberties in handling.
The vagaries of silicone
In principle, the process of making silicone castings is elementary, but this simplicity is deceptive.
Silicone constantly presents unpleasant surprises, preventing the master from relaxing and making mistakes. The main danger for uncured silicone is inhibition (poisoning) by various substances incompatible with it. The most formidable and at the same time the most common “enemy” of silicone is plasticine containing sulfur. To work, you need to buy only plasticines marked Sulfur Free, such as Monster Clay or Chavant. It is better not to keep questionable plasticines in the workshop at all - even accidentally touching a sulfur-containing material with your hand can “infect” the silicone mold.
The second “enemy” of silicone is latex. Do not use latex gloves, syringes with rubber nozzles on pistons, or any other instruments that have latex parts in their design.
Use wooden sticks with great care to stir the mixture. Some types of silicone do not tolerate contact with wood and may be inhibited. To protect yourself from unpleasant surprises, it is advisable to mix the silicone with metal stirrers.
Freshly cured polyesters, epoxy and polyurethane rubbers are also dangerous. As I already wrote above, before using any new material in your work, you need to test it by filling it with a small portion of silicone. If the mixture completely hardens in the usual time allotted for complete polymerization, and the surface of the silicone is not sticky, we can assume that the new material has successfully passed the exam and can be used in further work.
That's basically all I wanted to tell you about the techniques of working with silicone. I myself have often made mistakes, experienced many unpleasant moments, and I hope that this hard-won experience will help novice craftsmen not step on the painfully familiar old rake, and save nerves, time and money. Good luck with your creativity!
How to make silicone at home

Silicone is a material consisting of an organic silicon substance; it has the properties of plasticity and softness; it is because of these properties that it is used to create blanks and molds, as well as figurines and figurines. In the absence of special tools and materials, you can make polydiethylsiloxane at home, or if you use non-scientific formulations, rubber-based silicone.
Ingredients and getting started
To prepare silicone from rubber, you need to use only two common household products - the so-called “liquid” glass and ethyl alcohol.
You will also need a flat surface to work on and a container for the silicone itself, preferably not very deep and made of plastic. Then pour into the prepared container in equal proportions, first ethyl alcohol, and then “liquid” glass. Mix the resulting mass using any suitable object, be it a regular rod or a spoon. As soon as the mixture begins to thicken, you can stir or rather knead the silicone with your hands. The result will be a dense substance, which in structure and appearance resembles plasticine and the color of this substance will be white.
As soon as the substance hardens, you can give the silicone the structure we need; it’s better to figure out in advance what you will sculpt. This will be very easy to do, since the mass itself is soft and pliable, reminiscent of rubber, plasticine or clay. Once you have finished shaping, leave the resulting object for a certain time to allow the silicone to completely harden. The rubber silicone will harden, and the product itself will become more elastic and less susceptible to deformation, shock, etc.

Making copies from silicone
To make certain copies of objects or objects, you need to use liquid silicones, which you can find in the store. These silicone liquids contain certain impurities and the solidification process takes longer, thereby making it possible to cast the necessary objects from them.
Before starting production, take a mold in which you place plasticine for sculptures and the object itself to be copied. The mold must be without holes or crevices, and the sides of the mold must be removable to remove the silicone blanks themselves.
Pour the silicone into the mold, starting from the edge of the mold. As soon as the upper part of the workpiece hardens, take out the plasticine for sculptures, then in the mold you will see a figure 1/2 filled with silicone.
Therefore, it is necessary to pour silicone from the back side, and then remove the workpiece by disassembling the mold. The item itself for the copy is pulled out and a blank remains from which copies can be created an infinite number of times.