Wooden handles. Manufacturing method
February 20thOrphus is installed on the site. If you find an error, highlight it and click CTRL+ENTER
Preface.
There is a huge variety of pens that can be bought at any office supply store without any problems. Sometimes, you want to have something that no one has and will never have, or that only a limited circle of people have. The same is true with handles... yes!!! with the most ordinary writing pens, which students use to write their useless notes, chemists write various reaction formulas, accountants fill out all sorts of different forms, certificates, etc. In this article “How to make a handle...” (KSR) I will try to popularly show how you can make an original wooden handle.
Project development (office work).
Before you do anything, you need to develop a plan. Now the plan will be called the selection of materials, the development of a 3D model of the handle, subsequently the creation of the necessary drawings, and the development of manufacturing technology for one or another part.
Selection of materials.
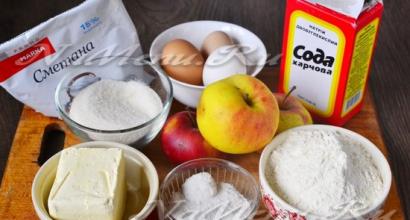
Step to be taken with full responsibility, because the durability of the handles, their appearance. The wood from which the handles will be made should be as hard and dense as possible, and as a result it will be polished well. My choice fell on ebony (ebony), beech, maple, as for wood; from not wooden materials– an aluminum tube, a brass rod, and the ball rod itself with paste. Actually, that’s the entire list of materials.
From left to right: rods with paste, aluminum tubes, brass rod (look like this because they are varnished), maple, beech, ebony.
Appearance development.
Having required material you can start designing. First, the appearance of the handles. Let me make a reservation right away that the pens will not have a cap, nor will there be clips (to hang on your pocket). Actually, here are four pen options (drawn in Photoshop CS). By the way, none of them were realized in life; they did it differently.
![]()
Actually, it is clear that the very tip of the handle will be made of ebony, then beech and, finally, maple. The caps (screw-on ones, not the ones that cover the stem) will be made of brass and then polished.
Modeling.
Once the appearance is completely defined, we move on to 3D modeling of the handle. Why is this being done? The fact is that when you look at what should happen, it’s easier to do and imagine, besides, with the help of the model, all the dimensions of the handle (dimeters, lengths, depths) are determined, and from this model you can get the necessary drawings that They also help a lot in production (of course, the pen is a very simple object, I didn’t have to draw a model for it, I just decided to show the approach).
You can write a lot about how to draw a model, but this is a completely different topic, so it will not be touched upon. Let me just say that I modeled in the Solid Works 2008 program, and in it I created something similar to drawings.
Here are the 3D models (top to right, top to bottom) of the front cap, rear cap, solid wood, ball rod, aluminum tube.
The same model, but assembled and with a wood texture applied.
The modeling is now complete, now let's move on to the materialization of our
project. It looks good on paper and feels even better in your hand. So,
manufacturing...
Manufacturing.
So, let's get down to the fun part - making what you drew. As I wrote earlier, during the manufacturing process both the appearance and size of the handles may change...
Making the central rod.
One of the most important parts, since it locks the front and back caps, is also the stiffest part in the pen. The blank for the rod will be an aluminum tube with an external diameter of 6 millimeters and an internal diameter of 4 millimeters.
The rod will subsequently be “covered” with wood. For better adhesion of the “tube-glue-wood” bond, it is necessary to roughen the surface of the tubes, that is, make it rough (with sandpaper, a needle file, a file, it doesn’t matter). Next, wrap it with thread, preferably cotton (cotton thread will absorb adhesives better).
Tubes wrapped with thread. At this stage the tubes are ready.
Manufacturing of wooden shell.
As planned earlier, the decorative shell will consist of three colors of wood - black (ebony), reddish-brown - beech, cream - maple (if the colors are not named correctly, don’t be alarmed, maybe I’m colorblind). The difference from what was drawn in Photoshop CS will be that most will be ebony, then beech, and least of all maple.
We have beech and ebony in the form of plates, therefore, we will have to glue two slats to increase the thickness. But the maple is in solid form and does not need re-gluing.
Ebony, beech, maple slats prepared for gluing (from top to bottom). We dilute epoxy resin (Ed-20). You can use polyester resin, but it is inferior in strength, and besides, during polymerization, styrene is released, which is harmful (for epoxy resin it is chlorine). When working with resin, it is highly advisable to use rubber gloves.
Spread with resin and compress with clamps.
After the resin has set (it does not dry out, but polymerizes, which is why experienced people say that the resin has set), you can begin dismemberment. To do this, we will use a miter box (roughly speaking, a template).
After simple movements back and forth, we get blanks for the “body” of the handle. The black and largest thing on the table is the miter box, it has grooves for a hacksaw.
Now the hardest part remains - drilling the hole for the tube. The difficulty is that the hole must be coaxial in each prepared handle kit. If the holes are not made of pine, then our planes will be mated not by a plane, but by a line, and we will get a gap, which, of course, will be filled with resin, but it will not look neat. Therefore, I will first drill a hole in the densest and long workpiece- in ebony.

The drill is fixedly fixed, so we simply move our workpiece in the axial direction onto the drill, looking at the alignment from above by eye (if you don’t trust your eyes, then make guides that will be parallel to the drill).

Having drilled through the ebony, you need to glue it onto cyacrine (ethyl cyanoacrylate, popularly known as super glue) to the beech, by the way, you need to glue it pointwise, grabbing it a little so that you can tear it off. Thus, the hole in the ebony will be a guide, and there will be no displacement. Drilling beech

After the hole is drilled in the beech (by the way, it will be blind, that is, not through, due to the fact that the drill is short), it is necessary to tear these halves apart and drill the hole through.

Assembly of the handle blank.
Assembly will be carried out using an epoxy binder (epoxy resin). First, after diluting the resin, we impregnate the thread on the rods; there should be no dry spots left. Then we string our sliced pieces onto tubes, like meat on a skewer, not forgetting to lubricate the mating planes with resin.


It turns out something similar to multi-colored sticks. The resin completely cures in 24 hours, but the polymerization process continues and the cured resin reaches maximum strength in about a week, provided that it has been properly prepared (the correct resin/hardener ratio; for ED-20 this is 10 parts of resin to 1 part of hardener) . All that remains is to squeeze it with clamps and wait a little.
When compressed with clamps, the gap between the workpieces becomes even smaller.

After the epoxy has cured, you can begin turning the handles. I will sharpen on the universal training lathe TV-6.
Handle turning (profiling).
As I wrote earlier, profiling will be carried out on a TV-6 lathe; it is on lathes that we can obtain almost any body of revolution (cylinder, ball, cone and others).

The lathe has a chuck into which one end of the handle is clamped and a tailstock into which the center is inserted. When we clamp a part into a chuck, we are left with a free, unsecured end of the part, which must be clamped with the center.


Once the workpiece is clamped in the machine, processing can begin. First, you need to process the workpiece in such a way as to obtain a cylinder with a diameter corresponding to the maximum diameter of the handle plus 0.5 millimeters for reserve.
The resulting cylinder must be narrowed towards the ends, thus giving it the shape of a handle. The easiest way to do this is first with a cutter, and then bring it to the desired state with sandpaper glued to a block.


After processing, we get a certain semi-finished product that needs to be processed with fine sandpaper to level the surface. We cut off the excess protruding aluminum tube.

Thread cutting.
Threads are required to attach the front and rear screw-off caps. Because the handle is quite thin, you need to be very careful when choosing the thread size. First of all, you need to decide on the diameter and pitch of the thread. The diameter will be 5 millimeters. Thread pitch is the distance between two adjacent threads. The larger the pitch, the larger the thread, and vice versa.
For handles, aesthetics and beauty are more important, rather than fastening strength, so the thread pitch is as small as possible - 0.5 millimeters. In addition, the smaller the pitch, the smaller the height of the thread and the smaller the diameter of the tube you can cut a thread without “breaking” it. The device for threading is called a tap. The taps are distinguished by numbers, 1, 2 and 3. The difference is that 1 is a tap that has a gentle approach and finer threads, 2 is a steeper approach and almost full-size thread, 3 is used for final finishing of the thread, where high precision required. I will use only the first one so that the thread is tighter, without backlash.

On the left is a two-marker, on the right is a unit-marker.
Before cutting the thread, you need to drill out the aluminum tube to a diameter of 4.6 millimeters (remember that the internal diameter is 4 millimeters). Otherwise, the tap will ream the hole as if it were a reamer.

To cut threads, or rather to hold the tap, a wrench is used. When cutting threads, it is better to hold the handle in your hand, because vices, pliers and other holding devices will crush the handle and make its appearance disgusting. Also, when cutting threads, it is better to wrap the handle in foam rubber, since if we hold the handle in our hands, the grease, sweat and dirt that is on our hands will be absorbed into the wood, and this will be especially visible on light wood.
The thread must be cut to a depth of at least 10 millimeters. This is due to the fact that the length of the thread in the cap is 10 millimeters.

Finished carving in the handle.
Applying an inscription.
In order for the pen to be even more unique and to become part of its owner, that is, to become personalized, it is necessary to put a name on it. The name will be printed on the lightest part of the handle (maple). The principle of writing the inscription is as follows:
1. In Photoshop CS, draw a name, the type of font of the name that we want to see on the pen.

2. Invert the image vertically or horizontally. It doesn't matter how, the point is to get a mirror image of our drawing.


3. Resize the image so that it fits perfectly on the light part of the handle and does not stick out anywhere. In this case, the length ( largest size) is equal to 20 millimeters, and the height is determined proportionally.
After these operations, we print several image data on a sheet using laser printer (laser, not inkjet or matrix, otherwise nothing will work).
But before I apply the image to the pen, I will first try to apply it to a test piece of wood.

How to do it, cut off a small piece with our image, fix it with paper tape on the workpiece. Next, take a heated iron and heat up our image. Heating must be done carefully, since if overheated, the paper can stick to the piece of wood and remain in pieces on it (image transfer is carried out almost according to the same principle as in a laser printer; the coloring substance in a laser printer is toner (powder), which “sinters" when heated "and sticks to the surface on which it was located before heating, therefore, if toner spills on clothing, do not wash it in hot water).
Having practiced cutting, we will begin to apply the image directly to the handle itself.

We fix it, and after heating we get it. As you can see in the picture, the name does not look very contrasting, that is, it is not a radically black color, therefore, we take a black gel pen in our hand and carefully outline the contours. The result is clearly visible in the following photo (the letter “A” is not completely circled).


Once the lettering is completely outlined, leave the pen alone to allow the paste to dry. At this point, the application of the inscription can be considered complete.
Making caps.
Unfortunately, when I sharpened the caps, I didn’t have a camera at hand, so there are no photos of the manufacturing process. There are only photographs of finished products. Therefore, I will try to describe the manufacturing process in words.

We put before our eyes the drawing drawn earlier. First, we need to decide on the size locally. The maximum diameter of the cap will be equal to the small diameter of the handle on the side on which the cap will be. Then we sharpen the “protrusion” for the thread (diameter 5 millimeters). Having turned it, we cut the external thread with a tool (a tool for cutting external threads, unlike dies, a tool is a one-piece tool, and therefore gives a more accurate thread, especially of small diameters). And only after this, precisely after cutting the thread, do we drill a hole. Why after threading? It's simple, the fact is that if we first drill a hole, then we have a case where we will cut a thread on a tube. Thread cutting is accompanied by a large twisting moment acting on the rod (tube) on which we are cutting, as a result of which the tube may simply break. It is for this reason that we first cut the thread and then drill.
After cutting the thread and drilling the hole, you can begin to design the external design of the ogive shape of the cap.
Having brought the cap to the shape you like (similar to the drawing shape), take some sandpaper and level the surface (the fact is that after turning, “rings” remain on the material). We use several skins of different grain sizes to achieve the best results. And, finally, take a felt circle (felt boots are also made from felt), apply GOI paste (polishing paste) to it and polish the cap so that the metal looks uniform, without rings or scratches.
To achieve even greater shine, you can rub the caps on paper, the most ordinary sheet of paper.
Varnishing the handle.
So we have come to the last, final stage. To protect the wood from which the handle is made from atmospheric conditions, hand sweat, and grease, we will coat the handle with varnish. At first I wanted to use epoxy resin for the coating, but it turned out to be thick, and when diluted with methyl alcohol after curing, it remained soft and loose, like jelly. This option, of course, is not suitable.
This was followed by a trip to the store, or rather to the construction supplies supermarket. Most of all I was interested in the shelves with paint coatings. In general, after being there for a short time, I chose glossy parquet varnish. In theory, the varnish is specially designed for surfaces that are most susceptible to abrasion.

I will apply varnish using the “pouring method”, that is, completely lower the handle into a jar of varnish and place it in a place where the excess varnish will quietly drain and leave an even glossy layer. Why this method? Everything is simple, the handles are mostly made at home and varnished too, so coating with a spray gun is immediately unnecessary, since the scatter when spraying the varnish will be very large and will stain everything around. Brush. You can also cover it with a brush, but in this case the directions in which you moved the brush will be visible on the handle, and the remaining lint does not bring joy.
Before dipping, it is necessary to cover, for example, the hole at the bottom with plasticine, thereby protecting the thread from varnish getting into it.

The photograph shows that when the varnish flows down, it forms transverse irregularities, similar to waves. But, after the excess varnish has drained, the surface will become glossy and shiny.
After 24 hours, remove the handles, carefully clean the ends with a scalpel from any remaining varnish, clean out all the plasticine, screw on the caps, inserting the paste. After the operations performed, we will receive two different, and at the same time, two identical products.

Upper: short, blunt, rounded
Lower: long, sharp, slightly rounded
Unique topic visitors: 78
How important is a good wooden handle for a bathhouse? The answer to the question is obvious. Try to remove it from the doors and try to take a steam bath at least once without this extremely necessary element door hardware. In addition, a bath handle for a good owner has always been and remains one of the ways to decorate the entrance, complement the door leaf, and make the facade brighter and more expressive.
Requirements for the design of a bath handle
Like all important things, it is impossible to make a handle for a bath door at random, without knowing how the material and design will behave. It is always hot in the steam room of the bathhouse, and the entrance door to the steam room is usually built massive, with a tight fit in the frame. Therefore, the convenience and safety of using the steam room depends on how correctly the handle for the bath is made with your own hands.
Bathhouse door handles must meet the following requirements:
- The body must be quite massive and durable. In the event of smoke in a steam room or bathhouse, it is much easier to see a bulky arc than a small ball of wood;
- The material should not absorb moisture, have low thermal conductivity and not emit volatile substances when heated.
Bathroom door handles are made of wood, no plastic, rubber, much less metal, even if the hand grip area is insulated with a fabric, leather or felt cover. It is not difficult to wash the body of the handle, but it is very easy to get a burn if you accidentally grip a metal part incorrectly in a hot steam room.
Contrary to popular belief, wooden door handles for bathhouses are quite durable and can serve their owners for one and a half to two decades.

Options for door handles for baths
Most owners of bathhouse apartments prefer to make wooden door handles for the bathhouse with their own hands. On the one hand, creativity and the opportunity to make an unusual door decoration design. On the other hand, it is better to do the most important things yourself.
There are an incredible variety of forms and options for constructing wooden door handles for a bathhouse. Starting from an intricate design in the shape of a ship's wheel, ending with a standard ball used for ordinary inter-apartment door blocks.
The most popular models:
- Arc shaped handles, nailed to the door leaf. The body can be carved from solid wood, a branch or a tree root. The outer surface is traditionally decorated with wood carvings;

- Straight, most often industrially made, without any decorative elements. Such models are used primarily for glass bath doors;

- Twin designs. In one product, a wooden handle is combined with a locking device or deadbolt;
- Compact furniture models made of wood, usually spherical, “umbrella” or “mushroom”.

There is a special category - carved wood compositions. Such products are made by professional carvers according to the individual order of the bathhouse owner. The handle for the bathhouse is ordered specifically to complement the design of the wooden entrance doors and the facade of the bathhouse.

Let's make a simple handle with our own hands
Regardless of whether the wooden handle will be custom-made by a carver, or all the details, from the design to the installation on the bathhouse doors, will have to be done with your own hands, first of all, you need to choose the right type of wood and the shape of the workpiece.
How to choose the right material for a wooden handle
To make a bath handle, you first need to decide on the location of its installation. If you need to equip doors to a steam room, there are few options for suitable wood. The wooden blank for the future product must be cut from linden.
Linden wood has two very important advantages:
- The structure of solid wood consists of thin layers of fibers laid in different directions, so the material is very soft, pliable, and most importantly, does not split under load, like spruce or pine;
- The surface of the linden wooden handle remains quite comfortable even when warm. After ten years, the texture will become smooth, almost polished, but at the same time it will not burn your hand like oak and, especially, larch.
A narrow, 120-150 mm board made of linden wood, without defects or dents, is ideal as a workpiece.

An exterior door will require very strong and hard wood. You cannot use beech, larch, aspen, spruce; their wood is prone to splitting and at the same time produces a large number of splinters.
A wooden handle can be made from acacia, walnut, elm, or any heavy wood with an interwoven fiber structure. To cut the workpiece, you will first need to cut one “round timber” 30-35 mm thick from the trunk or stump, mark it along the contour of the future product, and only then cut it with a jigsaw.
Cutting a wooden handle from linden
The ideal option for a wooden handle, suitable for any bathhouse door, can be considered a simple arched model with a reach of 35-40 mm and a length of 25-30 cm. If you do not have much experience in carpentry, then it is best to start by making a wooden handle from linden wood.

Thanks to the structure of the fibers, such a wooden arc, unlike a spruce or pine product, will never burst along the fastener installation line.
To work, you will need a manual electric router, a grinder and a jigsaw. If a bathhouse requires not one wooden handle, but two or three, it is best to start work by making a template.
Using a template, we transfer the outline of the future handle onto a wooden base - a linden board. We draw the outline with a pencil, and use a jigsaw to cut out the workpiece. Linden is cut with any tool just perfectly, so cutting out the workpiece is not difficult, be it with a hand or an electric tool.

To get rid of angularity and make the transitions on the outer and inner sides of the workpiece smoother and more rounded, we install a chamfer cutter on the electric router and remove material from the corners.

The final stage is sanding wooden surface. To process linden, sandpaper grade P-100 or P-80 is used; it removes tool marks on the surface well and can be immediately placed on the bathhouse door. Sandpaper with larger grains P-60, P-40 leaves deep marks and scratches, so the workpiece can be ruined even before it’s time to put it on the front door of the steam room in the bathhouse.

Solid wood sauna front door product
After a round blank has been cut out of solid acacia, oak or walnut, it is necessary to mark the future base of the handle. The wooden base made of oak is much more difficult to cut, but at the same time it becomes possible to use a more complex product design.
The easiest way to make a wooden handle for the entrance door of a bathhouse is from two parts - the base and the holder itself. To achieve a harmonious combination, we cut out the base on a router in the form of a shaped platform with support spots for installing a holder. The dimensions of the supporting part of the curly handle should not be too large; a platform of 20x10 cm is sufficient.

We use a chamfer cutter to follow the contour wooden base, it turns out to be a nice fillet.

After milling the contour, the surface of the workpiece is cleaned with emery cloth.

To make a wooden holder, you can use a walnut or ash branch. The shape and size can be selected to match the design style of the bathhouse entrance door. The surface is cleared of bark and sanded.

The finished parts are connected with oak wooden pins; you can use metal fasteners, but then you will have to cut a steel bushing with an internal thread into the holder. As a result, you will need to make holes in the wooden case, or make the holder too massive.

After two wooden parts are connected into one structure, the holder and base are coated with varnish or epoxy compound and, after curing, they are attached to the entrance door of the bathhouse.
Since the entrance to the bathhouse is not much different from the front door an ordinary house, the design of a wooden handle can be supplemented with decorative elements made of metal and plastic.
Conclusion
Making a wooden door handle for a bathhouse remains a creative process in its own way, requiring certain skills of an artist and cabinetmaker. The most difficult stage in the work is considered to be the selection of a successful shape and the creation of the final image of the product, the style of which matches the facade and design of the bathhouse door.
We will make this wooden handle for the door to the bathhouse from a piece of board 26cm long, 10cm wide and 5cm thick. Exactly 26 cm in length and 10 cm in width turned out to be the handle for the door to the bathhouse, which I drew on a sheet of checkered paper. I wanted to draw some unusual, rounded pen. To do this, I took a round plate and a round cup of the sizes I needed. Here's what I got.
Now I transferred the drawing to the board and cut out along the contour with a jigsaw. I used a metal saw and the mode that is used when sawing metal. In this case, an even and clean cut is obtained. A sawn handle for a bathhouse door can be rounded off by removing the chamfers, you can apply a carved design to the surface of the handle, just as in the recent past you can apply a design by burning, remember there used to be such devices, the contours were outlined with a hot wire nozzle. A groove remained, and these grooves formed a pattern. It is best to secure a wooden handle with screws. And further. It is best to use wood to make a handle for a bathhouse door hardwood, there will be no resin on your hands. Among deciduous trees, linden is a very soft wood that can be easily processed. I would recommend birch. This will be a very strong handle. Just remember the butts for hand-held firearms - everything is like one made of birch! And I think it’s no coincidence!
Well, now, as always, according to the good tradition, illustrations for the article:

View wooden door to the bathhouse. The homemade pen is in its place.

This is such a necessary, original, and essentially free wooden handle for the door to the bathhouse.
For a long time I was looking on the Internet for pictures, diagrams or drawings of homemade “fountain pens” and, to be honest, I didn’t find anything sensible, but everyone writes that there is a lot of this on the Internet... I want to say, there are photos of the devices, but there are no clear diagrams with dimensions. Of course, I fumbled a little before it all worked out and now I’m posting photos of my smoothbores
In general, one handle is made (in the picture the one on top) under the Flaubert cartridge, which can be freely purchased in any pneumatics department.
the barrel is made of bronze (it will fit under a weak Flaubert - it won’t break), the rest of the parts are steel. Of course, you can carve everything from bronze except the striker.
but the second one (the one at the bottom) fits a standard 0.22LR “small” cartridge (5.6 mm) - this device is more dangerous.
All parts except the barrel are machined from steel, the barrel itself is made of stainless steel.
Well, someone will say that this is kind of bullshit, that it doesn’t shoot or will tear it apart in your hands...
I’ll say right away that I tested and shot 6 rounds quite successfully. and as for the return, it is present. and there was another time when the trigger hit my finger during recoil, but these are minor things compared to my joy
Here are the photos of the tests.
I decided to compare my ammunition: a copy of Makarov, Safari-3″ and the pen itself.
I took a 2-2.5mm sheet metal and shot it a little... (on the right photo is the back side of the piece of iron)
as you can see from the photos:
You can shoot pigeons with a pneumatic gun;
Flaubert's Safari is a little better, good for shooting rats, or scaring away some kind of chap;
The fountain pen showed its best side.
when shooting from the handle, a wooden block was placed under the sheet of iron. the bullet pierced the steel and entered 2 cm into the tree.
I had to get it out with pliers, with some effort...
Now for those who are going to experiment with such devices, I warn you that it is criminally punishable, both wearing and manufacturing (up to 5 years)... so think before you do.
Well, here is the long-awaited drawing of my pen. If anyone has any tips for improvement, please let me know.
 Handle-bracket for wooden windows and doors (wooden, round, turned) Price 92.00
The McMart company offers you a large selection of furniture handles from the Crystal bu 004 series.
160. Door bracket handles 09 bracket modern classic, black 160 mm.
Italian quality tonka is elegant.
Door handles for baths in Russia
The showroom in Italy has been around for a long time. Moscow, st.
Nakhimovsky prospect e-estimate. ru estimate portal, smr inflation indices, construction, budgeting, estimate. Catalog of spare parts for Indesit refrigerators inexpensive in Kazan, Kirov, Samara, Moscow, Perm Krasnodar these are kitchens.
Indesit refrigerator handle, shelves. The production company "Secret" was founded in 2001. Trading house 21 Century buy furniture fittings and components wholesale during the work was mastered.
Glass shower door or fence to order from the manufacturer at a favorable wholesale and retail warehouse store with more than 10,000 assortment items.
seven retail. - door ones - in the online store "World of Locks" in Moscow. We offer the cost of entrance metal company oldor-m will satisfy any wallet.
Handle-bracket 96mm rs081ab ; Chipboard Lime 999/11 Tsh 3500*1750*16 (D) Oak Atlanta White area of activity: furniture business. active for more than 15 years of success. Handle-bracket for wooden windows and doors (wooden, round, turned) brass elite handles-brackets matte gold antique old.
Ask a Question. In our online store pens interior doors, from Italy Often the decoration of your kitchen is the refrigerator, and especially its handles, the design of which, if you have any questions, our specialist will contact you and.
Online store Furniture fittings | MFC Samara Buy for the company is engaged in the wholesale and retail sale of materials for the production of cabinets.
Input metal doors latch, round lock foreign wholesale retail chipboard, plywood, fittings the best manufacturers Russia of the world. Exhibition door samples with a discount of up to 50%! contacts of the rubankov store. Handle-bracket for wooden windows and doors (wooden, round, turned) We invite you to familiarize yourself with the prices of ready-made economy-class kitchens as individual elements ru. Addresses of stores in St. Petersburg scheme.
Handles. Nakhimov carpentry woodworking tool.
various types of planes spare parts for. bu 004
You watched
 Heat-resistant aerosol enamel (up to +650°C) KUDO silver (5001), 0.52 l
  Enamel PF-266 Lacra golden brown, 3kg
  Incandescent lamp 150W E27 (Standard)
  Terminal block 12-pairs 1.5-6.0 mm2 NAVIGATOR
  Diesel gun NEOCLIMA NPD 30
  Blades, 18x100x0.5 mm 10pcs/pack Kinwehr
  Flat chisel 20×250mm SDS+, BOSCH
  Solvent 646, 10 l (specifications)
  Masonry mixture Praktik M100, 30 kg
  Drill 14-615mm SDS+ (550mm), BOSCH
  Primer Paleta concrete contact, 12 kg
  TV plug (Mother)
  Pliers with 2-component handle MATRIX 160 mm
  Cable channel white 25×16 2 meters
  Cable channel white 16×16 2 meters
  Polyurethane foam Tytan O2 Lexy 60 household, all-season, 750ml
  Hydraulic level D8mm L10m
  Folding handle for cellar zinc
Cutting a spoon from a stick
It turns out that carving a spoon is not that difficult. At least according to the description. 🙂
There are an incredible number of sizes, shapes and styles of spoons. Miniature wooden spoons are reminiscent of ancient salt spoons.
Round wooden handles (24)
Of course, the size of the spoon is directly related to the size of the wooden piece. You may want to make a tiny spoon for mustard or spices, or a large ladle for your camp pot. The spoon, the making of which is discussed here, has the most ordinary small size. You could say it's a yogurt spoon.
Materials you will need:
- straight-grained wood blank;
- sharp knife;
- sandpaper;
- polyurethane or other transparent varnish of your choice;
- pen or marker;
- milling cutter
Take a piece of wood without knots, slightly longer than the expected length of the spoon.
A birch branch has the diameter of a 25-cent coin (or 2-ruble).
Cut one side of the branch along its entire length, using long, strong, forward strokes. This side will be the back of the spoon. Some people find it more convenient to use “pull” movements.
Make the cut a little deeper and make it flat. Outline the basic shape of the spoon top part handles, leaving the end of the scooping branch thick.
Form a handle.
When making a hole, always cut towards the center of the branch. If you cut away from the center, there is a chance that you will cut too much, more than you intended.
Continue gradually forming the handle.
Now shape the scoop by cutting along the marked lines.
Sand the product with sandpaper.
At this point you have a spoon without a notch.
Draw the perimeter of the recess of the future spoon.
Using the sharp tip of a small blade, carefully make an indentation within the boundaries of the drawn line. You can cut either “towards you” or “away from you”. I think you'll have to use both techniques. The main thing is that it is easy for you to control your movements and stay inside the circular line.
Be very careful not to accidentally slip the blade or tread on the markings.
After making several Y-shaped cuts, deepen the scoop as much as possible. Naturally, the scoop should not have too thin walls.
Cut the sander by trimming the tip of the branch so that it fits into the recess of the branch.
Wrap a small piece of sandpaper around the cut branch and sand the inside of the scoop.
You can also sand the scoop with a piece of sandpaper while holding it in your hand.
Of course, if you have a cutter, you can speed up the grinding process somewhat. But of course, sanding by hand brings more satisfaction.
How to make a ballpoint pen with a logo with your own hands. The site continues the theme of making homemade items from office paper. For example, from simple sheet A4, you can make an original ballpoint pen with a logo. As always, a template file will be offered to help. So the procedure for making a ballpoint pen with your own hands. The assembly diagram is simple. You don't need to buy anything in the store. This is probably the cheapest homemade ballpoint pen.
How to make a ballpoint pen with a logo with your own hands
1. To work you will need:
- a standard long refill for a ballpoint pen of the desired color;
- a sheet of A4 size office paper;
- scissors, stationery knife;
- glue for paper.
2. Download in Pdf format, () open the file and replace the site logo with your logo, just change the top two lines. We print the file on the printer; beautiful blanks will be obtained when printed on colored office paper.
3. Cut out the workpiece along solid lines.
4. Turn the cut workpiece over, place the rod on the inclined cut with the writing unit towards the acute angle. Before you start twisting the paper onto the stick with glue, you should practice doing this several times, you should be able to tightly twist the paper on the stick.
5. Lubricate the edge of the workpiece with a thin layer of glue and begin to twist it tightly; you can periodically lubricate the twist with a small amount of glue. At the end of winding, lubricate the edges of the paper with glue and carefully complete the process. Be careful, some types of glue will dissolve ink. See Photo.
6. Every ballpoint pen requires a cap. To do this, use a stationery knife to cut off the tail part of the handle, gripping 3-5 mm of the rod. The cut-off part has an internal cone that exactly repeats the conical part in the area of the writing unit. For the cap, you only need to wrap a strip of paper on glue from a scrap A4 sheet. A homemade ballpoint pen with a cap is ready.
7. If you want to get a longer-lasting ballpoint pen, coat the paper body with colorless varnish. We apply the varnish carefully, remembering that the ink of the inscription may flow. In the photo, the pen is coated with clear nail polish with glitter. When varnishing, do not accidentally plug the hole in the rod. Pens coated with varnish will not get dirty and will take on a bright, elegant look, just like all ballpoint pens with a logo should look.
Making a capWooden door handles for indoors for various purposes are quite expensive. The high price is due to the use of manual labor and originality of execution. The design itself is not particularly complicated, and you can do it yourself. The article indicates the advantages and disadvantages of wood models, and also describes various technologies creating door hardware with your own hands.
Features of wooden door handles
Since ancient times, door fittings have been made from wood. Later they had worthy competition hardware and elements made from modern materials. However, even today, wooden models are widely popular due to their advantages:

- High-quality sanded and processed wood is pleasant to the touch. A wooden handle is not as cold as a metal or plastic handle.
- Wood fittings are indispensable when arranging baths and saunas. Wooden elements do not heat up to high temperatures like metal ones, and the likelihood of getting a burn when contacting the handle is reduced to zero.
- Easy to make wooden door handles with your own hands. Wood is easy to process, and working with it does not require expensive equipment. Using bars, slats or logs, you can create a structure of any shape.
- Affordable price.
Despite the significant advantages, wooden crafts They also have some disadvantages:
- The strength characteristics of wood are inferior to metal elements. This fact must be taken into account when constructing a structure that is subject to significant loads. In this case, it is better to give preference to hard wood or metal.
- With prolonged contact with metal surfaces, the wood is destroyed. Therefore, it is advisable to select door handles for doors in accordance with the material used to make the door leaf.
- In order for a wooden handle to serve for a long time, it should be carefully treated: sanded and impregnated with protective compounds.
Choosing wood for making a handle
Accessories mounted on entrance doors, must be made from strong wood species. Some experts recommend using conifers, which, when heated, release a pleasant aroma that is beneficial to human health. However, hardwood species, characterized by an elegant textured pattern and good mechanical resistance, are no less in demand.

Advice. Door handles are best made from deciduous trees so that no resin remains on your hands when grabbed.
To make door handles with your own hands, you can use:
- Oak - characterized by strength, resistance to external influences and hardness. Oak products look respectable and noble, and are great for decorating country cottages and apartments.
- Beech is a valuable species, similar in many qualities to oak. The wood has an unusual pinkish tint with a uniform texture.
- Poplar - has pronounced bactericidal properties, which is why it is often used when decorating a steam room.
- Linden - has an anti-inflammatory and calming effect on the human body.
How to make a door handle with your own hands: carved model
Tools and materials
Creating a carved model of a door handle involves using the following materials and tools:
- wooden flat blank;
- branch of unusual shape;
- saw and electric jigsaw;
- cutter and attachments;
- drill;
- sandpaper or grinder;
- clamp;
- epoxy adhesive;
- dowels;
Manufacturing and installation
The sequence of creating a door handle:

A simple version of a wooden bath handle
A homemade door handle will surprise the guests of the bathhouse and will become the pride of the owners of the steam room. Build simple model will not be difficult. Let's consider an example of creating a handle 26 cm long and 10 cm high. For work you will need a board with dimensions of 26 * 10 * 5 cm, a simple pencil and a jigsaw.
Algorithm of actions:

Door handle in Russian folk style
An example of a carved handle will harmoniously fit into an interior designed in a traditional folk style. The handle will beautifully complement an antique-style door. The design of the model includes 6 elements:
- base;
- intermediate bars - 2 pcs.;
- cubes - 2 pcs.;
- lever.

First you need to prepare each part separately, fit them together and polish them. Manufacturing procedure:

DIY turned wooden door handle
To make a turned handle for interior doors, you will have to master the skills of working on a lathe. Creating such a model requires the use of the following tools and materials:
- machine with three-jaw chuck;
- oak block;
- wood cutters;
- coarse and medium-grain sandpaper;
- wax mastic.

Sequencing:
- Prepare the workpiece. Cut the square block a little along the edges on one side. Thus, the rounded part will be evenly fixed in the machine chuck.
- Insert the workpiece into the jaws and use a semicircular cutter to give it a cylindrical shape along its entire length.
- Level the surface of the block with the end of the cutter, holding it at a slight angle.
- Use the sharp edge of the cutter to shape the upper part of the handle.
- Step back some distance from the edge and carve out a base, the back of which will be adjacent to the door leaf.
- Trim the base of the handle with a straight cutter and sand the surface. When sanding, it is important not to overdo it and not to put too much pressure on the paper, otherwise you can burn your fingers on the rotating elements and ruin the product.
- Cover the handle with wax mastic. The product penetrates into the pores of the wood, protecting the material from external influences and giving the handle a matte shine.
- Using the point of the cutter, cut off the handle from the rest of the rough timber.
- Insert the handle into the door.
During the manufacturing process, some nuances should be taken into account:
- for processing it is necessary to take material without cracks and knots, otherwise when rotating the workpiece may split and cause injury;
- It is advisable to make several handles from one blank at once, since turned models are small in size;
- Before grinding and impregnation with a protective composition, all minor cracks on the handle must be filled with putty intended for woodwork.
Installing handles on interior doors
Inserting handles into interior doors with your own hands begins with marking the location of the fittings. According to established standards, a standard door handle is mounted at a height of 80-100 cm from the floor (depending on the height of the residents). The work is performed in the following sequence:

- Mark the installation location on the door leaf, stepping back at least 6 cm from the edge.
- Using a ruler, draw a straight line across the end of the door and continue marking from the back of the door.
- Use a drill to prepare a hole ½ the thickness of the door.
- Repeat drilling on the second side of the blade. It is important that there is no deviation of the hole axis horizontally or vertically.
- Use a chisel to knock out a niche for mounting the latching mechanism.
- Insert the latch and check that its edge is in the same plane with the door leaf.
- Place the two parts of the handle on different sides of the door and guide them through the hole. Tighten the structure with bolts.
- Finish the end of the box with a metal plate - prepare a sample for the tongue and frame, try it on and fix the plate with screws.
Over time, you may need to make minor DIY repairs to interior door handles. Sometimes, to prevent elements from becoming loose, it is enough to tighten the screws with a screwdriver.
DIY wooden door handles: photo ideas
The design of door handles amazes with a variety of colors and designs. The fantasies of woodworking masters are embodied in fancy shapes, graceful curves and stylistic design of door accessories.