Syrian Lost Tomb. Rise of the Tomb Raider Walkthrough Puzzles at the top of the main tomb chamber
Where the game starts and where the first tomb is located. Despite this, there are several collectibles and Lara's first challenge here. The general map shows the location of everything and everything, and then goes into more detail below. Don't forget to check the large map if you have any difficulties.
Document 1
Immediately as you enter the tomb of the Prophet, to the left of the camp among the boards.

Document 2
On the ground near the campfire.

Document 3
On the wall in the flooded hall near the column.

Document 4
As soon as you leave the central part of the tomb and go to a small room where you have to raise the water level.

Relic 1
On the ledge to the right before entering the tomb.

Relic 2
On a hill near the column.

Fresco 1
At the monolith in the camp.

Fresco 2
From the camp in a small corridor along which you will go in the story, on the wall.

Fresco 3
Opposite the fire in the camp above the stone.

Fresco 4
Behind the same camp fire, but from behind.

Fresco 5
After entering the tomb, on the left.

Test Hang 'em High
Task: knock down seven censers.
Performance: all the censers are located under the “ceiling”, so you have to lift the camera up and look for it. In order to shoot them down, it is enough to shoot them with a pistol. But shoot not at the censers themselves, but at the stone to which they are attached.
Censer 1
Under the balcony, behind a column in a large flooded hall.

Censer 2
In the corner of the flooded hall behind a column.

Censer 3
Under the arch above the water surface. It’s convenient to find when you go up to the upper levels of the hall, where the sarcophagus itself is.

Rise of the Tomb Raider is a direct sequel to the Tomb Raider reboot (2013), which follows Lara Croft's rise as a skilled hunter of ancient artifacts. But apparently, this experience was not enough for her, otherwise, why else would the developers call the game “Rise of the Tomb Raider”? You can find out exactly how the girl re-became into this kind of “Amazon” in our walkthrough.
Please note that this page contains complete walkthrough Rise of the Tomb Raider with all the additional tombs, which we decided to divide by locations rather than chapters to make it easier for you to find the information you need.
Peak
At the very beginning of the game, Lara Croft will find herself on the top of a high mountain with incredibly beautiful natural scenery. Here it is quite possible to fall into a bottomless abyss, staring at the local beauty. However, before us is a regular training prologue, in which you just need to follow the instructions, completing simple tasks. Difficulties can only arise with poorly working triggers. For example, when climbing up and jumping towards an outstretched hand, you should carefully make sure that you have reached the highest point and moved as far as possible to the left. Otherwise, you will not be able to jump to your hand. This also applies to swings on cables - you should jump only after reaching the highest amplitude.
Syria
The situation in the game changes extremely quickly - only recently you were climbing a snowy slope and now in a couple of minutes you are cutting through the sand dunes of Syria in a jeep. In this country, Lara needs to find a mysterious tomb in which the body of the prophet is hidden. After watching a short cutscene, climb up until you see a small crevice in the wall. To the right of it you will find a treasure - take it, and then climb inside through the hole in the wall.
Inside you will find a spacious room with a pillar in the center. On it Croft will find an inscription that she will not be able to read due to her ignorance of the Greek language. But this oversight can be easily corrected: you just need to study the two frescoes located to the left and right of the pillar. After this, Lara's level will increase and she will be able to read the inscription. Nearby you will find a treasure. Take it and move forward.
As you exit the room, you will see a broken bridge leading to the other side of the canyon. To overcome this obstacle you just need to use a double jump. Having reached the place indicated on the map, you should climb up and enter the new room. Another cutscene will begin.
Next, break the wall on the left using an ice ax. A stream of water will burst out of the opening. Now you can go back and use the improvised bridge to cross to the other side. Once in the next room, go around the large structure located directly in front of you. Then climb onto it from the other side. Beware of the trap with sharp spikes, which can easily kill you. Next you need to get to the other side, where the entrance to a new riddle awaits you.

Solving the puzzle will not be easy. When you walk normally on the boards, you will immediately be washed away by the water. Therefore, the first thing you need to do is knock down the boards with a shot, and then jump over to the other side. Here you need to destroy the wall with cracks using an ice ax. This will raise the water level in the container below. We jump onto the board again and wait until you are washed away with water. After this, we quickly climb onto the floating raft ahead. Now you can climb onto the wall and climb along the ledges to the beam. Let's watch a short video. Next, you need to run to the exit without falling under the bullets of hostile soldiers.
Siberian Wilderness
We head down and, not far from the abandoned camp, begin collecting useful materials. To do this, you should highlight them using a special key or button (depending on what you are playing on - a gamepad or keyboard). Then we return to the fire and “craft” the bow. We improve the available parameters and move forward to the point on the map. Don't forget to collect materials along the way - they will be useful to us in the future.

We go through several QTE actions (you need to quickly press certain buttons indicated on the screen), then we run away from the enemy and perform QTE again. As a result, Croft receives several dangerous wounds, and therefore it is impossible to do without medicine. We collect medicinal plants and heal ourselves. Next we will need to create a poison arrow to kill the bear. Its production requires the following items: wood, fabric and mushrooms. You can collect all these resources on the way back to the camp. We also advise you to look into the cave located to the right of the path. In it you will find explosive ore and a scroll.
Having reached the camp, we create a poisoned arrow (or several arrows), improve the bow and increase the skills (we advise you to upgrade your quiet jump and thick skin). Now we go again to the clubfooted bear. On the way to the bear you will meet several military detachments. You should deal with them quietly. It's best to kill them one by one.
Having reached the central point, pick up the canister and then blow it up next to the cave with an arrow - this will give you access to the treasury. You can get more treasures by finding the prince's crown. To do this, open the map and find the corresponding object. Then explore the crown to learn Mongolian. This will help you read the inscriptions on the pillars located nearby. After this, new treasures will open to you on the map.

Now you can go to the bear. The easiest way to kill a clubfoot is as follows: we make our way into his cave, and then shoot him with a poisoned arrow and finish him off with two ordinary arrows (you need to hit the beast right in the head). If you can’t hit the bear with poison arrows, then it doesn’t matter - just run back and create poison arrows again, the bear won’t chase you. After killing the bear, we take its skin and everything else useful resources indoors, and then we destroy the wall with an ice ax and go into the ice cave.
Ice cave
We go down, find a small rise on the right and climb up it. Here you will find another scroll. We go forward and find another camp that can be turned into our own small base. By the way, Lara can instantly move between camps. Therefore, you can always return to old locations to collect all the treasures in them. Improve your ice ax and increase the characteristics you need. Then move on. Ahead you will see a huge ship hanging right above the cliff. Follow the mast to reach the first optional mission.
Ice Ship (challenge tomb)
In general, the puzzle awaiting us is not difficult, but we will still have to rack our brains. You need to knock the ice off the ship and climb to the top of it. To do this, you need to start the mechanism, and then climb the mast using an ice ax and jump over to the right pendulum. Next, wait for it to go down, get off it and start climbing up the wall, which has been cleared of ice. We use the mechanism again and lower the pendulum to a height acceptable for a jump. We move forward along the mast and jump onto the pendulum in order to destroy the ice crust. We get off the pendulum and climb up again. Here you can collect a lot of useful things, including a sacred manuscript that will improve your archery skill. In addition, you will discover a lot of gold and increase your knowledge of the Greek language. Now you can go down the cable car. Be sure to pick up a medallion near the descent. In the future, with the help of it you will be able to discover an important secret.

After completing the test, you should return to the main task. Once you leave the cave and take a swim in the water, turn right - there you will see a scroll.
Lara needs to infiltrate the Soviet base, and this is quite difficult to do. The first step is to go down to the lower level and examine the small opening located on the right. He will lead you to a small cave where part of an ancient bow and other useful items are stored. There are no puzzles here - you just need to constantly keep the image of the map in your head, otherwise you can easily get lost. We take the artifact and go back.

Let's go a little further. Here you will find several enemies and kerosene lamps. Throw lamps at your enemies to set them on fire, then finish them off with your bow. We go upstairs, kill a few more adversaries, and go into the interrogation room. In it you can find your first pistol. We move further and find ourselves in the hangar. There will be a lot of enemies in it. You can destroy them all with a bow or climb up, pick up a kerosene lamp and set the tank on fire. On the wall you will see a drawing, after studying which your knowledge of the Russian language will improve.
Let's go ahead and get our first side quest. It says that if you break all the transmission systems on the map, you will be awarded experience and loyalty points, and will also be given a master key with which you can open a couple of cabinets and locked drawers on the level. The collected materials can be used to create a second pistol. Note that one of the transmitters is located above the cave where the wolves are located. You can get to this place by climbing the sheer wall located to the right of the cave. Next you need to climb up in a spiral. The remaining transmitters are quite easy to find.

Not far from the rise leading to the point where the plot continues, there is a factory. At the top there is a relic, and next to it is the previously mentioned cave with wolves. If you go left, you can find the entrance to a secret cave covered with boards. You can find a useful skill in it. Breaking the boards is quite simple - you need to shoot at the rope located nearby, and then a block of stone will rush next to you and destroy the boards. Now you can go down.
Cistern in the Cave (challenge tomb)
You can immediately run to the relic, but be prepared for the fact that wooden boards will break under you and you will fall into cold water. Therefore, you must first go to the right to the very bottom corner and find a passage there leading to a canister and a closed hatch. You should blow up the canister to increase the water level. We go back, go around the structure and find three more canisters on the right. Now you need to perform a rather difficult trick - take the canister and throw it on the wooden raft. Next, jump onto the beam and drive the piece of wood with the canister across the water to the opposite side.
Jump off the beam and wait until the raft floats near the hatch. Then shoot at the fuel container and watch as the explosion destroys the hatch and opens an additional passage. We go through it and find ourselves in a small room. Here we climb up and destroy the wall. Next, we jump down, throw the next canister onto the boards and repeat the action with the hatch. Now Lara needs to have time to get to the raft and throw the canister through the broken window. We go back, take the container with fuel and blow up the last hatch from the inside. This will help you increase the water level, and then you will be able to pick up the relic without any problems.
When returning to the USSR base, you can explore the cave in which wolves live, but there is nothing interesting in it. But the cave located before the main plot point will help you open a new dungeon. Go into it and complete the quest there. Next, go to the last bonfire found and kill all enemies near the new camp. Nearby you will find a building where a merchant hangs out. You can buy a lot of valuable things from him for gold. We go up, then go down and watch a short cut-scene with an unexpected twist.
Jail break
You need to loosen the pipe and pull it out of the pipeline. Then use it to destroy the wall covered with cracks. Take the new bow improvement (arrows with rope) from the table. Break the beam above the doorway using the cable, and then leave the room. Open the box with a master key and go outside. Here Lara will have to kill all the enemies on the level - we recommend strangling them one by one. Next, break all the laptops to complete the side quest.

We shoot from the cable at the desired point and move towards the window opening. Let's watch a short video again. Then we go outside and move forward. We attach the rope directly to the cable, and then hook it to the winch. Afterwards we need to de-energize the wire, because of which we cannot walk through the water. We find the machine gun and move forward again. You will learn how to make pomegranates from ordinary tin cans. Make as many of them as possible to quickly kill all opponents. Then quickly run outside.
Get ready for a protracted firefight with armored enemies - you will need cans with nails. As soon as you defeat the “walking tanks”, you will immediately take part in several runs with a time limit. In addition, Lara will have to swim several meters underwater (remember to speed up while in the water). Then you will have another obstacle course. After it you will find yourself in a new place.
Finding Jacob (part one)
You should not immediately start looking for Yakov - we advise you to first go to the cave located in front of the camp. Here you will have to fight a snow leopard - a rather tough opponent, so be careful with it. Next, break all the boards in the cave and save in the camp. Don't forget to also improve your skills near bonfires. We recommend that you upgrade advanced crafting (the “survival” section), which will allow you to create large bags for ammunition. Now you can go to the tomb.
Voice of God (Tomb with Trials)
We go forward and try not to fall from the second beam, covered with ice - when it starts to collapse, immediately jump off it and grab the wall. On the opposite side, you should shoot at the post with a bow and then tie a rope to it. Next you need to get into the inside of the tomb. In it you will find a note, a map and several gold coins.

You will find that one of the counterweights has failed, preventing the next gate from being lifted. You need to lower the outer gate, and then climb it and jump to the other side. You should jump to the right so that you can attach one end of the rope to the stuck counterweight, and the other to the reel. Order Lara to pull the cable and remove the bolt located on the right side. The reel will stop moving if you do everything right. We go back and destroy the wall leading to the side we need. We raise the gate again - now we can install the counterweight in the position we need.
We go back to where the lever is and try to move it to the highest possible level - then we need to cut the rope on the right. The ice will be destroyed, and we will be able to freely lift all the gates and take the hidden relic. It can restore health upon death. Let's go back. We use arrows with a rope to get to the starting camp. We recommend heading to the Wilderness Vault, as here you can now get into a cave that you couldn't reach before. Afterwards we continue to look for Yakov.
In Search of Jacob (Part Two)
On the way, you will meet a wounded descendant who will ask you to kill all the wolves in the cave. Yes, this is the same cave where you killed the snow leopard and wolves earlier. We go there again and destroy all the wolf cubs (we recommend using arrows with poison - this will quickly kill them). Completing this quest will reward you with a pistol upgrade.
Not far from the lumberjack camp, Lara can take on another minor mission related to rescuing prisoners from prison. The easiest way to get to the prisoners is through the river. We use a cable for this. The prisoners are located near the air duct. On the left is the geographer's bag. Next we find ourselves in the interrogation room. For this quest you will be given an additional skill.

There is another minor quest at the level, which is given by a wounded man in a cave. You will have to explore the enemy base and find the raven. The task is quite easy, so we will not describe it. Completing it rewards you with elements for firearms and one skill. Now you can return to completing the main mission. We select all the artifacts and documentation, then study the frescoes. After receiving the Molotov cocktail, you should go to the right, where you will be able to find a new tomb to explore.
Uranium Mines (challenge tomb)
We go down, fall into the water, and then go around all the forks. When you make the jump, the structure will collapse. Don't be scared - this was supposed to happen. Along the way you will find a pipe that will cover an object that can explode. Now you need to solve the puzzle.
We jump to the far counterweight and break all the paths. We rise a little higher and shoot from a bow at the mechanism (we use arrows with a cable), and then pull out the trolley. Next, we jump to the other side using the ledge in the wall and climb up. Being not far from the pillar, we shoot at the trolley again. We go down and jump onto the counterweight. As a result, we will be able to close the opening where the water comes from. We throw a Hammer cocktail at the explosive object and go through the resulting opening. Here you will find the Keen Eyes skill. It will allow you to see any traps in your path. Now let's go back.

Finding Jacob (third part)
It is necessary to burn the obstacle on the road and move forward. Then you will hear unfamiliar voices. You should blow up the gas pipeline located directly above your opponents and throw Molotov cocktails at them. Move on. After a while you will reach a point where you need to stretch the rope and climb down. Then the next run will begin. Then we watch a video that shows how we find ourselves in the Abandoned Mines.
We eliminate several soldiers and call the elevator. Then we drive the cart towards it and climb onto it. As a result, you will be given a new thing - a knife. We cut the rope with a knife and move to the opposite side. Here you will need to cut two more ropes holding the elevator. We go upstairs and go to the fire. We improve our skills and also improve our bows and firearms. Next, we examine the fresco to improve our knowledge of the Greek language. In a room located near the fire, we kill all opponents. We collect all the useful materials and notes, and then move on.

You will see a door with a complex lock. Using the cable we go down. We attach the trolley to the rope and raise it to the height we need. Next, we cut the rope and watch how the lock on the door is destroyed. We go around the structure on the other side and, being in the dungeon, jump over the pit. Next we climb up. We kill all enemies using explosives. We advise you to first deal with the enemy holding the shield. Then we go upstairs and reach the tap. You will see a winch on the other side. It is worth attaching it to a large bucket. Then we move the trolley so that the bucket stands directly above the pond. Now you need to run quickly to get to the right room. Let's watch a short video. Having gained control over Lara again, we explore the room and go through the underwater caves to a new location.
Geothermal Valley (part one)
This is a new huge level with many side quests, ancient artifacts and tombs. However most You won’t be able to get any treasures yet, since Lara still doesn’t have an oxygen tank for long dives underwater. For this reason, we advise you to concentrate your attention on completing additional missions and exploring locations. For destroying drones you can get good bow, and hunting deer and wild boars will allow you to get pieces of equipment and experience points. There is also an optional tomb located here.
Chamber of the Suffering (Tomb with Trials)
Go to the bottom corner of the map straight to the waterfall. You need to get over to the opposite side - the cable will help you with this. Then we crawl under the gate and kill several hostile animals. We break the grate and go into the cave, where the tomb is located. Here you have to solve a fairly simple puzzle. We roll out the reel with the cable to the very edge. Next, we attach a figure eight to the beam and go to the far corner with the bucket. We pull the rope to lower the bucket down. We tie the bucket to the cart on which the reel is located. That's it, a solution to the problem has been found. We go up the steps and take a new relic with the “Fast Healing” skill. Now you can return to the valley.
Geothermal Valley (part two)

After completing all tasks and inspecting the tomb, you can begin the main story mission. We light a torch on a hill and learn to create fire arrows. We go to a new point on the map and take a shotgun. Then we begin the battle with a new enemy - flamethrowers. You need to run around him and shoot at the cylinders weighing on his back. After killing him we move on. Everything around will be destroyed. We need to find the atlas. Along the way, you can solve another optional tomb puzzle.
Aquifer Cave (Tomb with Challenges)
Drag the rope to the other side and walk along it. On the right you will need to go around the small graves and go up. Here you will see a temporary parking lot. To solve the puzzle you will need all your ingenuity and dexterity. You will need to hook the boat to the devices, and then quickly jump to the next point. After getting to the island, you will need to hook the rook from one millstone to another. You will have to pull the rope using a lever. After doing several similar exercises, you will still end up on land. There you will find a relic that will give Lara the ability to hit animals directly in the heart. Unfortunately, there is little benefit from it, since it does not work on bears and leopards. Now you can return to your main route.
Acropolis
Next to the dungeon is a new level called the Acropolis. Move along plot points without deviating from the main route. Everything here is quite straightforward, so you won’t get lost. After receiving the explosive arrow, go to the grate and shoot through the hole at iron door to blow it up. Then move towards the tower. In it you have to fight with a whole group of opponents. Next, Lara will have to defend the tower from a bunch of uninvited guests. We recommend using poison and explosive arrows more often. However, be sure to save a few explosive arrows for the end to use against soldiers with shields. After the shootout, Croft will receive a new thing - an ice ax with a rope. With it, you can cling to various ledges in order to climb up to previously inaccessible places.

A new task will appear - to get to the church where the atlas is kept. Go to the point on the mini-map, ignoring all challenges. After entering the swamps, you need to go to the right corner of the map and kill the armored enemy standing on the left. Go around the area and blow up the canister. Also shoot at the barrels located above. This will reduce the number of enemies to two or three people, which can be easily killed with a bow. If the trick fails, then eliminate enemies in groups using explosive arrows.
You will see the second cluster of enemies after passing through the window. Three enemies can be killed at once using an explosive arrow. Just shoot the rest with a shotgun or any other firearm. We recommend setting the third group of soldiers on fire with a Molotov cocktail and then finishing them off with a machine gun. Then you will need to make several jumps, using an ice ax with a rope, in order to get to the entrance to the church.
Flooded Archive
This is where players often get stuck while looking for an entrance. We advise you to look at the beams located at the top. Cling to them with the help of a cat. After watching a short cutscene, pick up a pistol and shoot at two batteries. A short video will then begin.

Next, go to the fire and activate it. Your next task is to find the entrance to the archive. It's not as difficult as it might seem at first glance. On the way to the atlas, you will find an oxygen apparatus with a cylinder that will give you the opportunity to stay under water for a long time. This device will help Lara get to the last four tombs. After finding the device, several opponents will immediately attack you. They will begin to open the door with an autogenous gun - we advise you to wait until they finish their work and then throw an incendiary mixture at them.
Having received the desired artifact, we try to leave the Church. We blow up the barrels to tilt the statue. Then we go left and swim underwater for a couple of minutes. Ahead you will meet three opponents. Kill them with an explosive arrow. Now go right and go upstairs. Slide the amphora with fire. Then throw it away and blow it up with a fire arrow - this will help you clear the road ahead. Go to the opposite side and throw the amphora again. You need to tie it to a pole located nearby and release it down. As soon as it passes over the statue, cut the rope. Next, blow it up and shoot a fire arrow at it.
Go to the other side. Find another amphora and roll it to the lift. You need to tie the amphora to it. Then tell Lara to pull the other end of the rope. Then you need to find the second amphora and tie it to the lift again. Next, push it. Now you can push the first amphora down by cutting the rope. You should wait until she gets to the monument, and then blow her up. The ancients will be unhappy with your action, so run to the exit as quickly as possible. The next plot point points to the Observatory. But we don’t recommend you rush there - it’s better to go to a new tomb with challenges.
Ketezhnye Baths (challenge tomb)

Dive into a pond and swim several tens of meters underwater. Then you will need to deftly run between the water streams straight to the fire. Next, try not to fall into the trap ahead - you need to jump over it. Go forward and climb through the roots to the other side. You will see a cliff and a large amount of water below. You need to hook the boat to the beam located on the left side, and then lift it to the other edge.
We climb up, and then run to the lever to drain the water. The cable should be hooked to the lever and winch. Start winding the last one. This will help pour out one level of water. Go down and take the boat to the beam on the right. Move inside and drain the water from the right side. Use a cable to secure the lever to your small boat. Next you need to go down and blow up several barrels. Afterwards you will see a relic that will allow you to climb rocks faster. Now you can return to completing the main storyline. Go to the desired point until you reach the scientific complex.
Pit of Redemption (Tomb with Trials)
Now you have an oxygen apparatus, and therefore we advise you to return to the Geothermal Valley and find a cave there, where you need to swim underwater for a long time. Then we emerge and walk along railway located on the right. Somewhere nearby there will be a new tomb with a puzzle. We go upstairs and roll out the cart. Next, you need to turn the platform with wooden fences in the opposite direction. Order Lara to push the cart down.
Then find a small post to your right and tie a rope to it. She will help you move to the second platform. Get to the very top and use the lever to lower the platform down. Unfold the three-legged structure, and then move the cart onto the platform. Next, turn it so that it looks on the opposite side from Lara. Raise the platform and drop the cart again. This will give you access to a new relic, which will give you the skill of a geologist (unfortunately, there is little benefit from it). Now you can return to completing the main quest.
Research base and rescue of Ion

As you follow the plot points, be prepared to encounter big amount enemies. The easiest way is to destroy groups of enemies with Molotov cocktails, and then finish off the survivors with a machine gun or shotgun. Repeat this method several times, don't forget to blow up vehicles with fuel to get rid of some soldiers. At some point you will have to defend the camp. Afterwards you will find yourself under the ice. Once in the water, swim forward a little, and then swim out through a small hole and quietly eliminate one enemy.
Then you need to swim to the far left ice hole and kill all enemies with the help of sent arrows. Then we dive under the water again and swim to the far right hole. Here it will be possible to safely get out onto land. But within a few seconds the enemies will attack you again. Use homemade grenades to quickly deal with them. After destroying all the soldiers, you will see a short video revealing a great secret. Now you can try to enter the lost city.
Planetarium
Find climbable walls and climb up them to the planetarium. Here you have to solve a simple problem. The mechanism should be rotated in such a way as to create a small bridge from it. To do this you will need arrows with a cable. Line up the planets in one line, creating a bridge from them. This will help you cross to the opposite side and climb onto the grated surface.
Once you reach the second floor, remove the supports on both sides to begin rotating the structure. Lara needs to get to the very top. To do this, you need to jump to the very center of the mechanism using a cat. But first of all we get onto the board and hang on the structure with beams. Next, we wait until Lara tells us to jump off her. Then, with a running start, we jump to the center of the planetary system and climb up. Then you should reach the exit and take a new skill. Now you can head towards the path of the immortals.

Path of the Immortals
Let's move forward, avoiding encounters with immortal guards and enjoying the beautiful scenery of the city. Having reached the very top, you learn that the immortals are not so invulnerable, and therefore you have to fight them. Save often in camps, and use a shotgun and bow during battles. Don't forget to also explode the jugs to deal more damage to the immortals. After some time, almost the entire level will be on fire. We advise you to climb higher so as not to burn alive. Having killed all the enemies, we move forward and watch a short cut-scene. Afterwards you will find yourself in the Lost City, where the last tomb awaits you.
The Lost City (part one)
Walk forward a little, and then jump into the pond and swim underwater for several tens of meters. You will find yourself in a small crypt with valuables. Next, we advise you to turn around and go back. On the left on the mini-map you will see the entrance to the cave. Enter it and kill the bear with an explosive arrow. In this cave you can find the entrance to a hidden tomb.
Chamber of Exile (Tomb with Trials)
Once you kill the clubfoot, start looking for a wall with cracks. Destroy it with an ice ax and move forward. Take the explosive arrow and use it to create a passage. You will find out exactly where you can make a hole through the gas pipe. Then rotate the two levers using the cable arrows. Run a short distance to the cage with the skeleton and cut the chain. Then wait for the gas to dissipate or simply explode. Now you can try to lift the cage using a crane. You need to turn it straight towards the gate. Next, climb up to the upper ledge again and release some gas by activating the two levers. Explode the gas by shooting a fire arrow at it. Take the relic that gives a bonus to fire damage and continue with the main story quest.

The Lost City (Part Two)
You need to get into the forgotten city, but the path is blocked by massive gates. You should shoot them with a trebuchet. After destroying the first gate, get ready for a difficult fight. We recommend using a rifle at long distances and shooting with a bow in close combat. After destroying all enemies, head to the next trebuchet. You should turn the beam using a cable and climb along it to the opposite side. Hook the bucket to the structure and then rotate it. Don't forget to close the bottom of the bucket with a rope. Next, you need to bring the container to the water and turn it in such a way that the counterweight is directly opposite the ice. Empty the bucket of water by removing the bottom with a string. Leave some water in the bucket and then close the bottom with the rope again. Then jump onto the counterweight. This will help break the ice.
Shoot the gate with the trebuchet. You will only have time to fire one shot - after that your catapult will be destroyed. Therefore, another trebuchet must be used. Near it you will need to kill all the enemies, and then attach the cable to the mount and the boards. Clear the throwing structure and turn the combat vehicle into the right side. You are attacked by archers - kill them with a trebuchet. Then blow up the gate and go into the city.
We watch a short video, and then climb the tower. Having risen to a certain height, be prepared for the enemy to hang on you. He can be quickly killed by shooting him in the head with a pistol. We rise even higher and watch the video again. Now you have to fight a boss in the form of a military helicopter. You will need to shoot him with a trebuchet when he comes within shooting range of you. You need to hit it at least three times. Before each shot you will be attacked by crowds of enemies. We advise you to shoot them with poisoned arrows. You shouldn't rejoice after the helicopter explodes, because after that you will need to immediately engage in battle with the next boss.

Your weapon will be taken away, so you will have to attack the enemy with homemade grenades. Stun the boss and then hit him with the ice pick. At a certain moment, perform a simple QTE and deal a fatal blow to the enemy. Now you can go upstairs and enter the Chamber of Souls.
Chamber of Souls
We enter the temple, watch the final video and enjoy the music in the credits. Congratulations on completing Rise of the Tomb Raider!
After a cutscene showing a helicopter chasing Lara's jeep and her guide, the heroine will fall and land on a rocky ledge. From there you can see the city. Walk forward along the narrow passage until you reach a rocky wall.

Jump on the wall, Lara will hang on the ledge. Move right. As soon as the girl reaches the awning in the corner of the rock, jump up and pull yourself up.

You will see a passage leading to one of the temple tunnels. Approach it and Lara will go to the other side.
Search in a cave with frescoes

In the center of the cave you will find a monolith with writings in Greek. In order to read the information carved into it, Lara must better understand this language. Explore the cave. You will find three objects called murals. You can use instinct to pick them out. Instinct can be activated by pressing the corresponding button on the gamepad or keyboard (see control settings). Interactive objects will be highlighted in gold.

Go to each of the three murals found in the chamber (the fourth can be found in the corridor leading to the next part of the level, but can be used after completing all the activities in the chamber.

After interacting with the three frescoes, Lara's skill in reading Greek will increase. Now you can go to the monolith and read it. Both in this chamber and later in the game, reading the monolith will indicate the exact location of coin caches on the map. Open the menu and check the map, a new marker will appear next to the monolith. Walk up to the area and press X, Lara will dig up some coins.

After unearthing the coins, go to the dead end of the corridor with the fourth fresco. Then go to the wall behind which you can see a faint light. Press the interact button and Lara will use the ax to break the wall. Hit him three times to get out.
Find the entrance to the Prophet's tomb

Go left and jump onto one of the aqueduct pillars. Please note that all places where you can jump are marked with white paint. Double jump and Lara will grab the ledge.

Move left and jump to the other side of the hole in the wall. Then rise up.


Perform a few more jumps to the entrance to the main part of the temple. Cross over to the other ledge, move to the right, jump directly over the alcove shown in the picture above, and climb up onto the solid ground. Jump into the hole that is the entrance to the temple.

Lara will find herself in a dark narrow corridor. At the end, use your foot to break the stones that block the tunnel. When the Y button icon appears on the screen, press it on the panel. Repeat this action twice.
Searching the corridors of the tomb

In a moment, Lara will barely survive the trap she activated. To get further, use the pistol, shooting at the rectangular part of the trap almost to its top. When you aim the gun at Right place, the viewfinder will change its color to red. Destroy the trap and move on.

Further down the corridor you will have your first puzzle. Don't jump into the water. Instead, shoot at the rectangle object located above the wooden platform hanging on the other side of the hole. The platform will fall onto the water.

Now jump into the water and go to the wall on the left. Use the ax to break the wall. Water will begin to flow out of the new hole, increasing the water level. Swim to the previously knocked down wooden platform, climb onto it and jump from it into the hole.

In a moment, Lara's life will be in danger again. Another trap will activate and time will slow down, allowing you to shoot weakness traps are two tables shown in the picture, which are located above the three spikes.

When Lara starts to sink, immediately start quickly pressing the X button on the pad. The ax icon shown on the screen will begin to fill in white.

Lara is unable to hold her breath for more than a few seconds, so after freeing her leg from the trap, quickly swim forward by pressing the B button. This will make the floating character move faster.
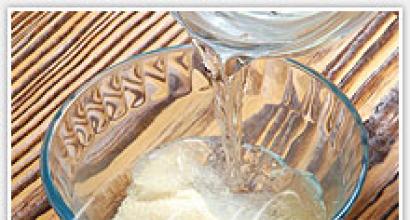
Puzzles at the top of the tomb's main chamber

You have to solve one more riddle. After pulling Lara out of the flooded tunnel, you will find yourself in a large room with a tomb. Again, you must raise the water level to get to the top of the chamber. Go below, jump into the water and note that there is another fragment of an unstable wall on the right side. If you don't see this, help yourself with Lara's instinct by pressing the appropriate button. Go to the indicated location and use the axe. After 3 blows, water will flow out of the hole and the water level in the chamber will rise.

Swim to the other side, near the rocky outcroppings shown in the picture above. Start climbing them. Get to the top, move right, pull yourself up. The platform hangs on ropes in front of you. Jump to her. Lara will be hanging on a wooden platform, and the weight will open the gateway. The water level will rise again and Lara will fall off the platform. Swim towards the beams, painted white and attached to the wall. Climb them, move as far to the right (around the corner) as you can, and once you have a corridor on the floor ahead of you, pull yourself up to it.

After walking a few steps, the floor under Lara will collapse. In moments like these (there are many), the game will test your reflexes. Time slows down for a second and you must jump quickly to avoid getting caught.

Jump to the other side of the chamber using the destroyed pillars and enter the dark corridor leading to the right. Carefully! After a few dozen more steps, the floor under Lara will collapse again - when time stops, jump forward. A moment later, a trap in the ceiling is activated. Time will slow down again and you must shoot at the trap's two weak points.

Another puzzle - the last one in this place. Shoot at the weak point of the hanging wooden platform shown in the picture above. The platform will fall. Now, using the suspended platform (also visible on the screen above), jump to the other side - you must do this very quickly, otherwise Lara will be washed off the platform and you will have to repeat the jump. Use the ax to break the wall. Water will begin to flow out of the hole and the water level in the chamber will rise.

Jump down onto the wooden platform again and this time let the water wash you away. Quickly swim to the previously knocked down platform that is now on the surface, climb up to it and from there jump off the side of the wall nearby. Climb the wall, move right and jump to the pillar on the right.

Once you stand up, notice that there is a board hanging above the counterweight, partially painted white. Jump to her. Lara will wash off again, allowing you to get close to the tomb. Climb up the wooden ledges with skulls.
Watch walkthrough