Homemade stand for a cauldron. Do-it-yourself stove for a cauldron made from a pipe
Metal cauldron stoves are an inexpensive option for a homemade device for preparing oriental cuisine. Many homemade designs and options have been developed, but the simplest is a stove made of a steel pipe. The work is simple, but requires compliance with several rules and step-by-step instructions for independent production.
Collapse
A piece of pipe selected to the size of the cauldron, which is installed on a brick stand; firewood is loaded through the top. Such a stove does not require a lot of time and skills to manufacture, but it will not allow the cook to enjoy the process of preparing pilaf due to the lack of draft and smoke screen from the stove.
Let's look at this reliable option, the production of which will require more time and money, but the result will definitely please you.
Construction of a stove for a cauldron made from a pipe
When making a stove for a cauldron from a pipe with your own hands, it is important, depending on your needs, to draw up a sketch or drawing of your future kitchen masterpiece. Please note a few points:
- Depending on the size of the cauldron, it is important to determine the diameter of the pipe and the dimensions of the entire structure. You should not select a cauldron to match the pipe; it is easier to find a piece of pipe or widen the neck than to buy an expensive cauldron. The depth of immersion in the oven is at least 2/3 of the height of the dish. When the cauldron is completely immersed, the overall height of the structure should be taken into account. But a greater distance to the heated surface will require extra firewood and overall cooking time.
- It is necessary to determine the height of the stove and the dimensions of the base or legs. The stove should not be placed on the floor; it is better to raise it off the ground - this will not only make it easier to maintain, but will also make it aesthetically pleasing. In this case, you will need to spend money on purchasing a sheet of metal for the bottom, so it’s up to you to decide. It is better to take into account the height of the permanent cook in the family; he should not bend over, putting additional strain on his back muscles.
- Before manufacturing, immediately decide how often the oven will be used. You will need to use a thick-walled pipe when installing a cafe stove. For home needs, it is enough to find a piece with a wall thickness of 3-4 mm.
- Select the height of your future stove. The optimal option is the distance from the bottom of the dish to the top of the layer of burning firewood is 300 mm. Depending on the depth of immersion of the dishes, achieve the required gap. If you plan to use several boilers of different sizes, you can change the distance using special inserts.
Design example
Manufacturing steps and instructions
Scheme and dimensions
We take as a basis the use of a steel pipe with a cross-section of 250 mm and a furnace height of 450 mm. 
Using these dimensions, make a drawing and you can start making a stove for a cauldron from a pipe with your own hands.

Diagram and dimensions of the stove for a cauldron made of pipes
Materials and their quantities
You will need to prepare:
To make a handle for the door, prepare a rod 6-8 mm thick and 200 mm long.
Tools
To make a stove for a cauldron from a pipe, you will need to prepare equipment and plumbing tools:
- welding machine;
- electrodes ANO-21 or MP-3;
- grinder with a cleaning and cutting wheel;
- electric drill with a set of metal drills;
- a set of locksmith tools;
- tape measure and marking pencil;
- a workbench with a vice or a small table vise;
Having prepared all the ingredients, you can start making a stove for a cauldron from metal with your own hands.
Making a stove
All work is divided into several stages:
- Having cut the pipe blank to the required length, the edges are aligned with a grinder and a grinding stone. Then the burrs, especially the upper part of the structure, are cleaned with a file.
Important! If the cauldron does not sink to the required depth, you can cut out small segments at the top and bend the top of the pipe. At the same time, we ensure that the dishes are immersed to the required level.
- A sheet of metal for the bottom is laid out on a flat surface, a pipe is installed on top and distributed in the center of the base. Now the pipe is stuck in 4 places after 90 0. The correct installation of the pipe on the base is checked. The joint is welded in one pass.
Then the slag is chipped off and the quality of the seam is checked. The seam does not need to be completely sealed here, but it is better to weld the areas with burns and holes. The workpiece must be cooled.
- Having marked from the bottom in a circle at a distance of 100 mm from the bottom where the legs from the corner are attached, they are installed at 90 0, one shelf is cut for better joining with the pipe and the leg is grabbed at an angle to the pipe of 25 0 -30 0.
The lower shelves of the corner are cut so that the leg touches the floor surface flat. At the bottom, for the stability of the furnace, small pieces of sheet steel are welded. These nickels are scalded only on the inside.
- The door hole for storing firewood is marked from the bottom. It can be made in different shapes. The simplest option is a rectangle made of a sheet of steel. But it is better to use a part cut from a pipe. Opening size – 150/200 mm. The door is hung on small hinges. A simple latch is made from a rod to secure it in the closed position and is welded to the door.
- From the strip you need to make handles for carrying the stove. To do this, mark 50 mm on each side of the workpiece, clamp it in a vice and bend it with a hammer. It is necessary to maintain an approximate bending angle of 90 0.
Then, having marked the mounting points on the sides of the pipe, they are grabbed. After making sure the handles are in the correct position, weld them to the base.
- Using a grinder and a file, all welding points and burrs on parts are cleaned. All protruding sections of the sheet along the bottom are first cut off, then the seam is processed with a grinder with a grinding stone.
- If desired, the stove can be painted with heat-resistant paint. To do this, you must first degrease all surfaces with a solvent.
- Do-it-yourself stove for a cauldron made from a pipe ready.
Making a chimney
On the back side you can embed a piece of pipe for the chimney. In this case, the smoke will escape through the pipe and will not sting the cook’s eyes. A hole is cut in the furnace along the diameter of the pipe using electric welding at a height of 150 mm from the top of the furnace.

Then a branch is made from the pipe at 90 0. Having inserted it into the hole, 3 tacks are made, the correct position of the outlet is welded and it is welded in 1 pass. Then a pipe 1.5-2 m long is put on it, at the top of which a protective canopy is installed. Now the gases are diverted straight up.

Expert opinion
Pavel Kruglov
Stove maker with 25 years of experience
You can increase your traction in a simple way. At the bottom of the stove, drill a series of holes with a diameter of 8-10 mm for ventilation of the stove. But it is better to make an additional groove with a box. It will serve as an ash box and ash pit. In this case, they make servicing the stove easier and prevent coals from falling out of the holes.

Ready-made stove design for a cauldron made from a pipe
Craftsmen have developed a number of improvements to the design of the cauldron stove. Among them we can highlight;
- Metal stove cauldron with barbecue. By welding the grill to the stove, the metal required for the manufacture of 1 side panel is saved. Space is saved on the site or in the gazebo. You can simply make cutouts - segments for rotating the skewers and use the oven as a barbecue.
- If the structure needs to be moved around the site and finishing elements need to be added to the structure, the stove can be placed on a cart with wheels. By performing simple finishing using twisted rods with curved ends purchased from blacksmiths, you can decorate the stove with different metal patterns.
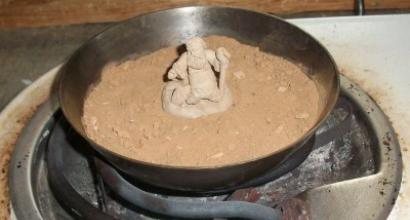
- You can make a structure with a roof made in the form of a cap. And a small gnome will appear on your site. It all depends on the imagination of the master.
- You can upgrade a steel stove that loses heat when burning. To do this, it is lined with natural stone or brick, and a tandoor or oven can be attached to it. In this case, a permanent structure is created on the site.
Other options
- Not very difficult to make.
- One of the best options for large cauldrons is. In this case, a large cauldron is immersed a certain distance from the inside of the disk. 1 design may require 3-4 discs.
There are many options, you can look at and make any design. It all depends on the capabilities and skills of the home craftsman.
How to use it correctly?
You should not immediately start cooking pilaf on a new device. First you need to burn off the remaining oil from the steel. If an old water pipe was used, all internal surfaces are cleaned with a metal brush to bare metal. Then the oven is washed with water.
Now you can lay the first stack of firewood and heat the stove. During the first “start-up”, firewood can be loaded through the top. Subsequently, they are placed through the door. After thoroughly calcining the pipe, remove the slag and remaining wood from the stove.
Now you can start cooking pilaf on a homemade stove. Firewood is placed along the upper edge of the door and ignited. Now they should burn out a little and only then put the cauldron on the stove. 
Conclusion
A DIY stove made from a pipe for a cauldron will serve for a long time if all work is done responsibly and carefully. The design is simple, easy to manufacture, and with minor modifications, you can decorate your site. And food cooked over a fire always tastes better. It gives off the smell of smoke and home.
←Previous article Next article →I look at my friend’s feed, search blogs using keywords and come across the same thing everywhere!
Listen up, comrades, ladies and gentlemen, bloggers! Well, that's not possible. After all, I’ve been writing about cooking for more than 12 years; seven years ago my first book was published, where I, it would seem, described and showed everything in sufficient detail. But no! The abuse of the unfortunate cauldron continues!
It’s time to understand, dear friends, that each utensil requires an individual approach. The frying pan needs a stove. Pan - burner. Pot - Russian stove. And the cauldron needs a hearth.
Moreover, you need at least the simplest fireplace, which can be built in five minutes even in an open field.
A hole is dug in the ground. A cauldron is placed in it. The sides of the cauldron are lined with earth and stones. A tunnel hole is left in front and below where the firewood is placed, and a hole is made in the back and above so that the smoke can escape.
All! Do not need anything else!
How it works?
As can be seen from the picture, the flames lick only the lower part of the cauldron. At the beginning of cooking, when the food is most often fried, this heating is quite sufficient. Gradually, the earth and stones from which the hearth is built warm up, and by the end of cooking, when rice is placed in the cauldron, they are already warmed up so much that they give off heat exactly where it is needed - into the walls of the cauldron. That is why the rice will not remain a sticky mess, as happens quite often when cooking on a gas or electric stove, where the cauldron is heated only from below. That’s why the food doesn’t burn, as often happens with inexperienced cooks on the stove. When the food is ready, the firewood can be removed altogether, but the cauldron will still be hot for a very long time - as if waiting for late eaters.
Shepherds cook on such hearths in the evenings, as they cook at weddings. This hearth is suitable for a 3-liter cauldron for two or three eaters; this hearth copes excellently with cauldrons that require four healthy guys to carry.
Many people in Uzbekistan still celebrate weddings at home, in their backyards. Wedding cauldrons are public property; there are several of them for the entire mahalla or village. Where there is a wedding, they carry it there. And what, for the sake of one day they will build some kind of special oven for a two-hundred-liter cauldron? No, of course not! They will do exactly what I just told you and prepare pilaf, which not every teahouse can produce.

What kind of fireplaces are there in teahouses? Yes, they are approximately the same in design as earthen ones, just for convenience they are arranged on a pedestal so that the cook does not have to bend over or work while squatting. The upper surface of the fireplace is leveled, covered with tiles - this is, of course, more convenient - and the smoke is diverted into a chimney so as not to breathe it for days on end.
I would like to warn you that a cast-iron stove with a hole for a cauldron, installed on a similar stove, is a so-so replacement for brick and clay. The hearth should be made of the same material, both the lower and upper parts. Now you can re-read what was written above again and understand everything yourself.
Try to draw the main conclusion for yourself - an iron stove, a barrel on legs, etc., etc. - this is all a way out of the situation, but not a major solution. And the rings over the barbecue grill, tripods, and even worse - a cauldron on a cast iron grate - are worthless solutions.
The major solution is to build a simple stove from fireclay bricks, line it with simpler bricks and install a firebox door in it, build an ash pit, install a blower door, a grate and a damper in the chimney. If all this is installed, then such an improved fireplace simply becomes much more convenient during work.
After all, how is the temperature regulated in an earthen hearth? If you need a stronger, hotter fire for a short time, add brushwood and wood chips. You need long, unhurried heat; place a long, thick branch, trunk or root under the fireplace - let it smolder. If it decays, push it deeper. What if you need to turn off the heat altogether? Oops, hurry up and shovel the coals out from under the fireplace!
In a fireplace with doors and blowers, everything is much simpler - adjustments are made mainly due to draft.
True, in this case sometimes unexpected effects arise. So, for example, if you turn off the chimney damper and the air supply, then for a minute everything in the cauldron begins to boil twice as hot. This happens because in normal mode, cold air constantly flows under the cauldron, as if the hearth is ventilated. And if the air flow is blocked, then the coals do not go out immediately, but the heat simply has nowhere to go - only into the cauldron!
Of course, to radically lower the temperature, it is better to remove the firewood and coals from under the cauldron altogether, but the doors should be left wide open so that under the cauldron it is ventilated as soon as possible, the bottom cools down and the food in the cauldron does not burn.
In general, everything is convenient, but the energy efficiency of such a fireplace is not much higher than a conventional earthen one.
Another drawback is the uneven heating of the cauldron. After all, cold air enters from one side, and hot gases heat the other side of the cauldron more. Yes, this disadvantage can be overcome by adapting to placing firewood and coals in the right place.

But what if you make more than just one outlet for smoke, but arrange, for example, four smoke outlets evenly distributed in the upper part of the firebox? Just imagine that you are looking at the cauldron from above, and the smoke exit holes are located every ninety degrees, in the letter X, and then the smoke is collected in a common collector, and only then into the chimney? After all, the heat will be distributed much more evenly!
Also imagine a cross-section of a flame. At the bottom, where the firewood is, it has one diameter, and at the top, where the flames are hottest, it expands. What if the firebox of the hearth is not built in the form of a brick box, which itself takes quite a long time to warm up, but rather built in the shape of a vase - with an expansion towards the top, as if repeating the shape of the flame from the fire? After all, this will undoubtedly increase the efficiency of the fireplace.
But that is not all! In order to increase the efficiency of the fireplace even more, a circuit with a collector for collecting smoke was used in my kitchen... below, below the level of the grate. Don't believe this can work? You ask yourself the question, how does this hot air go down? I also didn’t believe the Master when he offered me such a move, but now I’m grateful to him.
See how it works and why it's good. The hot air from the flame remains at the bottom of the cauldron, giving it its heat, until it is supported from below by hotter air. Then the already cooling air parts at the edges and falls down, once again warming up the walls of the vase-firebox. And only after that, under the pressure of the following air currents, it goes into the chimney pipe. In general, the difference in levels between the blower door and the chimney pipe is fundamental, and the fact that hot air can rise and fall along the way is a fact well known to stove makers.
However, if any of you decides to build such a rather complicated fireplace, then think about making a covered, so-called summer passage. Simply put, at the back of the fireplace, on top, you should leave one small passage leading directly into the chimney pipe. A damper should be installed in it, which should be opened when the fireplace is still warming up and closed when the chimney is already warmed up. The fact is that after long breaks in the operation of the fireplace, it still happened a couple of times that the smoke did not want to go into the chimney; I had to warm up the chimney for quite a long time before the system started.
So what now, if you don’t build such a stove, then you can’t start cooking? Practice shows that this is not so. You can cook in bad conditions, a cauldron forgives a lot, but if you want to do something well, you first need to create the conditions.
After all, if you create the conditions, you can cook quite well on both a gas and an electric stove. But more about that next time!
There are an innumerable variety of delicious dishes in the world that are prepared in all sorts of ways. Among them, dishes cooked over a fire have gained special love among gourmets and ordinary eaters. Fish soup, pilaf, borscht and other dishes cooked in a cauldron have an amazing aroma and simply amazing taste.
Types of stands for cauldrons

Cauldrons come in a variety of shapes and sizes; a hemispherical cooking container is considered classic. However, it will not be possible to cook anything in such a “saucepan” if there is no stand prepared for the cauldron.
In the simplest version, the role of a stand can be played by the most ordinary bricks, but such a support is unreliable and does not look aesthetically pleasing. If you want to cook over an open fire in comfort and without worrying about safety, then be sure to familiarize yourself with the types of cauldron stands and the options for making them yourself.
Upgrades for convenient cooking are varied:
Pot stand in the form of a tripod (tagan)- made in the form of a circle in the upper part from which three legs go down. The support of the tagan is provided by the legs located at a slight angle, and the cauldron itself is inserted into the circle during cooking.
This is one of the simplest models, available as a monolithic product or as a collapsible one, which is more convenient for outdoor events. Artistic forging is used as decoration for these products, which provides the aesthetic appearance of the tripod.
Stands on four legs no less comfortable than tripods. This option is also available in disassembled form and in the form of a cast structure.
Grill holder- the most convenient thing if you plan to cook outdoors not only over an open fire, but also in a cauldron. This design is made in the form of a square base and a circle (in which the cauldron is installed) on top.
In addition to cauldron stands used outdoors, there are also miniature options:
- For the stove. It is necessary for cooking food in a cauldron on an ordinary burner. The device is very convenient and does not take up much space.
- For the table. This type of support for a cauldron is often made in the form of a tripod. The legs of the structure are short, made of wires crossing each other. This type of stand is available with supports made of wood, so that when cooking in a cauldron the table surface is not damaged.
Stands for cauldrons can be:
- in the form of a circle under a cauldron;
- with a hook on which the container is hung.
How to choose a stand for a cauldron
The fundamental criterion when choosing a client is container volume for cooking, it must match the diameter of the stand's circumference. If the cauldron is wider than the circumference of the stand, then it will not be able to be placed stable, which is unsafe. If the cauldron is smaller than the circumference of the stand, then placing it in its proper place simply will not work.
Types of stands for cauldrons


If you use cauldrons of different sizes, then it is worth purchasing a stand for the cauldron in the form of supports and a hook, to which attach a thick-walled pot. An important factor when choosing a cauldron is the material from which it is made:
- cast iron - such a support is universal, can withstand quite strong heat and is almost impossible to break; the disadvantage of the cast iron design is its considerable weight (this stand is more suitable for stationary use);
- steel - a stand made of this material weighs less than cast iron, but is practically not inferior to it in its quality characteristics, this option is optimal in terms of weight - quality - reliability;
- aluminum is the material from which stands for cauldrons are the lightest, they are convenient to take outdoors, but these structures do not differ in strength.
Self-production of a support in 15 minutes
If purchasing a customer is impossible for some reason, make it yourself. For this you will need:
- old bucket;
- hammer;
- chisel.
The scope of actions to create a client in record time is as follows:

At the site of the broken bottom a cauldron is placed, firewood is placed through the door and a fire is started. Now you can start cooking!
If this is your first time cooking in a cauldron, then you need to prepare it correctly. To do this you will need:
- hold an empty cauldron over the fire so that the factory oil burns out in it;
- leave the cauldron with sunflower oil poured inside (at least a liter) on the fire for 15–20 minutes.
At this point, the preparation of the cauldron is completed, you can place it on the tray and start preparing dishes that will be mind-blowing in terms of aroma and taste.
Barbecue at the dacha is a common thing; a Russian person has a craving for friendly feasts in the lap of nature in his blood. But no less popular are camp kulesh, smoky pilaf and other dishes cooked outdoors in a cauldron. If you want to expand the range of dishes with which you can honor your friends when you come to the dacha with a noisy group, we suggest you learn how to make a stove for a cauldron from a pipe with your own hands in order to save money on purchasing a finished product.
Advantages of a cauldron stove
In a cauldron you can cook traditional oriental dishes, goulash, rich soups, including fish soup, smoky stews, conder, and aromatic pilaf. It is believed that only in such a cauldron with a rounded bottom and thick walls will the taste of these dishes be fully revealed.
The spherical shape of the bottom allows the flame to evenly heat the walls of the cauldron and the food in it. The food does not burn, it stews slowly, “simmering” in its own juice. Sounds delicious, right? But if you don’t have such a device in your arsenal, this variety of dishes is closed to you; on a fire or burner, the result will be completely different.
What is the difference? A stove for a cauldron made from a pipe or other consumable material has a hole for a cast iron container. The width of the hole allows the bottom of the vessel to fit 2/3 deep. It is this position of the cauldron during cooking that will provide the required temperature for uniform simmering of the food in it.
Such a roaster can be made of brick, clay, an empty gas cylinder - there are many options. In this article we will talk about how to make a stove from a pipe under a cauldron with your own hands, without outside help.
Preparatory work
Despite the fact that the process is simple and intuitive, you need to carefully prepare for the work in order to be satisfied with the results.
Make a detailed drawing based on the size of the cookware you will cook in and the desired dimensions of the structure
- Consider the design, shape and dimensions of the stove for a cauldron made from a pipe - the drawing should be detailed, with measurements and calculations. When making calculations for clarity, use the cauldron that you will use in the future so as not to miscalculate.
- Decide whether you will make a portable or stationary structure. The portable option is convenient - you can have a picnic outside the site. With a stationary model there is less fuss, no need to fold and unfold, or take it to the utility room. Plus, you can use it to decorate the exterior of your dacha; it is more economical and easier to maintain.

Furnace design drawing
To work you will need consumables:
- thick-walled pipe;
- corners and pipes of small diameter for making handles and stands for the structure;
- welding machine with electrodes;
- hammer;
- drill;
- gloves;
- welding mask.
Options for homemade stoves
Simple design

A simple stove model
The simplest, and therefore most common, option is a metal stove for a cauldron with a pipe, which is a cut cylinder on the ground. Sometimes a stand (made of bricks or a tripod) is used. The ratio of the height to the length of the product is 3 to 4. The opening of the firebox is of the same proportions; there is no door on the firebox.

A simple stove model
If your goal is cooking with smoke, simple Asian dishes or stews, you can choose this option.
- Determine the initial diameter of the cauldron - take a measurement along the outer edge of the rim with a centimeter or any cord or thread.
- From the resulting figure we subtract 4 mm (calculation for a volume from 3 to 12 liters) and multiply by the number “Pi”. This is the diameter you need for the workpiece.
Advice: if a pipe with a suitable “neck” is not found, cut its upper end, spreading the “petals” to the desired width.
Then hang the pot over the workpiece on a tripod, adjust the height - you can start cooking.
How to make a tripod? A piece of fittings or pipe will be required. We make a ring, weld it, attach the legs to it (using a welding machine or bolts). Convenient to use on hikes or if you decide to hold a feast outside your area.
A more complex stove for a cauldron made from a pipe is a model cut crosswise along the edges. You can also cook only smoky dishes with this design.

To increase the diameter of the workpiece, cut its upper part into “petals” and bend it to the desired angle
Progress:
- The section is made with a grinder on both sides, the resulting petals are moved outward.
- Holes are drilled in the lower petals for L-shaped pins with sharp lower ends (they can be made from scrap materials). On them, the product will be attached to the soil or mini-foundation for stability.
- A window for the firebox is cut out at the bottom.
- Legs and handles are made from corners or scraps of reinforcement, then welded.
- The finished product is coated with heat-resistant paint to protect against corrosion.
Note: a variant of such a stove with a bottom is possible. In this case, the lower edge of the pipe does not need to be cut into petals - just weld a circle of metal of the appropriate diameter, and make the legs longer.
Improved design
If you want to be able to prepare all the dishes listed above at your summer cottage, you will have to work out a more detailed version of the stove for a cauldron made from a pipe, with a chimney, a vent and a grate.

A model with a chimney and ash pit will allow you to pamper your household with a variety of dishes and make the cooking process more comfortable
The work progress is supplemented with several steps.
- It is necessary to make holes for the ash pan and for fixing the chimney.
- At the top of the pipe section, instead of “petals,” metal rods are welded crosswise.
- We install a grate between the blower and the clumsy slot (it can be made from strong steel wire by welding). The grate is attached to the base on supports made from segments of corners.
- A mini version of the chimney is fixed on the back of the product. Its length should be slightly greater than the height of an adult. For the comfort of those who will be near the stove while cooking, place a tin can with several holes at the end of the chimney.
- From the scraps obtained when making holes in the base, we make metal doors (for safety reasons, process the edges). You can buy decorative doors. We fasten them with a welding machine and bolts.
Here is an improved version of the stove for a cauldron made from a pipe, made by yourself. It can serve as a stationary cooking device or as a portable one. But due to the additional elements, its weight is significantly increased, so difficulties may arise when moving. This means it is better to use it in one place. There will be no problems with cooking, as well as with adding fuel. Smoke does not interfere, draft is easily controlled using a blower, and cleaning is easy.

You can make a stove with a bottom
It will take little time to install such a stove - the design is simple, additional elements are made from improvised materials, there is no need to spend money, and the result of efforts looks and functions no worse than purchased models.

Decorative elements can be added
Advice: if you plan to place dishes with a larger diameter on a homemade stove than its “neck” provides, we recommend including a metal concave cross in the list of additional improvement elements. This installation will help to avoid jamming the cauldron in the opening (its round bottom is not elastic, problems may arise with its removal).
Now you know what you need to make a stove for a cauldron from a pipe yourself, it’s not difficult, right? Remember the importance of calculations, and everything will work out.
Video: oven under a cauldron
23348 0 1
Do-it-yourself oven for a cauldron made from a pipe or how to conquer oriental cuisine without leaving home
Oriental dishes are not only incredibly tasty, but also very healthy, as evidenced by numerous longevity records held by residents of Asia. The main secret of the presence of such important qualities for food is a unique method of cooking, which consists of using special utensils called a cauldron and a special oven. And if the first one can only be bought, then the second one can be created with one’s own hands, which I will tell you in detail.
Let's get started
I should immediately note that a suitable oven can also be made of brick and coated with clay. This is exactly what they often do in the countries of Central Asia.

As you can see, in this case a special round ring is also created for convenient immersion of spherical dishes. But for myself personally, I still chose the option of a metal pipe for the following reasons:
- Simplicity and speed of production. Of course, you will have to work, but the whole process will take much less time and effort than erecting brickwork;
- High heating speed. Brick retains heat longer, but you don’t want to heat the room. The steel shell will much faster create the necessary temperature conditions at which you can start cooking;
- Compact and mobile. The metal structure takes up much less space and can easily be transported to any place on the site or even to the utility room during your absence;

- Low selling price. You will most likely be able to find most of the materials at your own dacha, which will significantly save your family budget.
A stove for a cauldron made from a pipe is made with your own hands in three stages:

Step No. 1: preparing tools and materials
Materials you will need:
- Large diameter pipe fragment. This will actually be the main “body” of the future furnace. It is best, of course, to find such a product left after any construction work on your own site, but if you don’t find a suitable piece among your supplies, then you can look for it at virtual “flea markets”; surely someone was more thrifty at one time .
As a last resort, you will have to go to a specialized store, but keep in mind that there will most likely be pieces of much longer length than you need and this will lead to overpayment;

- Pipe fragment with a cross section of 100-150 mm to create a chimney;

- Several iron angles or profile tubes to create legs;

- Steel grid or sheet to create a bottom.
From the tools:
- Electric drill with metal drills to create the necessary holes;
- Angle grinding machine for cutting iron products;
- Welding machine for connecting the main fragments of the furnace. This is the most expensive of the tools required to create a cauldron oven;
Welding machines are quite an expensive “pleasure”. Therefore, if you do not have such a unit on your farm, I recommend not buying it for one-time use, but renting it, which will be much more economical.
- A hammer, without which I personally never start any work;
- Spirit level to ensure that the structure is level.
Step #2: design

At this stage, you need to make several important decisions:
- Will you select a pipe for a cauldron or, conversely, a cauldron for a pipe? This largely depends on what you already have on hand. But the main thing is that as a result the dishes are immersed in the oven body by two-thirds or even along the upper edge. Otherwise, to fully warm it up, an irrationally large amount of firewood and time will be required;

- Are you planning to install racks? You can install the structure on the ground, it is simply then made higher, and the fire itself is lit directly on the ground. If you attach legs, which is much more aesthetically pleasing and functional, then in this case you will also need to weld the bottom to the bottom of the pipe;
- Who will use the oven most often? The height of the racks depends on this. That is, if you personally intend to engage in oriental cooking, then during the cooking process you should not bend over, and the stands should be suitable for your height;
- How much should the prepared pipe section be cut? To obtain the highest efficiency, it is necessary that the distance from the burning wood to the bottom of the cauldron does not exceed 300 mm. Adjust the steel cylinder to these parameters;
- Are you going to move the stove from place to place? Since the choice fell on a metal structure, then most likely the answer is positive. Then don't forget about the pens, the size of which must correspond to the dimensions of the palm;
As a result, you should end up with something like the following drawing:

Step No. 3: performing assembly work
Now let’s begin assembling the prepared materials into a single useful structure that will allow you to experience the wonders of oriental cuisine right on your own lawn:
- We apply all markings according to the drawn up project;
- We cut off the excess part of the pipe using a grinder. After this it is necessary check the horizontal and vertical of the resulting cylinder with a spirit level;

- We cut out a combustion hole closer to the bottom. Its shape can be either rectangular or semicircular, depending on your taste, but this factor does not affect functionality. You should not throw away the separated piece, as it can later become an excellent door or damper;

Never use an angle grinder without a protective guard.
Not only can sparks and dross fly in your face, there is also the danger of a ruptured disc, the fragments of which can cause very serious injuries.
- Now turn the cylinder over and at a distance of 100 from the top edge we create a hole for the chimney pipe appropriate diameter;
- Using a drill or the same grinder, we make several ten-millimeter through openings on the sides of the structure. Thanks to them, the fire will be able to receive the necessary amount of oxygen;
Do not make the flame air supply points too high, as the smoke escaping through them will sting your eyes unpleasantly and interfere with the cooking process.
- Using a welding machine, we weld the chimney part from two pieces of pipes connected at right or obtuse angles. Here you can use a “knee” for them or cut the edges at 45 degrees or less, be guided by the situation;

- The resulting We weld the chimney to the hole cut out on the body;
- Now we install corners or profiled pipes as legs. You can use either four or three supports, the main thing is that an equal distance is maintained between them, and the stove will ultimately be quite stable;
- Making the bottom from a lattice or solid metal sheet;

- Fixing the handles at the top of the structure;
- On one side of the firebox and on a set aside piece of metal, we drill a couple or more holes through which we thread wire, acting as loops. So you will get a homemade fire door, to which you also need to attach a handle;
- We clean all burrs and eliminate other possible design flaws;
- We apply stove varnish or fire-resistant varnish, after which we can consider the work completed.

But there is no limit to perfection, and the design you make can always be improved. Here are some of the ways:
- Possibility of using cauldrons of different diameters. This is done very simply. It is enough to weld a ring onto the upper edge of the stove, the outer diameter of which will correspond to the cross-section of the cylinder, and the inner diameter will be suitable for installing rings from a standard wood-burning stove. Thus, by adding or removing them, you can adjust the width of the outlet hole for different dishes;

- Implementation of the blower. To do this, it is enough to place the grille not at the very bottom, but a little higher, and make an additional door for the lower compartment. This will greatly improve the performance of the furnace;

- Creating a stand for a cauldron. This is not exactly an improvement to the design you created, but rather some useful addition to the process of its operation. Having built a high ring on which you can place the spherical dishes, you can remove them from the heat at any time and place them on a flat surface. A pre-made section from the main pipe is quite suitable for this.

Gas cylinder stove

Many summer residents may have used gas cylinder, so why not use it as a pipe? Moreover, it already has a bottom. The workflow here is very similar to that described above, but has some differences:

- Removing gas residues. Previously, the cylinder contained a flammable and explosive substance, remember this! Therefore, before starting work, open the valve and leave the product for several days to eliminate the possibility of a tragedy;

- Marking. This procedure is similar to that carried out when creating a stove from a pipe;
- Creating a firebox. We cut out the required hole using a grinder according to the drawn lines. Here, again, you can make any shape at your discretion, the main thing is that it is convenient to place firewood;
- Adjusting the oven height. According to the markings, we cut off the top of the cylinder. If necessary, bend the “petals” of the edges so that the cauldron is at the optimal distance from the hearth during cooking;

- Installation of functional accessories. Here we are talking about legs and handles, with which the structure is much more convenient to operate, and it will look more aesthetically pleasing;
- Internal firing. You can do without painting, but it is necessary to add firewood and bake the inside to remove any unpleasant residual odors before you start cooking.

Conclusion
After you build the oven, you will finally have a great opportunity to practice the culinary delights of the East. It is especially pleasant that the described method allows you to get by with minimal costs of finance, effort and time. So go ahead, delight yourself and your loved ones with delicious and healthy oriental dishes.

The video in this article will give you an additional opportunity to familiarize yourself with some information that is directly related to the topic presented. If you have any questions while reading the material, then ask them in the comments.
July 25, 2016If you want to express gratitude, add a clarification or objection, or ask the author something - add a comment or say thank you!