A two-story extension to a one-story brick house. Veranda attached to the house - design projects and decoration of a modern terrace (60 photos)
Over time, owners of private wooden houses sometimes plan to increase the area of their own home. The fastest and most reasonable way to implement this plan would be to build a frame extension to the house with your own hands. The frame is easy to construct and does not require special construction skills. If this is not a complex project, then it can be erected in a fairly short period of time. How to choose the type of frame extension to the house, what materials and what recommendations exist for each stage of construction.
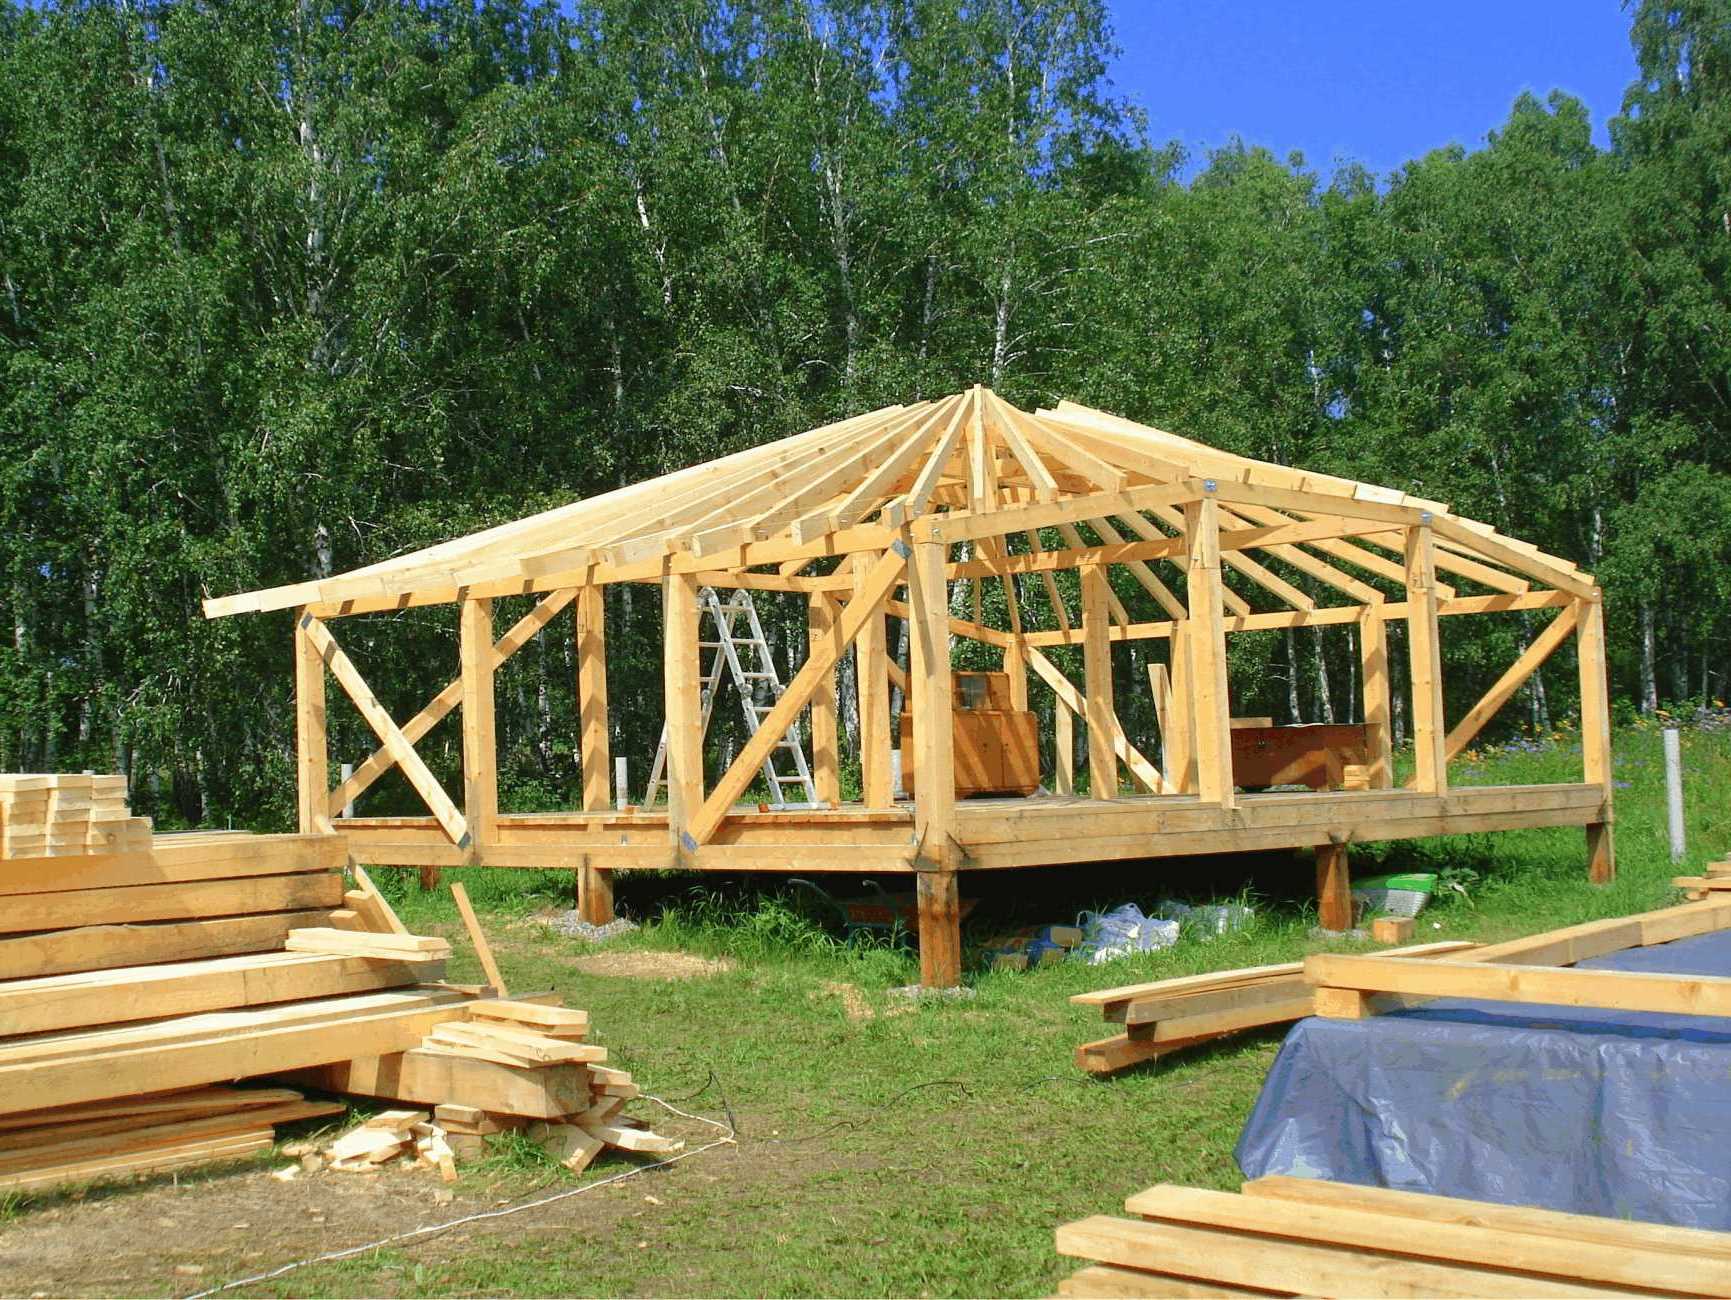
Frame extension to a wooden house
When a frame extension to a house is being built, the step-by-step instructions include not only the work of drawing up an estimate and coordinating the design of the future structure. There are also a number of nuances that need to be taken into account.
DIY frame extension.
Before agreeing on the project and building a frame extension, you need to choose what it will be like and what purpose is pursued by the new construction work:
- The easiest do-it-yourself frame extension to a house in terms of implementation and cost is a summer veranda or terrace for relaxing in the summer. Due to seasonal operation, the premises will not require large investments. Minus high-quality insulation, moisture-proofing and heat-insulating membranes. You will also need to use high-quality terrace tiles when installing a summer kitchen. If the summer veranda will not be used as a summer kitchen, then there will be no need to lay utilities at the initial stage of construction.
- A frame extension to a wooden house can be an additional full-fledged living space in an existing home - with one or several rooms. In this case, the structure will require additional insulation to reduce the cost of heating the room, choosing a more solid type of foundation and carrying out moisture insulation work.
- An extension to the old house of additional utility rooms, which will require timely and competent installation of utilities during the construction phase. All pipes must be carefully insulated for their further year-round use.
On a note
The choice of the type of frame extension to the house is also important in order to ensure the best connection with the already built walls, foundation and roof of the old house. If you do not attach importance to the similarity of the structures of both buildings, distortion or shrinkage of the house, cracks and further destruction of the structure may occur.
Choosing a foundation
The type of foundation that is being built also depends on the further intended use of the frame extension. Ideally, the foundation of the main part of the house should match the extension.
 Pile foundation.
 The choice of foundation for a frame extension with your own hands depends largely not only on the characteristics of the already erected wooden house, but also on the natural conditions and quality of the soil at the construction site. The main list of materials used is as follows:
- Concrete.
- Brick.
- Stone.
- Wooden beams and piles.
- Metal rods.
On a note
When choosing the type of foundation, it is necessary to take into account the depth of the main structures. When constructing a multi-storey or massive extension, the depth must be more than 700 mm.
The main types of foundation that are chosen when building a frame extension with your own hands are:
- Tape.
- Slab.
- Pile.
- Columnar.
- Pile-grillage.
 Strip foundation.
 If the construction is planned to be two-story or massive, it is necessary to make a choice in favor of a strip foundation. When using it during the construction of a frame extension with your own hands, the following step-by-step instructions:
- It is necessary to mark the territory. This is done using wooden pegs and a rope stretched between them. The markings will indicate the place for the trench for the future strip foundation.
- The soil is excavated to the depth of the already installed foundation for the house itself, or to the depth necessary for the construction of an extension. The bottom of the trench must be covered with a layer of crushed stone. Each layer must be thoroughly compacted.
- Formwork for pouring concrete mortar is prepared from wooden boards. Its height should be equal to the height of the future foundation. An important point is that it is necessary to carry out waterproofing work along the entire perimeter of the future foundation, as well as lay metal reinforcement to give strength.
- A third of the installed formwork is filled with prepared concrete mortar until it hardens completely. Subsequently, the remaining part of the cement is poured and air bubbles are removed using a special vibrator or by tapping the formwork walls with a hammer.
On a note
The upper part of the fill should not only be leveled at the same level, but also covered with film for more thorough drying. To prevent cracks, it is recommended to lightly wet the surface.
Flooring installation
We have found out how to attach a frame extension to a house with a high-quality foundation, now we will figure out how to install the floor. There are two ways to install the floor:
 Installation of wooden floor.
Concrete, most suitable for an extension with a strip foundation - which will ensure the greatest stability of the structure. The soil inside the already installed foundation is excavated to a depth of about 350 mm. The bottom of the resulting niche, as well as the foundation trench, is filled with sand and crushed stone, or a 20-centimeter layer of expanded clay is filled in for better insulation.
If the extension to the house is framed, then using a level, beacons are installed for further pouring of the cement floor screed, on which tiles, wooden flooring, or flooring corresponding to the purpose of the room are already laid. It is easier to install a floor heating system in a cement screed, if one is planned.
Installing a wooden floor will be more economical and environmentally friendly. According to it, beam floors are laid, installed on top of the waterproofing membrane. The wooden beams are fastened to the foundation using special anchor bolts.
Corner connections of floor beams installed along the perimeter of the foundation of a frame extension to a wooden house are made using the type of lock connections. Next, the transverse floor beams are installed, layers of insulation and the finishing coating of the extension floor are laid.
Installation of extension
Video and photo reports from real objects will tell you more accurately how to install a frame extension to a house.
In short, a do-it-yourself frame extension to a wooden house and the most important part - its base - are mounted as follows:
- Using dowels and a hammer drill, wooden beams are mounted to the floor and the first wooden crowns;
- Vertical frame beams are installed along the perimeter of the foundation of the extension and the places where future doors will be installed, in increments of no more than 70-100 cm;
- To give strength to the frame extension, transverse floor beams are installed;
- If installation of the second floor of the extension is necessary, it is necessary to additionally strengthen the ceilings of the first floor.
Attaching to a wooden structure
One of the important points in the construction of a frame extension to a wooden house is its connection with an already built structure.
If the selected materials, foundation depth or other technical characteristics do not match, then it is necessary to make an expansion joint at the junction of the foundations of the old house and the extension.
 Extension using frame technology.
 Work can be performed in two ways:
- Laying roofing material between parts of the foundation, if their parts are smooth and vertical.
- Laying foamed polyethylene and expanded polystyrene at the joints, filling the upper part with sealant and a special closing lining.
Roof
If you choose the simplest type of roofing - a pitched one - then installation of the floors occurs quite quickly:
- The beams are mounted at an angle - from the slope to the vertical beams of the extension with a protrusion of at least 300 mm;
- Sheets of OSB, plywood or frequent rows of sheathing are laid for the final installation of the roofing;
- Actually, the final touch will be the installation of the selected roof - slate, iron sheets, tiles or other options;
- sheets of mineral wool placed between the rafters;
- The insulation is masked by sheathing with OSB sheets and decorative elements.
Insulation
One of the final stages of construction - the process of insulating the extension to the house - also depends on the intended purpose of the future structure. If the building is not intended for year-round use, then the most economical type of insulation is selected, or work to preserve heat indoors is not carried out at all - when choosing a summer type of construction.
 Do-it-yourself insulation.
 In other cases, layers of insulation are laid not only during the installation of the floor and roof, but also at the stage of covering the frame racks with sheets of OSB boards. comprises:
- Internal lining.
- Vapor barrier membrane.
- A layer of insulation.
- Windproofing material.
- External cladding.
Insulation of a frame extension to a house can be carried out using mineral wool from the middle price category, or more expensive ecowool, but environmentally friendly and treated against fire and.
Finishing
The final stage of construction is finishing work inside the frame extension. They depend not only on the purpose of the premises, but also on the costs that the owner of the house is willing to bear. However, when choosing installation, you should also take into account the type of foundation laid and the reliability of the supporting beams - heavy coatings will significantly reduce them.
No matter how large your private home is, sometimes you need to add another room to it. The purpose of a new room can be different: a bedroom, a storage room, a gym, a veranda, a dining room, even a bathhouse or a garage can be set up inside. The best option in this case is an extension to the house from a frame. The structure is placed on a foundation, a kind of frame “skeleton” is made, onto which walls made of OSB boards, insulation and waterproofing are “put on”. The extension to the house is equipped with a floor and a separate roof, sometimes windows and always a door.
Before starting construction of a frame extension to the house, decide on its location. On the north or east side it is advisable to place a pantry or utility room, on the south or west - a bedroom or living room (then there will be a lot of light in the room, during the day the sun will warm up the frame extension, so you will save on heating).
If the extension contains a bedroom or living room, then build it on the south side - this way you can save a little on heating
Now sketch out a plan of the house with a new room on a piece of paper, indicate the exact dimensions of the building and the materials that will be used in construction.
This plan must be submitted to the technical inventory bureau of your locality. Of course, not all homeowners run to BTI to organize a frame extension. But in vain! If checked, the illegal building will most likely be required to be demolished. Do you need such problems?
As practice shows, BTI specialists will not create obstacles and will quickly approve the project (within a maximum of 10 working days).

Permission from the BTI for an extension to the house will be issued within 10 days. Provided that the application meets all established requirements, and the construction meets technical standards
Tools and materials for creating a frame extension to the house
Permission from the BTI has been received. Now you need to prepare tools and materials for construction. You will need:
- cement mortar;
- wooden boards;
- sand;
- small pebbles;
- OSB boards;
- insulation;
- waterproofing;
- putty;
- paint for OSB boards;
- roofing material;
- wooden or metal door (at the owner’s request);
- window in a plastic or wooden frame (if necessary);
- linoleum, ceramic tiles or laminate for flooring;
- perforator;
- construction mixer;
- rollers and brushes;
- nails and screws;
- polyurethane foam;
- construction stapler;
- shovel;
- metal pipes with a diameter of 15-20 cm, a length of 2.7-3 m.
Cement mortar is sold in bags of 25 kilograms each. The rules of use are indicated on the product packaging. Price - 700 to 2 thousand rubles, some of the best manufacturers are Silka, Maxsil, Mapei.

The base of the extension must be strong and stable, so choose high-quality cement for the foundation, not a cheap mixture
Wooden boards will first be needed to create the foundation formwork. They can then be used to cover a cement-filled floor to insulate and soften it. For such purposes, spruce, pine, and oak are best suited. The thickness of the board is at least 5 millimeters. Choose the length depending on the area of the frame extension to the house.
Choose OSB with a thickness of at least 7 millimeters with dimensions of 100 × 100 centimeters. The slab itself should be smooth and monochromatic. This indicates the high quality of the product.
Mineral wool or expanded polystyrene can be used as insulation. The first option is cheap, but the material quickly becomes unusable. Expanded polystyrene has a long service life (up to 20 years). Sold in the form of slabs, the dimensions of one are 200 × 100 centimeters.
Choose products from 10 millimeters thick from the companies: Penoplex, Extrol, TechnoNikol.

Expanded polystyrene for insulating an extension to a house is preferable to mineral wool. It does not absorb liquid and is not afraid of temperature changes
Waterproofing is a must. As such, you can use polymer roll material. Thickness – at least 5 millimeters.
The price per square meter is about 500 rubles. Among the companies, users recommend giving preference to the following: “Bolars”, “Penetron”, “Polylen”, “Zubr”.
Putty and paint are needed for exterior and interior decoration. You can find out more about choosing paint.
You can put metal tiles on the roof. This is a durable and weather-resistant material that will last a long time, besides, it looks stylish and is inexpensive.
You will pay 200-400 rubles per square meter. The thickness of the tiles must be at least 5 millimeters.
Important: the easiest way to create a frame extension to a house is using OSB. Such a room will be warm and durable if it is properly insulated. Of course, you can build walls from brick, foam blocks or wooden beams. But it is much more expensive and energy-consuming.
The drawings below will help you decide on the type of room:

Using such a drawing, you can create a simple extension to a house with a pitched roof. Use your own sizes

Such a drawing of an extension to the house will help you quickly and easily build an additional room or, for example, a storage room
By stages: stages of building construction
The process of constructing a frame extension to a wooden house can be divided into several stages:
- creating a foundation;
- floor filling;
- erection of a frame for an extension;
- wall production;
- roof laying;
- installation of windows, doors;
- external finishing;
- interior decoration.
Work must be performed sequentially, following the instructions and safety precautions. For some “events” (installing windows, laying a roof), it is advisable to involve an assistant.
A strong foundation: pouring the foundation
To create a frame extension to the house, you need to pour a strip foundation. But if the groundwater level is high on the site, then it is more correct to make a pile or columnar foundation.
The instructions for constructing a strip foundation are as follows:
- Mark and dig a trench 30 centimeters deep and 20 cm wide. The result should be a rectangle or square.
- Fill the trench first with sand, then with stones exactly halfway for strength.
- Insert metal pipes at the corners of the trench. They will serve as the basis for the future frame.
- Build formwork for the foundation from boards and fill the trench with cement mortar, prepared strictly according to the instructions.
- Leave the structure for 24 hours until completely dry.
- Then fill the floor with cement mortar. It will dry completely in a day or two, depending on weather conditions. The warmer it is outside, the faster the cement hardens.
You will learn how to make a strip foundation from the video.
If you need a column or pile foundation, watch the following videos. They will talk about the rules for constructing such foundations.
Durable “skeleton”: install the frame
The future building already has iron pipes in the corners. Between them, other metal pipes are welded horizontally from the floor to the end of the pipe. The distance between parallel parts is at least 70 centimeters. You can “connect” the corner iron parts to each other using wooden boards. They will also serve as a frame.
Important: if the distance between the corner tubes is more than 1 meter, then you can place another vertical pipe or board in the middle to give the frame strength and reliability.
To learn how to make a frame for an extension to a house, watch the video.
Construction “sandwich”: building walls
Now, in the process of building an extension from a frame to a wooden house with your own hands, the most difficult and interesting part begins: the construction of walls. There is already one camp - it is part of the house. There are three more left to do:
- Attach the OSB to the frame using nails. There should be no large gaps of more than 3 millimeters between them.
- Fix the waterproofing on the inside of the OSB board using a construction stapler. The material should cover the entire area of the walls - from top to bottom.
- Attach the insulation to the waterproofing using polyurethane foam. The work is not difficult. It is quite possible to cope with it alone. Do not apply too thick a layer of foam and press the insulation board tightly against the OSB wall.
- Place OSB boards on the insulation. Attach them with self-tapping screws.
- Attach waterproofing to the existing wall of the house, and OSB on top.
- If gaps have formed between the slabs themselves or the floor, fill them with foam.
Builders call this design a “sandwich.” It is erected quickly and simply, but is practical to use, reliable and durable.
If you need to install windows and doors, provide them before you begin installing the walls. In OSB boards, you will need to pre-cut holes of the required size.
You will learn more about the plates themselves from the video:
Serious protection: no way without a roof
The roof for a frame extension to a house can be made pitched or. In any case, its creation involves the following steps:
- We build the base from wooden boards.
- We lay insulation on top.
- We put waterproofing on the insulation.
- We fasten the metal tiles on top with an overlap. In this case, moisture from precipitation will not accumulate under the tiles.

The shed roof of the extension to the house seems to continue the existing roof. It's quite simple to build. It is enough to place wooden slats of the required length on the main roof
To make it beautiful: interior and exterior decoration
The construction of a frame extension to the house is not completed until the interior and exterior finishing is completed.
The best option for OSB boards is painting.
First the surface is prepared:
- sanding is carried out;
- antiseptics are applied (good quality from Tikso, Drevolak);
- primer treatment (“Body”, “Tex”).
Then the slab is painted. Use alkyd, oil, water-based, acrylic, latex paints. Different products are used for external and internal work. Information on which surfaces a specific colorant can be used on is indicated on the packaging.
You can find out more about painting OSB.
Interior finishing also includes floor treatment. Waterproofing is placed on the cement screed, then insulation and wooden boards (this step can be skipped if you put laminate, linoleum or ceramic tiles on the insulation).
What's next?
It would seem that the frame extension to the house is ready. But putting it into operation is not yet possible - first you need to install electrical wiring into the room, install heating radiators and connect them to the general heating system of a private house.
You will learn how to do the wiring.
Read about the heating system.

To make the extension to your house cozy at any time of the year, install wiring inside and install heating radiators
Finally
To ensure that the frame extension to your house is strong and safe, strictly follow the basic rules when building private houses in general and creating extensions in particular. Do not forget about basic safety requirements at a construction site. Protect your hands and eyes, work in special clothing and durable shoes.
The simplest option for creating an extension from a frame for a house is an OSB board. It is quite light, but fully copes with its “professional responsibilities”.
There is an opinion that using OSB is unsafe for health - products are impregnated with a mixture of phenol for strength. However, when painting and priming, phenol is contained and is not released, so OSB does not harm health.
Often, when drawing up a house project, developers are so carried away by architectural aesthetics that they miss another important point - the practicality of its operation. Therefore, in many cases, unaccounted construction nuances have to be corrected after the house is built.
This problem also includes the lack of usable space, which can be eliminated by building an additional building adjacent to the wooden house.
Preparation for construction work
Of course, as in any other matter, the construction work itself is preceded by preparatory activities, during which all the nuances of the upcoming work are considered. As for the construction of a building adjacent to a wooden house, the important factors that determine the entire construction process are the following:
- it is necessary to decide on the location of the building and prepare its design;
- choose material for construction;
- make an estimate;
- choose the type of foundation and how to connect it to the main one;
- consider ways to connect the building with the main building and the placement of communications.

When choosing a foundation, ideally, preference is given to the type that was laid during the construction of the main building. But the construction of a monolithic and strip foundation will also guarantee the durability of the building. For lightweight structures, the columnar option is also suitable, but this is only if there is hard soil at the construction site, which is not so common. In the presence of groundwater close to the surface and sandy soil, monolithic and strip foundations will be optimal.
An important component of construction work is the moment of connecting two foundations. In most cases, the process is carried out by hammering pipes and fittings into the old structure and then installing them in the new one. In this way, simultaneous shrinkage of the house and the extension is achieved, as well as reliable installation of the new building connected to the house.
An important point before construction is to determine the location of the connection of the new extension with the main house. The best simple option would be to create a doorway at the location of the window of the main building.
Therefore, even at the planning stage, based on these considerations, you can choose the location of the future extension.
This connection method will not require dismantling the entire wall of the house to combine it with an additional building, and will thereby prevent large expenditures of time and money.
Return to contents
DIY house extension: frame technology

If, if it is necessary to erect a building adjacent to a wooden house, the budget is limited, then affordable and simple frame construction technology is used. This technology has two advantages - in addition to low cost, it also achieves high speed of work, which allows you to build an extension to a wooden house in the shortest possible time.
Frame construction involves the construction of a structure from beams or planed timber. After the frame is erected, it is covered with pressed wood. Subsequently, the tree is filled with various insulation materials, and a full range of thermal and waterproofing is performed. All of the above measures allow you to create a comfortable and cozy extension to a wooden house.
Frame technology is in many ways similar to assembling a construction set; its simplicity and low labor intensity allow you to implement the technology yourself, which is an undeniable advantage of this method.
Return to contents
Option for building an extension to a wooden house

To build an extension to a wooden house, there is no need to construct a massive foundation. In this case, you can get by with the construction of a strip with a depth of up to 40-50 cm and a width of up to 25-30 cm. In the proposed version of the extension, the length and width parameters are reduced to dimensions of 8x3 m. Based on this, the length of the foundation will accordingly be equal to 14 meters.
To work you will need:
- cement mortar;
- fittings;
- level;
- beam;
- circular or regular chainsaw;
- nails;
- self-tapping screws;
- reinforced staples.
So, the work begins with digging a trench along the width of the foundation. The depth of the trench should be 2/3 of the entire height of the foundation, and 1/3 of the remaining part should protrude above the ground. Next, the ground part of the foundation is poured. For this purpose, formwork is made from boards. After pouring the cement mortar and its hardening, the formwork is removed. To prepare a cement mixture (at the rate of 0.8 bags per 1 m) you need 11 bags of cement (grade M400), the solution is prepared by mixing cement with sand in a ratio of 1 part/2.5 parts, respectively, and adding water until the consistency of thin sour cream. Before pouring the foundation, to increase its strength and durability, old reinforcing wire, fragments of bricks, bottle glass, etc. are poured into the trench.
Ultimately, in order to achieve a perfectly flat surface, it is mandatory to carry out control measurements of the surface of the extension’s foundation using a horizontal level.
To create the floor, 100x150 mm timber is used. Logs made of timber in the amount of 6 pieces are laid at a distance of 1.3 m from each other, two of which must be mounted in the end parts of the extension, and the remaining 4 are placed between them. To ensure the stability of the logs, special “pedestals” are used - made from cinder blocks, scraps of timber or support bricks. “Pedestals” are installed on the ground evenly under each joist in its two places, and the formation of gaps under them is not allowed. When installing joists, as when pouring a foundation, control measurements are taken using a horizontal level to determine the evenness of the floor surface.
Transverse logs are mounted using grooves and nails 120 mm to the longitudinal part of the foundation of the building. A circular or regular chainsaw is used to create grooves.
Boards of 100x30 mm are laid on the transverse joists; boards of greater width can be used - they will be more stable and their service life will be much longer. The boards are fastened with nails or self-tapping screws at 90 cm.
To make the frame, 100x100 mm beams are mounted in the corners of the future structure. Where the extension adjoins the house, the timber is installed much more tightly. Next, in two places a screed is made with the house using reinforced brackets, while the surface is checked with a vertical level, and the remaining corner beams in the amount of 2 pieces are fastened with brackets to the longitudinal joist. It is worth noting that the corner beams act as the main frame of the extension to a wooden house, so it is very important when installing them using a level to ensure that they are perfectly level.
Another beam is installed in the central part of the front wall so that the distance to the outer corner beams is 4 meters.
At the next stage, additional vertical and horizontal beams of 100x50 mm are installed between the main ones, while maintaining a distance that between horizontal boards should not exceed 610 mm, and between vertical boards - 1230 mm. An exception to these parameters will be the sections between horizontal boards near door and window openings. A vertical beam is attached to the lower and upper lags using 120 mm nails, and the horizontal beam is fixed at an angle of 90 degrees to the vertical using 90 mm nails.
Ultimately, the stability of the structure is ensured by laying diagonal beams at the outer corners. This solution will prevent the corners from becoming loose over time.
Thus, the wooden extension to the wooden house is ready. Having carefully studied the sequence of work and prepared the necessary materials and tools, you can begin construction work yourself. Good luck and patience!
Very often, you want to add a veranda or terrace to a finished house in order to increase the existing living space and simply transform the appearance of the residential property. In such cases, an extension to a wooden house is built, the designs of which can be very different depending on the size of the new object and the materials from which it will be built.
An extension of a veranda and terrace to a wooden house can be built in different ways in terms of design features. Most often this is done in several ways:
- The extension is built on the side and has a single roof with the house.
- The extension is located on the side, but under a separate roof.
- The veranda is located on the second and higher floors or in the attic.
Of course, most often the extension is made on the side of the house. The option with a common roof is more convenient and profitable, but for this it is important that you can make a common roofing system with the house. As for the add-on, this process is not easy. So, first of all, it is important to take into account the capabilities of the foundation of the house, which may simply not withstand the load under the influence of the built-on terrace.

Which material to choose
A veranda extension to a wooden house can be built using different materials. Most often this is timber, logs or frame technology, since these options look harmonious against the background of the overall exterior of the cottage. But extensions made of brick or foam blocks are no less popular. Let us note right away that each of the options has its own nuances in terms of construction. Let us consider the features of construction from each material in more detail.
Timber extension
- the most common material. This is explained by the characteristics of the material itself:- Its production is carried out in a factory, so the wood is of high quality.
- Thanks to special processing, the material is highly resistant to rotting and fungus.
- Environmental friendliness and naturalness are the main advantages of any type of timber.

But before making an extension, you need to solve a number of issues for yourself. The most important thing is the foundation of the future home. There are a huge number of options for creating it, but any foundation must be firmly “tied” to an existing building. Ideally, the extension needs the same foundation as the house. Therefore, it is important to study the condition of the soil, its type, and think about what the load from the extension will be. After this, the second question needs to be resolved: will the veranda be combined with the general perimeter of the house or will it be built as a separate structure. Combining structures is not easy, since it will shrink, and even experts will not answer what it will be.
Frame extension
From a frame it is a budget option, since significant investments in its construction are not required. In addition, the construction of a veranda or terrace itself will be much faster with minimal expenditure on materials. The construction of the structure is carried out on the basis of a frame consisting of wooden beams or metal profiles. The frame is erected along the entire perimeter of the future veranda.
According to their purpose, all extensions to the house are divided into:
- living room;
- garage;
- terrace;
- summer cuisine;
- porch.
Depending on the type of material used, extensions are:
- frame;
- brick;
- from foam blocks;
- from timber.
At the first stage of preparation for construction, it is necessary to decide whether it is planned to construct a capital building or not. Construction of a canopy or terrace is quite possible without a project carried out by a specialized organization; a plan or diagram may be sufficient. The construction of a living room or garage is best done using a specially designed or ready-made project for an extension to a wooden house that is tied to specific conditions. Savings at this stage, as a rule, result in additional, much larger costs during construction.
Capital buildings
Frame room extension project
Advantages of using a frame structure:
- speed of construction;
- no settlement of the structure during the first stages of operation;
- small load on the foundation, and as a result, minor requirements for it;
- excellent compatibility with the wooden structures of the main private house.

A frame structure is especially suitable for the construction of a two-story extension to a country house, since it is much lighter than other types of construction.
Foam block extension project
An extension made of foam blocks is one of the most common options, since it simultaneously combines the relative cheapness of the work and its simplicity. In addition, these are not all the advantages of using this technology.

Advantages:
- speed of construction;
- durability of the structure (at least 50 years);
- light load on the foundation (a foundation on pillars is sufficient instead of a strip one);
- structural strength;
- simplicity of construction technology;
- the ability of the material to “breathe”.

Flaw:
- the need for external finishing of the facade due to the unattractive appearance of the blocks.
Timber extension project

Structurally and technologically, everything that was said about frame extensions can also be applied to structures made of timber. In fact, a combination option is most often used.

Key points when building an extension from timber:
- the foundation for it must be similar to the foundation for the main building and connected to it;
- it is possible to use a more economical pile foundation, of course, in the case of structural calculations;

- it is necessary to create an expansion joint between the house and the extension, which will prevent damage to the walls during shrinkage of the new structure;

- The technology for constructing the structure of the walls and roof of the extension is similar to the technology for building a house.
Non-permanent buildings
Veranda made of polycarbonate
The established opinion that a veranda is a warehouse for storing unnecessary things (tools, bicycles, skis and other junk) is fundamentally wrong. In fact, this is an excellent opportunity to create a comfortable and beautiful recreation area. Especially if you use modern designs and materials for this.

Key points when building a veranda:
- can have almost any configuration - rectangle, square, semicircle with an arch-shaped roof;

- the lightness of the structure allows its construction on a minimal foundation, for example, a strip foundation with a depth and width of only 30 cm on a sand cushion 20 cm thick;

- it is advisable to construct a small plinth to which the frame structures are attached;
- Due to the properties of the material, polycarbonate itself is easy to cut and mounted on an already assembled frame.
Canopy

A canopy is constructed, as a rule, in order to protect any used space from precipitation. In this way, you can arrange almost the entire area adjacent to the house for a summer dining room, playgrounds and much more.

The canopy structure usually consists of:
- pillars dug to a depth of about 0.5 meters and filled with concrete;
- horizontal beams, one of which must be attached to the wall of the house;

- rafters and lathing on them;
- roofing material.
The existing variety of materials and various structural elements allows you to create a variety of combinations when constructing sheds. But most often, when building an extension to a wooden house, wood and metal tiles are used.