How to make a fence from corrugated sheets yourself. How to build a fence from corrugated sheets with your own hands - instructions for building a fence
Many owners of suburban areas are concerned about the safety of their properties. Many modern building materials allow you to choose the material for building a fence according to your taste and cost, but without sacrificing quality. In this article we will tell you how to make a fence from corrugated sheets with your own hands with posts, and also show photos and videos on installing the fence.
A metal profile fence can be of any height. Typically, for areas far from the city, a height of 3–5 m is chosen. Such a fence not only visually protects from unnecessary witnesses, but also screens out sounds from a federal highway, for example.
Construction from profiled sheets is technologically quite simple and does not require the use of expensive equipment or teams of workers.

Note! Brick can also be used as a decorative element, covering metal or wooden pillars with it.
Installing logs

Then you can install logs - a transverse profile for fastening the canvases. A profiled beam with a cross section of 40x25 mm or pipes of the appropriate diameter are suitable here. The number of horizontal logs depends on the size of the fence. If it is less than 1.7 m, two rows are enough. They are attached at a distance of 4 cm from the top of the future fence and from the ground. With a higher fence, the number of horizontal lines should be increased to three.
Note! The best way to fix all the metal parts together is welding.

If you use wooden beams, the service life of the fence will decrease.

Note! After installation, the entire steel structure must be primed to protect it from rust.
Fastening the metal profile

The last stage is attaching the profiled sheets to the joists. This should be done using metal screws 35 mm long and in increments of 500 mm. Adjacent fragments are fixed with an overlap.
This type of fence does not require special care. You may need to spray paint the canvas from time to time to hide any scratches or corrosion.
From the outside, such a fence looks solid and durable, reliably hiding the house and surrounding area from prying eyes.
Video
Photo


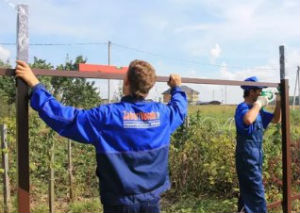
Having installed the pillars, the user began installing the logs. We already wrote above that the logs were cut to a size that was a multiple of the pitch between the pillars. From the point of view of practicality and strength, the logs should be installed in one whole six-meter length. Moreover the logs are butt welded not on the pole, but in the space between the spans.
As an option, for greater rigidity of the fence, you can use the installation diagram of the logs with the offset of the rods by one span, proposed by the user of the portal with the nickname Yriy.

Usually, a profile pipe of rectangular cross-section, for example 40x25x2.5 mm, is used for the logs. When installing veins, it is also necessary to take into account one nuance.

Yriy User FOUMHOUSE
If the pipe is square, then it does not matter which side to weld it on, but if the pipe is rectangular, then we weld it to the pole with the wide side.

Palych R34, To mount the logs yourself, I first placed one end against the pipe, pressed it with a clamp and, aligning it horizontally using a magnetic level, fixed the second end of the log on the pole with a clamp.


Having grabbed the logs with spot welding, he welded the horizontal seams (the logs were welded overlapping).


Palych R34
To put the remaining material into use, I joined the meter-long scraps of logs remaining after cutting the 6-meter long rods, fixed them at the “fiftieth” corner with clamps and welded them in a circle. So I made 10 lags. After stripping, puttying, sanding and painting, it is impossible to find the welding site.

The user also installed temperature compensators made of steel strip every 20 meters.

“Horseshoes” are needed to level out the expansion of the metal when it is heated in the summer.
In addition to the fence, the user made a gate for household needs - delivery of building materials, garbage removal, etc. For this Palych R34 dug a trench for pouring a strip foundation to tie together the gate posts.

Sand was poured into the bottom of the trench, compacted, and roofing felt was laid to separate the concrete from the ground. Next, we welded 4 rods of the “twelfth” reinforcement to the metal pillars. Also, a 50x50x4 mm masonry steel mesh was used for reinforcement and the tape was filled with concrete.

To weld the gate leaves, and at the same time they open easily and do not warp, Palych R34 took advantage of the technology developed on our portal. To do this, the entire process is divided into several successive steps:
- We weld the hinges to the vertical sections of the sashes.
- We weld the sections with loops to the post.
- We weld horizontal pipes to the sections with loops.
- We weld the vertical ends of the sashes.
- We weld the amplifiers in the corners of the sashes.
- We cut the gate leaves with a grinder.


Using this technique, when gate leaves are welded from a whole piece and only then cut into halves, it is possible to avoid deformation of the metal during welding and maintain the correct geometry of the gate.

Palych R34
On the advice of welders I knew, I installed the vertical ends of the sashes not parallel, but with a wedge. At the top the gap is about 1 cm, and at the bottom 5 mm. After cutting the sashes and hanging the corrugated sheet, the gap between the sashes became almost parallel.
At this stage, work on the construction of a fence from corrugated sheets has reached the finish line. All that remains is to paint the logs and posts and hang the corrugated sheet, but there are a number of nuances that need to be taken into account in advance.
When making their own from a profiled sheet, novice developers often treat the process of painting it “carelessly,” believing that the paint can be applied directly to the rust, and if something happens, it can be repainted later. The right approach: do everything right away with high quality, even if it takes longer and is somewhat more expensive in terms of costs. But in the next 5 or more years you can forget about painting the fence.
That’s exactly how I approached the process of painting the fence thoroughly. Palych R34.

Palych R34
To properly paint fence posts and joists, I took the advice of professionals with many years of experience in this work.
So here are these tips:
- Before applying paint to metal, you need to clean it until it shines and then prime it. We remove all rust, old paint, oxides.

Using special chemicals to remove rust does not bring the desired result.

Therefore, we stock up on patience, take a grinder with a special attachment and clean the pipes properly.

- We degrease the cleaned surface with a solvent and prime it in 1-2 layers and only then paint.
The main advantages of a fence made of corrugated sheets are relative cheapness compared to other building materials for fencing, durability provided there are no mechanical damages, and ease of installation. Corrugated sheeting is a corrugated steel sheet with a protective layer, it provides noise and dust insulation, it is fireproof, and combines well with other materials.
A fence made of corrugated sheets, properly installed with your own hands, will last for ten years. The service life of some types of fence reaches 25-35 years, depending on the aggressiveness of the environment (sea wind, ammonia precipitation from the enterprise, etc.). You can make the height of the fence different, apply different patterns on it, imitating brickwork, stone, wood and others.
Corrugated sheeting for fence
When looking for a suitable corrugated fence, you will find that the difference between them lies in the covering material. The following types of metal profile coating are distinguished:
- Polymer coating. Increases the level of protection of corrugated sheets and can be painted at the production stage.
- Plastisol. It features a thicker coating layer, which provides protection not only from aggressive environments, but also from mechanical damage. This protective material provides greater durability.
It should be noted that the profiled sheets also differ in thickness. Metal profiles with increased thickness are used in load-bearing structures, and for a fence, a profiled sheet with a minimum thickness is suitable (rib height is about 21 mm, metal thickness is up to 0.5 mm).
While following all the tips listed above, do not forget about the appearance of the fence. You can choose a monotonous color or different patterns.
Construction of a fence made of profiled sheets
To install a fence made of profiled sheet metal poles are used (economical option), or a brick column goes around the pipe (expensive option). The pillars are installed with the same distance (after removing the length of the fence and dividing it into equal sections) or, for example, into sections of 2.5 meters, and one section will be obtained “in fact”.
The pillars are concreted, the concrete is allowed to gain strength (depending on weather conditions), and transverse logs (metal square or rectangular pipes) are installed by welding them to the main vertical pillars.
The last step is the installation of the profiled sheet on the transverse joists using rivets or roofing screws.

General scheme for constructing a simple fence made of corrugated sheets
All installation work can be divided into several stages, which we will consider below.
- Marking the fence line.
The immediate first stage of work is marking and transferring data onto a sheet of paper. Calculate the number of segments (spans) following a simple rule for installing a fence made of corrugated sheets - the distance between vertical posts ranges from 2.5 to 3 meters. It is very convenient to “mark” future supports using wooden pegs or pieces of reinforcement.
- Concreting metal pillars.
The height of the pillars depends on the planned height of the fence. For fences of a standard height of 2 m, use a concreting depth of 100-110 cm below the soil surface; for higher fences, accordingly, we increase the concreting depth, and for low fences, we lower it.
Having dug a hole. it is necessary to start knitting a skeleton from reinforcement under concrete (will increase the durability of concrete). Next, we prepare the concrete - 1 part cement to 3 parts sand and 4-5 parts crushed stone or slag, water. We fill holes with supports with concrete, having first checked them with a building level on all sides and fixed them so that they do not move during pouring, although specialists always double-check metal pillars with a building level after pouring.
Depending on weather conditions, concrete needs to gain strength within three days (in hot weather, moisten the concrete with water every day, this will give additional strength, and in rain and cold weather, this period must be increased by 1-2 days).
- Installation of transverse joists.
The next step is the installation of transverse square or rectangular pipes. This is done using a welding machine by “welding” transverse joists to vertical posts. For a two-meter fence, use two transverse logs. Welding areas should be coated with primer paint to provide protection against corrosion.
- Fastening profiled sheets.
The final stage of fence installation is attaching the corrugated sheets. The sheets are installed with an “overlap” on the adjacent sheet in one wave. They are attached to the transverse joists using roofing screws. It is also necessary to leave a small gap at the bottom of the sheet - from 5 to 10 cm, in order to allow snow and rainfall not to accumulate and to allow the wind to blow through.

Necessary materials for the fence
Before installing the fence itself, it is necessary to calculate all the necessary materials. The most important material is a profiled metal sheet that fills the main area of the fence.

Specialists in installing a fence from corrugated sheets recommend using a sheet with C18 or C21 coding.
Next, you should stock up on metal poles for vertical installation. These can be square pipes 60*60 or 40*40 mm, or round pipes with the same diameters.
You will also need metal transverse joists (rectangular pipes measuring 40*20 mm) to provide basic rigidity and strength. Profiled sheets will be installed on them.
During installation work, you will need to use the following tools:
- Shovel and crowbar - for earthworks.
- Grinder with cutting disc - for cutting fittings and pipes.
- Concrete mixer, buckets – preparing and pouring concrete.
- Brushes – for painting metal pipes.
- Drill or screwdriver - for attaching a profiled sheet to transverse metal joists.
You will also need a construction level, a roll of rope or twine (for marking), a tape measure, a pencil, gloves and various consumables (cutting discs, electrodes, etc.).
Preparing metal for installation
The durability of paint and varnish coatings applied to a metal surface depends on the correct preliminary preparation of the metal surface for painting. The service life directly depends on the condition of the metal before painting. Therefore, if metal pipes are lying in a warehouse and are covered with a small layer of corrosion, it is necessary to remove it.
There are two types of metal preparation for painting:
- Primary preparation. This preparation is carried out to remove scale, dirt and rust until bare steel remains.
- Secondary preparation. Surface preparation leaving organic and metal coatings firmly bonded.
After these preparation steps, it is necessary to degrease (white alcohol, gasoline or acetone) the metal surface to be painted, then apply a primer layer. After the primer coat of paint has dried, apply one or more layers, depending on the aggressiveness of the environment.
After installing the vertical posts and metal cross beams, it is necessary to knock off all the scale and slag from the welding machine, and paint the welding areas in one or more layers.
The procedure for installing supports (pillars)
After all the metal supports are prepared (cut and painted), you need to begin their installation. Let's describe this process step by step:
- Marking the territory. We divide it into segments, insert pegs and pull the tourniquet.
- Digging holes. Using a shovel and crowbar or with a hand (electric) drill.
- Concrete cushion. We fill the bottom of the hole with a cushion of sand and crushed stone, then compact it.
- Pole installation. We install the support and align it with a level and plumb line.
- Pouring concrete. We pour the concrete solution and fix the post level using boards and auxiliary material.
We accurately install corrugated fence posts, as they ensure the strength and durability of the entire structure. There is no need to rush at this stage, because it is better to spend a little more time now than to fix or even completely redo the fence in a few years.
Installation of metal transverse joists (lintels)
The installation of jumpers is carried out using bolted connections or clamps (a relatively old method) or using a welding machine, which is currently one of the most reliable and fastest methods.
Experts in installing fences of this type recommend attaching the logs at a height of 25-30 cm from the surface of the foundation or ground, and at the same distance from the intended top of the fence. This ensures optimal structural strength.
Advice. If you make fence spans 3 m long, then with a length of transverse logs of 6 m there will be a minimum amount of remnants of the metal tube, since the length of the logs will be enough for just two spans.

Installation of profiled sheets on the skeleton of the structure
After completing the main labor-intensive work, all that remains is to attach the profiled sheet. The easiest way is to fix the sheets to the transverse joists using self-drilling screws (roofing screws). Thanks to the special tip of the self-tapping screw, it drills a threaded hole using a drill or screwdriver.
When screwing in self-tapping screws, it is important to remember:
- A loose self-tapping screw will subsequently cause leakage with a trace of corrosion.
- A tightly twisted self-tapping screw causes deformation of the profile sheet.
- A screw screwed in crookedly violates the integrity of the metal and creates a loose fit of the gasket, which causes corrosion.
A correctly screwed self-tapping screw is considered to be screwed in at an angle of 90 degrees with pressure that does not allow overtightening or deformation. Screw screws into every third wave.
Prices for corrugated fences with installation
The cost of a fence made from a profiled sheet depends on the thickness of the metal, the presence of a colored polymer coating on one or both sides, the length and height of the fence. Also, the price depends on the method of concreting and the foundation under the fence, the presence of additional elements in the structure (gate, gates, brick pillars, etc.).
Here are some of the approximate prices for various types of fences made of corrugated sheets (at a height of 2 m with local concreting of vertical pipes):
- A fence made of galvanized corrugated sheets costs about 1,400 rubles per 1 linear meter.
- A fence made of profiled sheets with a polymer coating on one side - from 1,600 rubles per 1 linear meter.
- A fence made of profiled sheets with polymer coating on both sides - from 1800 rubles per 1 linear meter.
In addition to installing the fence itself, you need to take care of the entrances and entrances to the territory. Prices for some additional installations of related work:
- A gate made of corrugated sheets (width up to 100 cm) with handles, a lock and a latch - about 5,000 rubles (manufacturing and installation).
- Swing gates (from 3-4 meters) with latches and hinges – 10,000 rubles.
- Brick pillars of one and a half bricks - 8,000 rubles/pillar.
Despite the fact that you can install the fence yourself, it will take a lot of effort and time, so it is often more profitable to order the installation of the fence from professionals.
The decision to build DIY corrugated fence requires certain skills and knowledge. Installation of a corrugated fence requires preliminary study of some nuances; it is important to understand the types of construction, draw up a work plan, and select suitable components and materials. This review will help you understand how to build a fence, A video at the end of the article it will be useful for beginners.
Types of designs
The variety of landscape and aesthetic requirements determine the features of the structure:
- Continuous fencing. Sheets of corrugated sheets cover the supports. This option is most often used.
- Sectional. They are not in demand so often; they are constructed in the presence of stone or brick pillars. The length of the section depends on the terrain features. Accurate calculations of span lengths make it possible to reduce the amount of waste from cutting corrugated sheets.
In addition, fences are divided into:
Fundamental. The pillars are included in the strip foundation design. It increases the wind resistance of the fence. The gap under the fence is completely covered with profiled sheets, and dust from the street will not blow into the area. Construction time and costs for its arrangement are increasing. This is how permanent façade fences are built.
Supported - fences are mounted on support posts that are not connected to each other. This results in significant cost savings. However, the high height of the building significantly reduces the reliability of the fence. But it ensures good circulation of soil and water on the surface of the earth. These advantages are especially noticeable when building on a slope or on loose, creeping soils, as well as soils with high humidity. Fences between neighboring areas are usually used as support fences.
It is better to determine the type of structure after creating a complete sketch of the construction.
Required materials and tools
To install any type of fence you will need:
- Corrugated sheeting, wave height 8-20mm.
- Fasteners, rivets, screws.
- Sand, gravel, cement.
- Coating against metal corrosion – metal paint.
- Marking ropes, pegs.
- Tools for earthworks (shovels, drill).
- Welding machine, electrodes, fasteners for cross beams.
- Riveting device, drill, screwdriver, cutting devices.
- Supports made of profile pipe 60x40 up to 3.5 m long for support.
- Measuring tools (tape tape, level, plumb line).
- Cross members – profile pipe 40x20.
- Ruberoid, another insulating material that prevents concrete and earth from mixing in the holes.
Measurements and a sketch of the fence allow you to calculate the required amount of materials.
Watch the video! Mistakes when installing a fence
Carrying out work according to plan
Step-by-step instruction How to create a fence from corrugated sheets is suggested below. Installation involves 6 stages of work. It is better to study these steps in advance so that make a fence from corrugated board strong and reliable.
Marking
The future location of the fence is marked with pegs that are driven into the corners around the perimeter. After measuring the distances, you can determine the number of openings. The locations of the supports are marked with pegs. You will need to designate a place for a gate or wicket. Pegs are driven in there too.
Advice! For a sectional fence, it is better to make the span width a multiple of the sheet dimensions. For solid – the standard 2.5 – 3 meters is suitable.
Installation of a fence on a strip foundation, including a stepped type, requires the installation of levels. Marks are placed on appropriate posts installed in the corners along the perimeter, and on inclined areas - at the beginning and end of each section.

The marking of the territory is carried out independently; there is no need to use any complex equipment.
Creating a Project
To create a plan, the perimeter of the territory, slopes are measured, and obstacles that cannot be moved or removed are identified. These could be pipelines, electrical poles. According to the measurements taken, a fencing plan is drawn. Depending on the type of soil, terrain features, and economic opportunities, choose:
- foundation type;
- rack design;
- material for pillars and additional structures (cross beams, connecting brackets, mortgages);
- types of fasteners used, finishing.
Drawing up a detailed sketch allows you to carry out comprehensive calculations and determine the number of necessary components.
Installation of supports
The following types of racks are used to ensure strong fastening of sheets:
- regular tubing pipe diameter from 73 mm to 89 mm or profiled 60x60 or 80x80 mm;
- pillars made of reinforced concrete or wood;
- brickwork;
- screw piles.
Installation of profile pipes as supports
In the designated locations, holes are drilled with a depth of 1 to 1.5 meters and a diameter of 20 to 40 cm.
Comment! With a high fence height of 2 meters or more, the depth of embedding of the supports should increase by 35% underground and 65% above the ground.
The racks are placed in one line using a plumb line. Verticality and linearity eliminate possible difficulties in joining corrugated sheets.
 The supports will need to be concreted. Before pouring the solution, the edges of the pits are covered with roofing material; you can use plastic film. This will prevent mixing of concrete and earth and maintain high structural strength. The solution is poured to a depth of 1 meter, the rest is covered with sand and compacted. This method helps compensate for soil deformations when temperatures change.
Important! Concrete always has air pockets that need to be removed. The air is removed by bayoneting with available tools. It is permissible to use reinforcement or a metal corner.
The remaining types of work can be performed only three days after pouring the concrete.
Before installing the profile pipe requires:
- Make a top cap to prevent rainwater from entering. You can use plastic plugs and decorative tips. It's a good idea to just weld the top of the counter.
- It is better to immediately coat the supports with paint of the required color.
- It is necessary to weld metal heels (a square of sheet iron) onto the base of the supports. This will simplify the work of aligning the pillars. The fastening will be more reliable and reduce the draft.
Installation of reinforced concrete or wooden poles
 Installation of wooden or reinforced concrete supports is carried out in the same way as when installing a tubing or profile pipe. Wooden supports are not durable.
Reinforced concrete pillars are too heavy and crossbars are difficult to attach to them. It is better to install such elements on a strip foundation.
Installation of brick pillars
Installation of brick pillars requires the presence of a strip foundation, since the weight of the structure is very large, the pressure on the ground increases. Such poles are difficult to install and require significant costs and additional waterproofing.
The installation process repeats the installation of a profile pipe, which is later covered with brick.
Important! When installing brick pillars, it involves installing metal mortgages, which are used when attaching the transverse elements of the fence.
Watch the video! Fence made of corrugated board. Very budget option
Fence on screw piles
Installation advantages:
- creation of a traditional foundation;
- can be used on any soil;
- no need to use special equipment, high installation speed.
Proper anti-corrosion treatment ensures a fence service life of more than 50 years.
However, there are also disadvantages. Screwing into rocky soils breaks the protective coating, making visual detection of damage impossible. The posts are attached to the piles by welding. Its implementation requires certain qualifications and experience. Installation of posts on piles using screw connections is carried out after welding the flanges.
Installation of cross beams
 The next stage of fence installation is the installation of transverse joists. This is done using welding, clamps, and bolted connections. Electric welding is the most efficient and reliable method. The logs are placed parallel to one another and to the base of the structure. For a fence less than 1.7 m high, 2 logs are required; if the height is greater, you will need to install 3 logs.
The created structure is a frame. Everything is painted with anti-corrosion paint. Particular attention is paid to welding areas to prevent corrosion.
In addition to welding, it is allowed to use:
- Brackets, clamps for connecting joists to supports.
- The brackets allow you to fasten the logs to the pole (end-to-end at the front, with holder pads, at the side of the supports).
Installation of corrugated sheets
The fifth stage is attaching the corrugated sheets to the transverse strips using screws. The joining of the canvases is usually done with an overlap.
Important! One edge of the sheet should have a full wave, the other - not a full one. The joint is made in one direction only. This point is important if the sheet is marked and cut gradually during installation. The joint should be secured with rivets.
 Self-tapping screws are screwed into the lower front wave:
- Loose screw tightening will cause leakage.
- a self-tapping screw that is tightened too tightly causes deformation of the gasket and destroys the metal coating.
- A screw placed crookedly will tear the metal, causing a loose seal on the gasket, which can lead to premature corrosion.
Correctly, the screw is tightened at an angle of 90 degrees in order to evenly press the gasket without touching the metal surface. Self-tapping screws are allowed to be attached every third wave.
Completion of installation work
The end of construction will be the installation of a U-shaped strip on top of the fence. The element is optional, but creates a smooth edge. The bar is secured with clamps.
Some features of installing a fence made of corrugated sheets
Uneven areas or heaving soils require special techniques.
Heaving soil
 This aspect is taken into account by those who want to install sectional or combined fences with heavy stone pillars. Sandy loams and loams pose a danger. In other words, soil that retains moisture during frost has a heaving effect. The soil rises sharply when it freezes. The foundation behaves like plasticine.
The problem can be solved in various ways:
- Complete removal of soil to the freezing depth and its replacement with sand. The soil around the foundation must also be removed.
- Installation of the foundation below the freezing point. But the pressure of the heaving will remain on the walls of the base.
- Lightweight structures can be installed if the foundation is insulated with special material. The insulation is laid at a width equal to the freezing depth.
- A good solution is drainage. It is a trench with a depth equal to the depth of the foundation. The bottom of the trenches must be equipped with a pipeline wrapped in filter material. The trench is dug at a distance of 30-50 cm from the foundation. The finished drainage is covered with crushed stone.
Uneven areas
If leveling the area is too expensive, you can install a fence on uneven ground. An area with sharp slopes can be fenced off with sectional or combined fences that fit perfectly into the terrain. It is necessary to calculate the height and width of each span. Aesthetics will be ensured by a stepped foundation.
On a slope of less than 35 degrees, it is allowed to make fence spans 2.5 meters wide. If the slope is uneven, you can make a fence from spans of different lengths. Increasing the slope requires reducing the length of the section. On uneven areas it is better to install fences on a strip foundation.
- The connection of sheets at an angle must be closed with corner strips, which are obtained on bending equipment.
- Working with corrugated sheets requires the use of work gloves, since the material has sharp edges.
- Sheets are cut using metal scissors. The edges need to be painted over. A grinder cannot be used; it destroys the decorative coating.
Features of care
There is practically no need to maintain a fence made of corrugated sheets with a polymer anti-corrosion coating. The polymer serves as excellent protection. The barrier along the road can be damaged by stones and gravel. Places of damage must be periodically painted over with a special paint.
Watch the video! How to make a fence from corrugated sheets with your own hands


Fences of various forms are an organic part of the vast majority of private garden plots. They not only protect the internal area from prying eyes, but also often perform a natural decorative function. In an effort to ensure a safe and comfortable life, owners order fences from all kinds of materials. One of the best options that meets most requirements would be to install a fence made of corrugated sheets.
In this article we will look at how to properly make a fence from corrugated sheets, and also discuss in detail the issue of choosing this material for a fence from corrugated sheets.

Classic fence and gates made of corrugated sheets Source vorota750.ru
What is corrugated sheeting
Corrugated sheeting (profile sheet or metal profile) is a common and popular roofing material due to its advantages. Being a product of cold rolled metal, it is a sheet of rolled galvanized steel that has passed through a roll forming machine. As a result, the surface of the sheet becomes wavy, reminiscent of slate, and the waves themselves form stiffeners.
Waves (corrugations) can have different heights and structures: sinusoidal, rectangular, trapezoidal.
Manufacturers apply polymer and paint coatings (polyester, plastisol or pural) to the finished sheets, which perform protective and aesthetic functions.

Profiled sheets do not need to be additionally painted or processed in any way Source gx.net.ua
Online fence calculator
To find out the approximate cost of a corrugated fence, use the following calculator:
Corrugated fences: pros and cons
As a fence material professional sheeting is chosen because of its positive qualities:
- Affordable price (they are much cheaper than wood or stone) with a decent appearance.
- Strength and wear resistance (treated with special compounds that reliably protect it from negative factors of natural origin).
- Lightweight material, which facilitates transportation and installation of the fence.
- The construction of fences from corrugated sheets is time-consuming.
- Comfort in operation (barrier from dust and noise, especially near the roadway).
- Mechanical strength.
- Environmental friendliness and fire safety.
- Unpretentiousness; an individual part can be replaced without dismantling the entire structure.

For any design of a fence made from corrugated sheets, individual sheets can be easily replaced Source rmnt.net
- Practicality (does not require annual painting, dirt can be removed with a damp cloth).
But we also need to take into account disadvantages of using corrugated sheets:
- Large windage. Sheets can bend and become deformed in strong gusty winds.
- The sheets are coated with a compound that protects them from rust, but the joists and posts are made of steel profiles. At the attachment points, even with a primer, metal corrosion begins over time.
- It is difficult to carefully paint the joists without touching the main sheet.
What are the types of corrugated sheeting for fences?
The material is selected according to the conditions of future operation and the wishes of the owner. The manufacturer offers corrugated sheeting in a variety of colors and imitations of natural materials.

Fence made of corrugated sheets, stylized as stone Source www.msk-novostroyka.ru
Varieties by coating:
- galvanized standard sheet;
- sheet with polymer coating, painted (plastic and synthetic resins);
- sheet coated with plastisol or polyester with increased wear resistance.
Sheets also differ in markings(steel thickness, type, width, wave height are marked):
- N – load-bearing profiled sheet intended for roofing work.
- C – wall sheet, suitable for the construction of fences and walls. By the number you can find out the height of the corrugation in mm (C10, C21, C20).
- NS is a universal-purpose sheet suitable for any construction work.
Additionally, profiled sheets are marked with the letters A and R. For fences, A-profiles are used (they are intended for painting on one side)
What you will need for installation: materials and tools
Materials included in the estimate:
- Profiled sheet of the selected brand.
- Metal pipes (used as support posts).
- Pipes for guides (standard steel profiles).
- Consumables (dowels, screws or rivets).
- Ruberoid to protect the holes from soil shedding (if the pillars are decided to be concreted) and a primer to protect the fastening points.
- Ready-made concrete, or its components - sand, crushed stone and cement (if the solution is mixed by hand).

If it is necessary to install a fence on a slope, the profiled sheet will have to be additionally processed Source zavodsota.ru
In addition to materials Tools will be required:
- Rope, nylon thread and wooden stakes for preliminary marking.
- Tape measure (minimum 4 m) and building level.
- Hand drill (replaced with a shovel).
- Welding machine for mounting the frame.
- Drill, screwdriver.
- Metal scissors, grinder, sledgehammer.
Development of a fence diagram and drawing
Before starting construction work, a graphic sketch (diagram of a fence made of corrugated sheets) is developed and a detailed drawing is drawn up. For this:
- The perimeter of the fenced area, topography and soil properties are clarified.
- Measure slopes.
- Insurmountable obstacles along the fence path (pipelines, electrical poles) are noted.
You need to ask the builders whether they make similar measurements. If not, then they are unlikely to be able to choose the right type of foundation, material of supports, joists and fasteners.

Standard layout of the fence site. Source prometr.com.ua
Marking the fence line
Marking begins with driving corner stakes into the corners of the territory. They fix the location of the support pillars. Additional stakes are driven in at the breaking points of the future fence.
Video description
About the initial stage of building a fence from corrugated sheets in the video:
Installation of support pillars
The work begins with the placement of support (corner) and auxiliary (in bending places) pillars, on which the height from the ground is marked. The post must enter the ground until the mark aligns with the stretched string. It is also necessary to regularly check the vertical position of the pillar with a level.
As supports for fastening corrugated sheeting, choose a profiled or ordinary pipe, reinforced concrete or wooden pillars, and screw piles.
The supports are fixed in the ground by concreting the base or driving it in. It must be remembered that a third of the length of the pillar is buried. During operation, it is necessary to control the verticality of the supports.

Detailed diagram of installation of a fence made from a profile sheet. Source plus.google.com
Lag fasteners
After installing the main and intermediate supports, the crossbars (joists) begin to be installed. They are attached parallel to the base of the fence, retreating 20-25 cm from the edge of the profiled sheet. The frame for a fence made of corrugated sheets is mounted according to the rule: 1 log per 1 m of structure height. On a fence up to 1.7 m high, it is recommended to fasten logs in 2 rows, over 1.7 m - in 3 rows (to increase the rigidity of the structure).
To install the logs, 2 types of fastening are used:
- Welding. The fastest and most reliable method. Welding areas are coated with a primer to prevent rust.
- Screw. Allows for dismantling.

Painting a frame for a profile sheet fence Source obustroeno.com
Installation of sheets
The corrugated sheets are fastened to the transverse joists using screws. It is necessary to monitor the fastening of the screws.
An incorrectly installed (strongly or crookedly twisted) screw when installing a corrugated sheet on a fence can deform the metal and cause corrosion.
The joint is overlapped through the wave and fixed with roofing screws or rivets (preferably steel, not aluminum).
How much will the fence cost: installation price
The total cost of fencing made from corrugated sheets consists of the total costs of materials, services for their delivery and installation of the structure.
The price of a corrugated sheet is determined by its thickness, the nature of the coating and the profile height. Delivery costs are determined by the distance to the construction site. The cost of installation work varies depending on the terrain and project characteristics.
The main value that influences the final amount is the height of the fence, which determines the size of the post and the depth of its placement in the ground, as well as the number of logs (cross members). You can calculate the required number of sheets by dividing the total length of the fence by the working profile sheet. Self-tapping screws are purchased based on the number of corrugated sheets. 9-10 self-tapping screws are taken per sheet.
On average, you can find the following prices on the market:
- A fence made of corrugated sheets with metal posts 1.5 m high - from 1000 rubles. per linear meter, height 2 or more meters (on three logs) - from 1200 rubles. per linear meter.
- A fence made of corrugated board with brick pillars - from 1400 and 1700 rubles, respectively. per linear meter.
Video description
Examples of beautiful fences made from corrugated sheets in the video:
A metal fence made of corrugated sheets serves as a laconic and popular way of fencing a private plot of land. It is in demand due to low monetary and labor costs; basic construction skills are enough to build it.