How to make raised beds with your own hands from boards? How to make beds from boards: the three most successful options Do-it-yourself frame beds.
Only a person far from farming can say that plants don’t care in which bed they grow. The shape and size of the beds determine the level of soil moisture, the intensity of gas exchange and the species composition of microorganisms that live in the upper layers of the earth. All these factors have a direct impact on the quality of the substrate, and consequently on the level of productivity - the main criterion of success for any gardener. How to use a scientific approach for the benefit of your garden, how to create not only a neat appearance of the beds, but also increase the productivity of your plot as high as possible? We will try to answer these questions in this publication with a large-scale selection of photos of a wide variety of beds.
Principles of arranging beds
A garden bed is a relatively small, often quite isolated area of soil where you can provide individual care for a plant of a particular crop, create a moisture regime and fertilize it. It is obvious that in a summer cottage or garden, plants with different agricultural techniques are grown, often with opposing care requirements - without an individual approach it will not be possible to achieve high yields. It is for this purpose that differentiation is necessary on the site - dividing the territory into zones, and the zones into beds.


If the purpose of the beds is more or less clear to every gardener, then such nuances as the level of illumination, the composition of the soil and even its consistency, necessary for different crops, are not always taken into account by everyone. Unfortunately, failure to understand that cucumbers and tomatoes, for example, require different approaches leads to a significant loss of yield. By creating simple trenches for planting certain crops, or isolated beds, the owner of the site can give the plants proper care - all efforts will invariably pay off in the quality or quantity of the harvest.


Cultivation methods
There are two main (and at the same time diametrically opposed) approaches to farming:
- traditional;
- ecological.
The traditional method of cultivating the land is a thing of the past, incredibly labor-intensive and often irrational, extremely traumatic for the ecosystem. It is based on human attempts to control the processes in the soil and its condition. The traditional method of farming includes the following activities:
- digging up the soil twice (per year);
- herbicide treatment;
- uncontrolled amount of fertilizer applied to the soil;
- With this principle of farming, beds are cultivated in such a way that they have a small number of capillaries and, as a result, an insufficient number of microorganisms.
- All these factors inevitably lead to low yields and depletion of soil resources.


The second approach, ecological (natural), is based on the ability of the soil to regenerate itself. There are many principles of natural farming, but they are all based on the fact that humans rarely interfere with the natural course of processes occurring in the soil. Digging up the soil is replaced by surface loosening, and weeding once a week or two is replaced by timely mulching.


Modern farming methods are based on an ecological method and with this approach microorganisms, plant roots and insects independently restore the soil structure. An increase in the number of capillaries increases gas exchange processes, as a result, plant roots are naturally enriched with nitrogen, which leads to an increase in both the quality and quantity of the crop. All this can happen without chemical fertilizers at all or with a minimal amount of them.


Types of beds for a modern vegetable garden
Only at first glance it may seem that the beds differ from each other only in size and shape. Although these indicators are of great importance for plants that require an individual approach and isolation from other crops. The beds may differ in the very principle of formation, for example, they may be not on the site, but above it, located on the so-called “green wall” or inside large-diameter plastic pipes. It all depends on how to care for each specific type of plant.
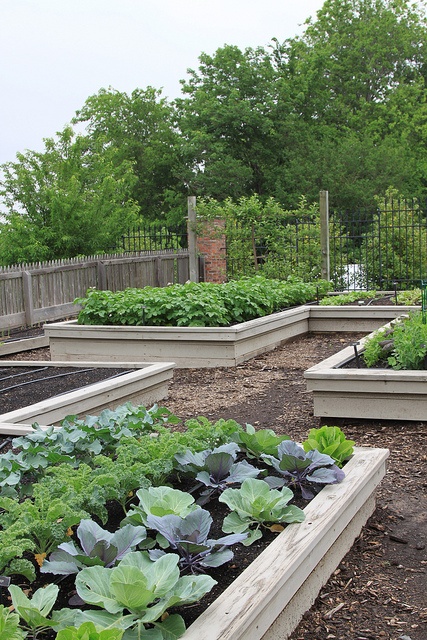


Box-shaped bed
The box bed is one of the most popular methods of soil cultivation today. This method of planting allows not only to create a separate place for each crop, but also to organize the landscape of a summer cottage or vegetable garden at a high aesthetic level. It is not difficult to organize a garden bed in the form of a box - a fence in the form of low shields is installed on the prepared and marked site (hacienda or small backyard).


To organize the fencing of the bed-box, you can use:
- flat or wavy slate;
- unnecessary boards;
- polycarbonate sheets;
- plastic;
- any waste material that can withstand soil moisture for more than one summer season.


Next, layers of organic matter and the soil itself are poured into the prepared compartment. Such beds are not dismantled for the winter, and in the spring, after surface loosening, it will be possible to plant seeds or seedlings of certain crops again. This approach is not only practical and rational, but also aesthetic.


Beds with high sides
Raised beds are usually shaped like ridges or trapezoids. The rise of the soil is usually ensured by a “cushion” of compost layer, on top of which soil is poured. In areas of our country where the mole cricket is common, a layer of compost is not used; lifting is carried out only by pouring soil. The mole cricket usually makes nests in the compost layer (a warm and humid place is an ideal habitat) and can spread throughout the entire area very quickly.


Raised beds are most often used for growing melons:
- cucumbers;
- pumpkins;
- zucchini;
- Sometimes some varieties of potatoes are grown this way.


Beds with high sides are created for one season. In most cases, the embankment subsides greatly under the weight of snow and loses its functional purpose. If weaving plants (for example, cucumbers, some types of zucchini) will be grown in a bed with a box design, then it would not be a bad idea to equip the fence with a vertical lattice (made of wood or metal, created using weaving, or any available means).


If such a structure is equipped with a high dome covered with film, then an ordinary garden bed becomes a greenhouse. Growing seedlings in such portable structures is very convenient and practical.


"Warm" beds
The beds are called “warm” because their lower layers contain fresh, unrotted manure. The mound of manure is carried out in late autumn, so that all processes take place during the winter period under the cover of snow. In early spring, after the snow has melted, such beds are cleaned so that they are warmed by the sun and decomposition processes begin.


Next, the manure begins to rot with a large release of heat. As a rule, in compost heaps during “burning” the temperature inside can reach 40-50 degrees. But the layer of manure on the beds is not high and this effect does not occur; moreover, winter exposure significantly slows down the “burning” processes. All these manipulations and preparations are needed in order to plant crops in a ready-made, “warm” bed. This is usually done for planting plants with a shallow root system - cucumbers, radishes, etc.


After the end of the summer season, all manure is processed. If you remove the top layer of soil, you will find humus underneath, which is a very valuable substrate. This natural fertilizer can be scattered throughout the garden or summer cottage. And at the end of autumn, it will be possible to put manure back into the bed and start the process of preparing a “warm” bed over a new one.


Beds with drainage
In clay buds, in very low places into which all the water constantly drains and in wetlands, it is necessary to arrange beds with drainage. They are not difficult to make - usually a 50-60 cm layer of soil is removed, then sand about 20 cm high is laid out at the bottom of the resulting hole, then sawdust and humus are poured in, and only after that soil is added. Drainage and gas exchange in beds of this type are excellent - an ideal place for growing root crops (for example, potatoes).


Material for making beds with your own hands
Creating a bed of any configuration requires some preparation. In order to arrange the beds in the form of boxes, you will need to use the following materials:
- slate or boards, plastic or polycarbonate of such a height that there is at least 30 cm in the ground, and at least 20 cm on the surface of the entire size of the product;
- pegs made of wood or metal, which will be needed to secure the fencing material;
- non-woven material that can be used to cover the bottom of the prepared trench.


After the workpiece - the dug hole - is covered with non-woven material, it will be necessary to fill it with the following layers on top:
- sawdust or straw - approximately 10cm;
- dry foliage (which you prepared in advance in the fall) - about 10 cm;
- a mixture of compost and soil, ratio 1 to 2 (layer size 10 cm or more);
- a clean layer of soil of at least 10 cm.

- marking on the ground - usually done using pegs and a stretched cord. When calculating the size of the bed, it is important to understand that the narrower the trench, the faster it will dry out;
- Next comes the preparation of the material for the fence - cutting it, preparing pegs. If the box is not very large, then it will be more convenient to assemble it in advance using self-tapping screws. Such structures are reusable, they can be removed for the winter if the beds are moved;
- then a fence is installed on the garden bed;
- then non-woven material is placed at the bottom of the pit;
- A layer of sawdust, dry leaves, soil mixed with compost and just soil is poured in successively.


And in conclusion. Your plot can not only produce a good harvest, but also look aesthetically pleasing. Landscape design can manifest itself not only in the courtyard of a private house, but also in the garden and vegetable garden. But the main principle for arranging beds on the territory should still be the plants’ needs for sunlight. In a properly located bed, plant care will require minimal care.


Traditional cultivation of the land requires a lot of time and physical effort, and the harvest does not always correspond to expectations. That is why more and more gardeners are setting up high beds on their plots, which allow them to obtain an excellent harvest of vegetables every year without much effort. Anyone can make raised beds with their own hands, because this does not require special skills or special equipment.
Benefits of raised beds
Compared to conventional beds, bulk beds have many more advantages:
- a vegetable garden can be planted even in an area completely unsuitable for farming;
- Digging and weeding of the garden are replaced by light loosening of the soil;
- in a limited space it is easier to remove weeds;
- the high bed is easy to install and just as easy to disassemble;
- You can lay out paths between the beds and walk along them in any weather;
- plants ripen faster, which is especially important for cold regions;
- when arranging a high bed, good drainage is ensured;
- crops in the beds can be easily protected from frost by covering them with tarpaulin or agrofibre.
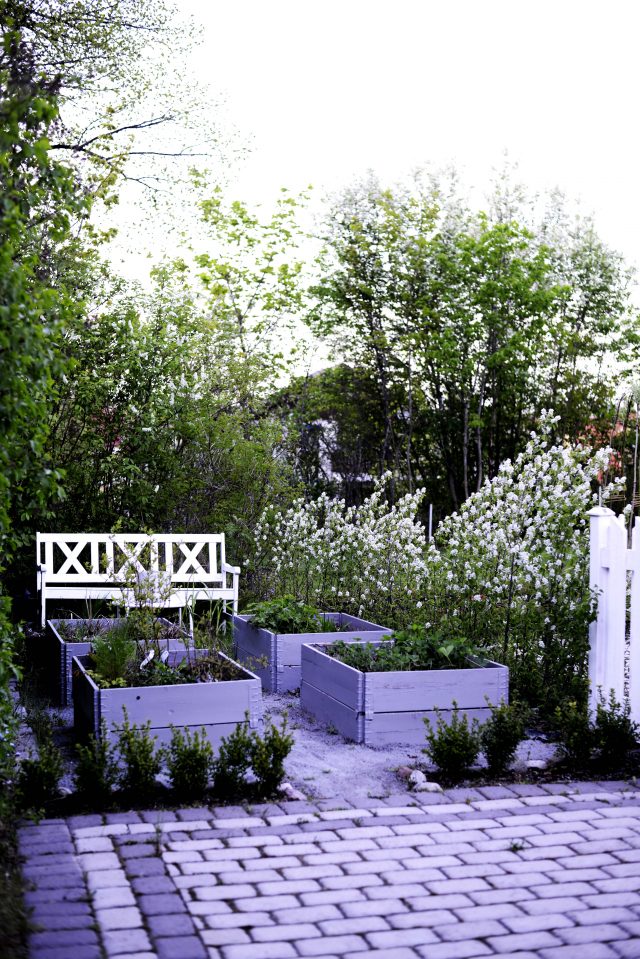
In addition, a vegetable garden made from raised beds can be very decorative, so you can plant it next to your house.

Fencing materials
A raised bed is a frame of certain dimensions, the internal space of which is filled with soil, compost and fertilizers. Most often, the frame is made of a rectangular shape, and it is assembled from boards, slate, branches, plastic and other materials.
Wood is the most affordable, easy to install and environmentally friendly material. To assemble the beds, boards, timber, and small logs are used. Disadvantages: wood requires wood, quickly darkens and loses its attractiveness, and is short-lived.

Vine and twigs are an inexpensive and original solution. Wicker walls look very attractive; you can give the bed any shape. Disadvantages: weaving vines requires skills; the service life of such a frame is very short.
Stone and brick are an option for areas with classical architecture. A very reliable and durable material, it gives the beds a decorative look. Disadvantages: high cost, it will take more time to create a bed, difficult to dismantle.

Plastic is an excellent alternative to wood. Sheet plastic is easy to assemble and disassemble, it is quite durable, has an attractive appearance, is very durable and relatively inexpensive. Disadvantages: certain types of plastic contain harmful substances, so they are not suitable for the garden. The environmentally friendly material has an appropriate certificate, which must be presented upon purchase.

Metal is a convenient and durable material, ideal for shaped beds. If necessary, moving the metal frame will not be difficult, as will dismantling it. The appearance of the metal walls is neat; they can be painted in any color or decorated with ornaments. Disadvantages: welding skills are required to assemble a metal curb, the price of sheet metal is quite high, and high-quality surface treatment is required to protect against corrosion.

– an excellent solution for multi-tiered beds or arranging a vegetable garden on a slope. The walls can be made monolithic or assembled from separate ones. The concrete surface is easy to decorate, it is extremely strong, durable, and has a neat appearance. Disadvantages: lengthy installation process, high cost of materials, additional requirements for the design of the drainage system.
Decorating beds with slate is a completely budget-friendly and simple option. The walls can be installed very quickly, this material lasts a long time, and for decorative purposes the slate can be painted in any color. The main disadvantage is the fragility of the material, so it should be handled with care during installation.


Each gardener selects the size and shape of the bulk bed at his own discretion. And yet, there are optimal parameters at which the bed will be most effective:
- height from the ground 15-50 cm;
- width 90-120 cm;

If the bed is placed on fertile soil, it is made 15-20 cm high. This is quite enough for a good harvest. If the soil on the site is not suitable for farming, the bed is raised to 30 cm. Compost beds are made even higher - up to 0.5 m. Sometimes the walls are raised very high, which allows you not to bend over while cultivating the soil and planting plants, but this increases material consumption and requires more time to arrange a garden. In addition, with a large frame width, it is inconvenient to cultivate the soil at such a height.

The width of the bed should be sufficient for two rows of plants. With this planting, all plants will receive the same amount of air and sunlight, which has a very positive effect on yield. More rows result in the average plants receiving less air, being shaded, stretched upward, and yields falling. It is also much easier to cultivate a bed of standard width than one that is too wide.
The length of the bulk bed does not play a special role, therefore it is limited only by the size of the plot. The most common option is beds with a length of 1.5 to 3 m; They are compact and look neat in the garden.
Proper arrangement of high beds
For example, a bed with a fence made of boards is taken; This option is the most convenient and inexpensive.
During the work you will need:
- bayonet shovel;
- roulette;
- drill or screwdriver;
- building level;
- circular saw or jigsaw;
- self-tapping screws;
- boards 50x200 mm;
- timber 50x50 mm;
- primer;
- construction mesh.
Step 1. Wood processing

The boards are cut to the size of the frame, after which they are coated on all sides with antiseptic impregnation. You can use used oil for these purposes, and to prevent harmful substances from penetrating into the soil, after treatment it is recommended to cover the tree with film on one side. The lower edges of the boards, which will be in contact with the ground, are treated especially carefully. The timber is sawn into pieces 50 cm long and also impregnated with a protective agent. After this, the building material is laid out to dry.

Step 2. Site preparation
The area for the garden bed should be illuminated by the sun for at least 5 hours a day. They mark the boundaries of the bed, remove stones and branches, and dig up perennial plants. If desired, you can dig up the soil together with fine grass - this will increase the permeability of the soil. If the soil is very dense and trampled, it is enough to remove the layer of turf around the perimeter of the marking to a small depth to make it easier to position the frame.
Step 3. Assembling the frame for the bed


The dried boards are knocked down in pairs into panels and connected to each other using bars. The height of the shields is equal to the height of the bed, the long sides of the frame are additionally reinforced with transverse bars in the center. Since the length of the bars is greater than the height of the walls, they should protrude 10 cm above the frame. These will be the legs of the frame. To improve the appearance of the structure, boards laid flat, the edges of which are cut at an angle of 45 degrees, are placed around the perimeter of the frame. Finally, the frame can be painted on the outside.

Step 4. Installation of the structure

The finished frame is transferred to the installation site; align the structure according to the markings, make recesses for the legs, check the location of the bed using a building level. If necessary, place pegs or, conversely, remove excess soil. The structure should be as level as possible, with all corners at the same level. Finally, add soil around the perimeter of the walls and compact it so that there are no gaps left.
Step 5. Filling the bed
First, the bottom is covered with a construction mesh and nailed along the edges to the walls of the frame. The mesh will protect the structure from the penetration of moles and mice. Then geotextiles are laid, which will not allow weeds to grow. Next, the beds are filled in layers:
- small branches, bark, large shavings, leaves;
- bird droppings, rotted manure or;
- fallen leaves, branches, bark, grass;
- mineral fertilizer;
- fertile land.

The thickness of each layer is 10 cm. There is no need to mix the layers, but it is necessary to level and compact well. If the soil on the site is not of very good quality, it is better to use purchased soil. After filling, the bed is well watered and left for a couple of days. During this time, the layers will settle a little and become denser. It is recommended to cover the frame with black agrofibre, which provides better soil heating and prevents weeds from germinating.

It is recommended to make high beds in the fall or at the end of summer, so that the layers are well rotted and the plant roots receive the maximum of useful substances. If the beds are installed in the spring, it is necessary to fill them at least a month before planting and pour plenty of water several times to compact them. It is easy to turn such a structure into a greenhouse: to do this, plastic or metal arcs are installed above the frame, the ends of which are secured to the walls with bolts. A polyethylene film or special agrofibre is attached to the arches on top.

Prices for various types of construction boards
Construction boards
Construction of beds made of slate
To create bulk beds, you can use both flat and wavy slate. The technology for installing beds using this method is very simple and anyone can do it.

Table. Wave slate

To work you will need:
- slate sheets;
- Bulgarian;
- bayonet shovel;
- a piece of chalk or pencil;
- roulette;
- level;
- rubber hammer;
- drill;
- wooden pegs or metal rods.
Step 1. Marking
In the selected area, the boundaries of the beds are marked and beacons are installed. Narrow grooves are dug along the perimeter to the depth of a bayonet. If the soil is good, then remove the entire fertile layer inside the marking, pouring it near the future beds.
Step 2. Preparing the material


Sheets of slate are laid on a flat surface, the required length is measured and a chalk line is drawn across the waves. After this, the slate is cut along the lines using a grinder. The pegs are impregnated with bitumen mastic or waste oil, and if scraps of metal rods are used as posts, they are treated with anti-corrosion compounds.
Step 3. Installing the frame

The first sheet of slate is installed vertically in the groove from the corner of the marking. Next, place the next sheet with an overlap in one wave, level it, and beat it on top with a rubber hammer so that both sheets are at the same height. Check the location of the upper edge of the slate with a building level; if necessary, add or remove soil from below. The walls are reinforced with metal rods or pegs, which are driven in on both sides to a depth of 0.5 m. So, all the sheets of the frame are placed one by one, the trench is filled up and the horizontal level is checked again. After this, the soil near the walls is compacted and the excess is removed.
Step 4. Filling the bed

At the very bottom you can put old newspapers, cardboard, pieces of wallpaper, the next layer is chopped brushwood, tree bark, sawdust. After this, small shavings are poured in, plant waste, peat or compost are laid. And all this is sprinkled on top with the soil that was taken out at the very beginning. Apply plenty of water to the bed to wet all layers and leave for several days. When the bed is compacted, you can begin planting.
Garden bed care
When the plants sprout, the plantings should be well watered and mulched. Weeds that break through the mulch layer are immediately removed. After harvesting, the surface is loosened and sown with green manure. Before the onset of cold weather, all vegetation is mowed down, leveled on the bed, covered with a layer of earth on top and covered with black film for the winter. Periodically it is necessary to inspect the walls of the frame, replace or repair individual sections.
The soil between the beds is most often covered with fine crushed stone, gravel, straw, and sometimes sown with lawn grass. In such conditions, the garden always remains well-groomed, weeds do not grow, and dirt does not stick to shoes. If desired, you can use tiles and bricks, or pour concrete.
Video - DIY raised beds
Video - Raised beds made of slate
Raised beds have some advantages over classic beds. Many people think that making such a bed is a difficult and expensive task, but this does not require special skills or special tools.
DIY raised bed- what to make from, photo and description of the process of assembling the beds, what high beds are intended for, advantages and disadvantages.
Cultivating a plot in the traditional way requires a lot of effort and time, and the harvest does not always exceed expectations. Therefore, many gardeners set up high beds on their plots, which allow them to annually obtain an excellent harvest of berries and vegetables with proper care.
Raised beds: pros and cons
The main advantages of raised beds over classic ones include the following:
Possibility to set up a vegetable garden in areas not suitable for farming;
- digging and weeding is replaced by light loosening of the soil;
- it is convenient to work with high beds, because they are raised above the ground;
- warming up of high beds occurs faster than ordinary ones;
- it is easier to remove weeds in a limited space;
- by arranging a high bed, good drainage is ensured;
- vegetables and berries ripen faster in high beds, which is important for regions with cold climates;
- the high bed is easy to install and disassemble if necessary;
- beds can be protected in case of frost by covering them with agrofibre or tarpaulin.
Disadvantages of raised beds
A high bed requires frequent watering and enhanced mineral fertilizing. A pest like the mole cricket loves to settle in high beds, so you’ll have to keep an eye on it and fight it.
Material for beds - what to make high beds from
High bed is a frame of a certain size. The inside of the frame is filled with compost, soil, and fertilizers. The shape of the frame can be different; the most common is a high rectangular bed.
Material for making beds – boards, slate, plastic, branches and others.

Tree- the most accessible, easy to install and fairly inexpensive material. To assemble a bed you will need timber, boards, or small logs.
The main disadvantage wood is its fragility, which requires additional protective treatment.

Twigs and vines– original, cheap material. The woven walls of high beds look attractive, and the shape of the bed itself can be made to any shape.
Such a frame has a very short service life and you need to know how to weave a vine.


Brick and stone– durable, reliable material for beds. But such beds are difficult to dismantle and construction takes a lot of material and time.

Plastic frame - an alternative to wood. Plastic is easy to install and disassemble, durable and strong.
But some types of plastic contain harmful substances and cannot be used in the garden.

WPC beds- frame for beds made of wood-polymer composite. Beautiful appearance, durable material, connected using joining elements. The disadvantage is that the material is very expensive.

Metal– durable, convenient material for creating beds. You can easily change the appearance of the frame by painting it in any color. To assemble such a frame, you need to have the skills of a welder; the material is quite expensive; surface treatment will be required to protect it from corrosion.

Slate- a budget option for designing beds. Installing such a bed is quick, slate is durable, and you can paint the surface any color. The disadvantage is the fragility of the material; care is required during assembly.

Summer residents use it to build high beds plastic bottles, old plastic boxes.
Video - Raised beds made of slate
Each gardener chooses the desired size and shape of raised beds independently.
There are also optimal sizes at which the bed will be most effective:
Bed width 90-120 cm;
- the height of the bed from the ground surface is 15-50 cm.

Bed height depends on where the soil will be poured - if directly onto fertile soil, then a height of 15-20 cm is enough, this is enough for a good harvest. If the site is not suitable for farming, the bed is raised by 30 cm. Warm beds are made even higher up to 50 cm by adding compost.
Bed width they make it so that 2 rows of plants fit - this will be convenient for processing, the plants will receive enough sun and air.
Raised bed length does not play a role and is limited by the size of the site. Beds with a length of 1.5-3 meters are common.
A convenient row spacing is at least 45-50 cm; do not make a smaller distance, it will be inconvenient to move between the beds and process.
Do-it-yourself raised beds made from boards

An inexpensive and convenient option for making a frame for a raised bed.
To work you will need:
Roulette
Bayonet shovel
Screwdriver
Hand saw for wood or jigsaw
Building level
Boards size 50x200 mm
Beam 50x50 mm
Self-tapping screws
Construction mesh
Primer

Decide on the dimensions of the frame. Cut the boards to size and cover all sides with antiseptic impregnation (you can use waste oil).
Also cut the timber 50 cm long and treat it with an impregnating agent.
Lay out the boards and timber to dry.
Site preparationChoose a sunny location for the raised bed; it should receive at least 5 hours of light per day.
It is necessary to mark the boundaries of the bed, remove branches, stones, and rhizomes of perennial plants. Dig up the soil along with the grass; if it is dense, remove the layer of turf around the perimeter to conveniently position the frame.
Assembling the bed frameAfter drying, the boards are knocked down into panels, connecting them together with bars. The height of the shields is the height of the bed. In the center of the long sides of the frame, additionally strengthen it with transverse bars.

Upon completion, you can paint the frame from the outside.
Transfer the finished frame to the installation site. The structure should be as level as possible, the corners should be at the same level.
After installing the frame, add soil around the perimeter of the walls so that there are no gaps left.
Video - Making raised beds
How to fill a raised bed
The bottom of the frame is covered with a construction mesh, nailed to the walls of the frame. The net is needed to protect against moles and mice. Then lay geotextiles that prevent weeds from germinating.
Drainage in the form of bark, small branches, leaves, large shavings;
- a layer of fertilizers: compost or rotted manure, bird droppings;
- grass, fallen leaves, bark, small branches: creating a permeable layer;
- a layer of organic matter which is supplemented with mineral fertilizers;
- a fertile layer of soil, the composition of which depends on the type of plants that you plan to grow in the beds. The minimum layer thickness is 10 cm.

When filling, the thickness of each layer is approximately 10 cm; there is no need to mix each other.
When the high bed is full, it is necessary to pour it well with water and leave it for several days for the layers to shrink.
It is better to cover the bed with black agrofibre or polyethylene at this time to ensure better heating of the bed.
The beds should be made at the end of summer or autumn - this way the layers will rot well before spring and there will be a sufficient amount of nutrients for plants in the soil. Leave this bed covered until spring.
When installing beds in the spring, a month before planting, water the bed several times.

It is easy to turn high beds into a greenhouse by installing arcs over the frame, which you can fasten to the walls of the frame with self-tapping screws or bolts.
A film or special agrofibre is attached to the arches on top.
Video - DIY raised beds
How to care for raised beds
When the plants sprout in the garden bed, it is good to water them and mulch them. Weeds that break through the mulch layer are immediately removed.

When the entire harvest is harvested, the high bed is loosened and sown with green manure. Replace damaged sections in the garden bed.
Many gardeners know that wooden beds, which are slightly raised above ground level, have many advantages when compared with classic ones. However, you should not assume that their creation is labor-intensive and time-consuming. It is worth choosing the mentioned beds for several reasons.
Firstly, they allow you to create a vegetable garden even in places that are unsuitable for farming. This applies to rocky areas. Secondly, such beds only need to be dug twice, one of them is carried out during planting, while the other - during harvesting. Thirdly, a wooden bed makes it easier to cultivate the land, because it is quite convenient to approach.
Why else should you choose a raised bed?
Wooden beds are quite easy to install and dismantle; it is for these two reasons that summer residents quite often choose such structures. It is easy to fight weeds on their surface, because space is limited. Crops ripen faster, this is due to good drainage; in addition, in the spring the soil warms up quickly under such conditions. Structures of this type provide increased protection from freezing, because the bed can be covered with suitable material that will be ready to save the plants from frost.

Preparation of tools and materials
A wooden bed can have different parameters, but in this case we will consider an example that assumes a length of 3 m. The width and height will be equivalent to 1.8 m and 40 cm, respectively. A summer resident can choose any other size - everything will depend on the available free territory and needs.
First you need to prepare tools and materials, including:
- wooden boards;
- protective impregnation;
- miter box;
- nails;
- hacksaw;
- hammer;
- fine mesh construction mesh.
As for the boards, their dimensions should be 5 x 20 cm. Experts recommend selecting species that will be less susceptible to rotting. Additionally, you should purchase a special impregnation that will delay these processes. For wood, you should prepare a hacksaw with which you can cut the material.

Preparing for work
If you decide to make a wooden bed, then first you need to choose a place for it. An area that will be in the sun for about 5 hours a day is perfect for this. A fairly significant advantage of the described design is the possibility of its installation in a place that previously turned out to be not entirely suitable. This could be an area of lawn that was previously overgrown with weeds. This should also include vacant lots.
The area must be cleared of construction and other debris, weed roots must be removed, and annual weeds can be left. The area is dug up along with the grass, which will increase its moisture permeability. At the final stage of preparation, it is necessary to determine the dimensions of the structure.

Making a box
Quite often lately, summer residents have been making wooden beds. You can make a wood box with your own hands. To do this, it is necessary to cut four blanks from the board, each of which will be 3 m long. Four other blanks will have a length of 1.8 m.
You need to take care of the presence of bars; their height should be equivalent to 40 cm or more. The ends of the boards are cut at an angle of 45° using a miter box. The boards of the lengths mentioned above should be connected, and then nailed to wooden blocks. This will allow you to assemble the box. In the central part of the three-meter side, the levels of the boards should be secured with additional bars. It would be useful to decorate the top edge of the boards; for this, boards of appropriate sizes are used, which are laid flat. A net should be nailed to the bottom of the box, which will protect plantings and crops from moles.

Filling the box
If you are faced with the question of how to make wooden beds, then you should familiarize yourself with each stage of the process. Among others, filling the box with soil should be highlighted. To do this, the structure is installed in the chosen location, and the organic matter can then be laid out on a high bed.
The first layer will be a 10 cm permeable material. This should include fallen leaves, shredded branches, shavings or tree bark. The second layer is organic fertilizer, namely:
- compost;
- manure;
- bird droppings.
The third layer will be a permeable material, such as organic fertilizer. If desired, you can use mineral fertilizer. The fifth layer will be garden soil, which is laid 10 cm thick. Mixing of materials should not be carried out. The bed is watered from above and left for 3 days to shrink.
If the plants are not to be planted immediately, then the top of the soil is covered with black plastic film. It is better to create wooden beds, photos of which you can find in the article, at the end of summer. The raised structure is covered with dark material until spring, which will ensure effective heating of the soil. If the bed will be used as a greenhouse, then plastic pipes should be fixed to the body, which need to be shaped into an arch.

Optimal bed size
Before you make wooden beds with your own hands, you should familiarize yourself with their optimal sizes. These parameters, like the shape, are selected individually. However, there are still recommended sizes with which the bed will be most effective. The height from the ground can vary from 15 to 50 cm. As for the width, it is usually 90-120 cm.
If the bed is supposed to be placed on fertile soil, then its height should be 20 cm. This will be enough to get a good harvest. If the soil in the area is not suitable for farming, then it is better to raise the bed to 30 cm. Wooden garden beds can also be composted, they are made even higher - up to 0.5 m. Sometimes the walls are made very high, this allows you not to bend over during processing soil and planting. However, the material must be laid in a larger volume - a lot of time will be spent on arrangement. Among other things, with the impressive width of the frame, cultivating the soil will not be so convenient.
When choosing the width, you must take into account that it should be enough for two types of plants. With such planting, crops will receive the same amount of sunlight and air, which will have a positive effect on yield. By increasing the number of rows, you will be faced with the fact that the plants will receive less air, neighboring crops next to the outer ones will stretch upward, and the yield will fall.
By choosing a standard width, you can manage your bed quite easily. If you are wondering how to make wooden beds with your own hands, then you should remember that they can also be bulk. At the same time, their length does not play a special role, so you can limit yourself only to the size of the area. The most common garden bed option is a solution whose length ranges from 1.5 to 3 m. Such structures are compact and look neat in the garden.

After the boards are cut to fit the frame, they should be coated on all sides with antiseptic impregnation. You can also use used oil for this. However, when deciding how to treat wooden beds, you must remember that the substance should not get into the soil. For this purpose, the structure is covered with film.
It is necessary to approach the processing especially carefully from the underside of the boards that will be in contact with the ground. Once the composition has been applied, the material must be laid out to dry.
Garden bed care
After the plants sprout, the plantings are watered and mulched. Weeds that have made their way through the mulch layer must be removed. The surface should be loosened after harvesting and sowed with green manure. Before the onset of cold weather, the vegetation is removed, everything is covered with a layer of earth on top and covered with black film for the winter.
The walls of the frame must be periodically inspected to determine whether they require repair or replacement of individual sections. Between the structures, the soil is filled with fine crushed stone, straw, gravel, and sometimes lawn grass is used. Under such conditions, the garden will always look well-groomed, and weeds will not grow, while dirt will not stick to shoes. If desired, you can lay out paths made of bricks or tiles. Some summer residents fill the space with concrete.
Conclusion
Cultivating the land using traditional methods is quite labor-intensive; it requires the application of physical strength, while the harvest does not always meet expectations. That is why gardeners have recently begun to build high beds on their plots, which allow them to get an excellent harvest of vegetables every year. Anyone can make such designs, because this does not require special equipment or special skills.
Sometimes, by the way, wood is replaced with some other materials. Among them, slate, plastic and even concrete should be highlighted. In the latter case, the bed will turn out to be stationary, so it is necessary to approach the issue of choosing a place for it more carefully.
The productivity of plants depends not only on the time of planting the seeds and their germination, but also on the planting location and the height of the embankment. We hope that our tips for building garden beds at the dacha with your own hands will be useful not only to novice gardeners.
Selecting a location
Some vegetable crops, for example, peas, dill, sorrel, lettuce, can grow in partial shade. But most plant species are not able to fully ripen in the absence of light.
Therefore, when placing beds on a garden plot, they are primarily guided by their illumination - it is advisable that they be warmed by the sun from the very early morning until 6-7 o'clock in the evening.

Decorative garden plantings
When choosing a landing site, it is necessary to take into account the following requirements:
1 You should not plant plants in lowlands or on northern slopes, where the soil freezes deeper than on flat areas; the yield in these places will be low; plus the water in this place will constantly stagnate, which can lead to rotting of the roots
2 The site should not have a strong slope, otherwise water will simply drain from it when watering, and the plants will not receive enough moisture
3 There should be no large trees, buildings or fences near the plantings that could shade the plants
4 It is advisable to place them north to south so that they are evenly illuminated by the sun throughout the day
5 To grow vegetables for a family of 3-4 people, about 1 hectare is enough; the rest of the territory can be planted with potatoes, berries and flowers
6 To make the plot look neat, try to make “correct” beds of the same width and length; standard dimensions – 3.5x0.8 m
7 Don’t forget about plant compatibility: some of them don’t get along well with each other
Dimensions

In principle, you can make a bed of any length – up to 10 m. We agree, such beds look original. But constantly bypassing them when watering is very inconvenient. It is better to prepare an embankment 3.5-4 m long. This size is considered optimal. Or break a long bed into two using a small path. This will make it much easier for you to move around the site.
Standard width 0.8 m. Do not save space (!) and under no circumstances make it wider. You may be able to reach the center of the bed when planting and scatter the seeds, but weeding will turn into a real pain. Don't believe me? Try an experiment and prepare a small but wide mound. Believe me, next year you will lose the desire to make beds of this size.
A more compact version, only 0.45 m wide, is made for carrots. This crop does not like dense plantings - the sprouts must be well ventilated. For the same reason, try not to place tall plants next to carrots. Otherwise, you will significantly reduce its yield. In dense plantings it will grow small.
Shape and height
When designing a plot, we can decorate it with beds of different shapes, from standard rectangular to triangular, trapezoidal or oval. There are plenty of ideas for unusual garden beds online. The main thing is that it is convenient to approach them from either side for watering and weeding.
The height of the embankment depends on many factors, including the type of site. In most cases, it is enough to raise them to a height of 35-50 cm. This will be enough to prevent the roots of the plants from rotting. Too high beds - up to 0.8 m - are usually made in very swampy areas.
But such structures are very labor-intensive. Plus, they will need to bring at least a couple of KamAZ trucks of fertile soil to the site. For one small bed you will need at least half a ton of it.
Raising beds is often required for growing heat-loving crops, for example, cucumbers. After all, in high beds the earth warms up much faster. It is often impossible to get an early harvest without this.
Sometimes they raise beds just for their own convenience.
In this case, caring for plants is much easier. Just keep in mind that in high-altitude beds the soil dries out much faster, so you will have to water the plants more often. Experts also advise raising the planting area in areas located in the shade. The optimal height of the embankment in this case is 50 cm.
To prevent water from rolling onto the path when watering, the bed should be slightly concave inward.
Arrangement of a high bed

A box for it can be made from available materials: boards, plastic, metal or stones:
1 It is better to put a metal mesh at the bottom - it will protect the plants from the ubiquitous rodents.
2 Crushed stone, expanded clay or broken brick are used as drainage. The thickness of this layer is 10-15 cm.
3 It is better to pre-treat the prepared soil with agents against pathogenic microbes and insect pests. If you don’t want to use chemicals, mix the soil with a small amount of wood ash - it will protect the plants from harmful bacteria.
4 You should not fill the bed with soil up to the very edges - it will constantly spill out onto the path. You need to leave about 5 cm.
Drainage

When the site is located in a lowland or swampy area, growing many types of crops on it becomes a problem. Even if vegetables and berries ripen on it, due to excess moisture they quickly deteriorate during storage.
Their taste also changes - much less sugar accumulates in them. To prevent this from happening, take care of the drainage of the wetland.
Most gardeners know that cabbage, melons, zucchini and cucumbers require more moisture to grow than other crops. But it turns out that it is also possible to grow massive heads of garlic only in areas rich in moisture. On dry soil, even with abundant watering, it is rarely large.
For the above types of plants, drainage is not required (unless, of course, the stagnation of water in the beds is insignificant). It is better to drain the area for growing other crops.
To build multi-tiered beds, you can knock down special boxes from wood. It is highly undesirable to use metal - it heats up quickly in the sun, and the soil in them will dry out even faster. If necessary, paint metal containers with light paint - light surfaces heat up less.
Ready-made boxes, racks or containers of suitable size are often used for such structures. You can also place large containers filled with soil on the shelves.
Lazy beds

Such mounds are used when planting a large number of plants. They are small in height and externally look like bulk trapezoids without the use of a box. True, such embankments will have to be made every season - they settle during the winter.
Make a shallow ditch in the area of the path, throwing the earth onto the ridge. Level the soil with a rake. The bed is ready.
Let us repeat - the drier the soil on the site, the lower the height of the embankment should be. In swampy areas, dig paths as deep as possible and make the bed higher. On sandy soil you don’t even need to do this - just trample the paths on the dug up ground well with your feet, thus marking the location of the paths.
Boxes for beds
Decorative options, limited to a box, are a favorite technique of many gardeners. After all, caring for them (watering and weeding) is greatly simplified. Using boxes is a good way to protect against soil erosion. In addition, the paths between them will always be clean, without streaks and puddles.
As a rule, paths are covered with wood, tiles or concrete so that grass cannot break through the ground.
Before you begin installing the box, the place for the garden bed must be prepared by digging up the ground, carefully removing all weeds. Level it thoroughly with a rake so that water can be evenly distributed over the entire surface when watering or raining.
When digging, you need to cover a slightly larger area. Otherwise, the roots of perennial plants will again emerge from the ground. Getting them out from under the box will be problematic. It is better to first dig up a neglected area twice in spring and autumn.
It is simply unrealistic to get rid of the roots of perennial plants in one go. To make the job easier, simply turn the sod over with a shovel so that the plant roots are above the ground. Gradually they will dry out under the sun's rays and die.
Wooden box

Wooden box
The simplest wooden box is assembled from 4 long and 8 short boards of suitable size. They are connected in pairs using bars. Nails, screws and metal corners are used as fastening elements.
You will also need 4 pegs or cuttings of reinforcement 0.6 m long - they are driven into the ground from the outside to enhance the strength of the structure. To ensure that the bed is perfectly level, its walls are aligned horizontally and vertically with a building level.
Stone or concrete box

Stone or concrete box
Such structures are characterized by high strength and long service life. However, they will not be cheap.
Plus, the procedure for their construction requires a lot of time. And moving the bed will be a serious problem - the structure will have to be broken up.
Metal boxes

Metal boxes
If you have scrap metal on hand, you can make beds from it. Such structures are light in weight and, if desired, can be easily moved to another place. They can be easily painted in any color, so they look quite decorative.
However, to create such products requires the ability to work with a welding machine. You can cut the metal at your nearest scrap metal collection point.
Slate fencing

Slate fencing
It is quite resistant to rotting, even when buried in the ground, and can last a long time.
The disadvantages of slate structures include increased fragility - high precision and accuracy are required when assembling and cutting them.
Plastic structures

Plastic structures
If you have a few plastic panels left after renovation, you can make a fence out of it. Bright, they stand out against the background of plants.
Moreover, plastic can lie in the ground indefinitely - it is not afraid of moisture. However, under the bright rays of the sun, this material quickly fades and loses color.
Mulching
Weeding often takes gardeners a lot of time. If the area is large, this becomes a serious problem. You just have to spend the day and night in the garden.
To reduce the time spent on endless weeding, prepare so-called smart beds. The principle of their manufacture is simple. To protect plants from weeds after planting, cover the gaps between the sprouts with sawdust, pine needles, straw or dried last year's tree leaves.
Mulch the soil and cover it with a dark film. It is spread out before planting, making small holes for the plants. Transparent film is not suitable for these purposes - weeds will continue to develop when exposed to light.
It has been proven that mulching significantly (almost 30%) increases productivity
After all, covering the top layer of soil protects the fertile layer from weathering and rapid drying out. Plus, under a layer of organic matter, beneficial microorganisms and earthworms multiply faster.
Using this method, you can quickly put even abandoned areas in order - just cover the ground overgrown with weeds with mulch for a couple of years.
Unfortunately, in wetlands, mulching often leads to a sad result - covering the soil leads to stagnation of water in the beds, and as a result, rotting of plants. But even in this case, mulching can be useful.
The only difference is that you should not cover the ground for the winter and early spring. Wait until the soil dries well.
Mulch should not be used during rainy seasons. If the summer turns out to be hot, with the help of mulch you will get rid of not only weeding, but also frequent watering. The moisture underneath will evaporate much more slowly. In wet areas, be sure to prepare drainage around the perimeter of the beds to remove excess water.
Warm beds

Achieving an early harvest in our climate is not so easy. At the first return frost, tender sprouts planted in open ground will simply die. Surviving plants will be stunted and diseased. The ideal solution for growing in this case is warm beds.
They can be used for many types of crops: first greens and radishes, heat-loving cucumbers, zucchini, pumpkins, eggplants, tomatoes, etc.
Let's look at the basic rules for creating warm beds and how to grow each crop on them:
1 They can rise above the ground or, on the contrary, be built below ground level.
2 They are buried no more than 0.5 m into the ground. This is quite enough to protect the sprouts from spring frosts. At greater depths, the plants will be in the shade and will be pulled together.
3 Raise them to a height of up to 0.5-1 m. In principle, they can be made even higher - caring for them will only be simplified.
4 The first layer to be laid is a drainage layer of fine crushed stone and sand. You can replace it with broken brick, but remember that over time this material can decompose when exposed to moisture.
5 The next layer is plant waste. The heat released during their decay will serve as natural heating. It is better to prepare such a bed in the fall, during harvest. You can use cut tops or any weed left after weeding as a “warm layer”. The most important thing is that it does not have time to form seeds.
6 For cucumbers, pumpkins and zucchini, manure is often used as a warm layer. When overheated, it heats up much more. For crops such as tomatoes, manure, as well as pure humus, is contraindicated. The plants on it will only increase their green mass. You may simply not be able to wait for a harvest made from manure - the ovaries will immediately fall off. Therefore, to warm up tomatoes, use ordinary vegetable waste.
7 The last layer is fertile soil. It is poured at least 30 cm thick.
8 Novice gardeners sometimes complain that their neighbors have high yields in their warm beds, but for some reason nothing grows in theirs. Indeed, if a layer of grass or manure is only slightly sprinkled with soil, it will simply be impossible for the plant’s roots to gain a foothold in it. And the food for the sprouts will clearly not be enough. Overheated plants serve only as a layer of insulation. Therefore, without a solid layer of soil, you will not achieve a harvest.
9 Next, arcs are placed over the bed and covered with film. Covering material such as spunbond (agrofibre) should not be used for these purposes. It can be spread directly on the ground in case of return frosts or used as additional shelter. Unlike polyethylene, agrofibre has many holes through which precious heat will freely escape.
This bed “works” for about 4 years. After it is completely depleted, a new one is prepared, and the rotted plants are used as fertilizer when digging up the beds. The first two years, the most heat-loving crops are planted on a warm bed - cucumbers, pumpkins, zucchini, eggplants, etc.
In the third or fourth year, any garden crops can be planted in this place - from carrots, beets, onions to potatoes.
When it gets warm, the plastic film is folded back on both sides during the daytime so that the plants get a little air. Otherwise, they will simply “burn” from the heat. At night, the plants are again completely covered with film.
Read also:
Paths between the beds

The French way of planting crops
French version- one of the ways to decorate a site. Unlike traditional planting methods, such a garden always has a strictly symmetrical shape. Moreover, it is absolutely not necessary to make the beds rectangular. They can have the shape of rhombuses, ovals or semi-ovals, etc. The most important thing is that each of the segments is strictly symmetrical to the neighboring one.
As a rule, for ease of caring for crops, French beds are located at a certain height.
It is advisable (but not necessary) to plant plants symmetrically. For example, radishes are located along the edge of all the beds, lettuce is in the center, and red cabbage is on the other edge.
Unlike the French, English do not require strict symmetry. The main emphasis in them is on lawns, with the help of which the site is decorated. Against the background of sown grass, plantings of even ordinary garden plants look like ornamental crops. Essentially, it is a mixture of a vegetable garden and a flower garden.
With the English planting method, a garden house looks like a huge vertical bed. Climbing plants are planted near its walls. Pots and vases of various shapes are placed along the building. Each of the plants is carefully cared for - despite the riot of vegetation, there is no smell of “wildness” here.